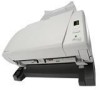
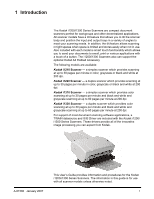
Kodak I1210 User Guide
Kodak I1210 - Document Scanner Manual
 |
UPC - 041771012434
View all Kodak I1210 manuals
Add to My Manuals
Save this manual to your list of manuals |
Kodak I1210 manual content summary:
- Kodak I1210 | User Guide - Page 1
- Kodak I1210 | User Guide - Page 2
the Kodak Driver Software 7 Connecting the power cord to the scanner 10 Connecting the USB cable 11 Attaching the output tray 11 Turning on the scanner and finalizing Kodak Driver Software installation 12 Installing application software 13 Scanner components 14 Locking the scanner 16 - Kodak I1210 | User Guide - Page 3
main Kodak Scanner window 46 The Image Settings window 49 Preview document - Example 3 . . . . . 71 Creating a new Setting Shortcut 73 Changing Image Settings 75 The Device Settings window ISIS Driver 84 The main ISIS Driver window 84 Main tab 85 Layout tab 88 Image Processing tab 89 Scanner - Kodak I1210 | User Guide - Page 4
feed module 110 Vacuuming the scanner 111 Cleaning the imaging area 111 Supplies and consumables 112 Accessories 112 6 Troubleshooting 113 Indicator lights and error codes 113 Clearing a document jam 114 Problem solving 115 Appendix A Specifications 116 Appendix B TWAIN Image Processing - Kodak I1210 | User Guide - Page 5
200 dpi. Kodak i1320 Scanner - a duplex scanner which provides color scanning at up to 30 pages per minute and black and white and grayscale scanning at up to 60 pages per minute at 200 dpi. For support of most document scanning software applications, a TWAIN datasource and ISIS Driver are included - Kodak I1210 | User Guide - Page 6
tilt positions for production scanning • Smart touch functionality allows you to send documents to file, email, printers, fax printers or desktop applications that support TIFF, JPEG, RTF, PDF and searchable PDF • Scans up to 1500 pages per day using the i1200 Series Scanners or 3000 pages per day - Kodak I1210 | User Guide - Page 7
of the Kodak i1200/i1300 Series Scanners and any other mechanical devices. • The Kodak i1200/i1300 Series Scanners are designed to meet worldwide environmental requirements. • Guidelines are available for the disposal of consumable items that are replaced during maintenance or service; follow local - Kodak I1210 | User Guide - Page 8
last user wishes to discard this product, it must be sent to appropriate facilities for recovery and recycling. Please contact your local Kodak representative or refer to www.kodak.com/go/recycle for additional information on the collection and recovery programs available for this product. Power - Kodak I1210 | User Guide - Page 9
expressly approved by the party responsible for compliance could void the user's authority to operate the equipment. Where shielded interface cables have been provided with the product or specified additional components or accessories elsewhere defined to be used with the installation of the product - Kodak I1210 | User Guide - Page 10
Kodak i1310 or i1320 Scanner • Output tray • Output tray extender and exit deflector • USB 2.0 cable • Power supply • AC power cord bundles • Sample Cleaning Kit • Welcome Folio which includes: - Bundled installation and application CDs - Registration sheets - Printed User's Guide, English - Service - Kodak I1210 | User Guide - Page 11
edition and Windows 2000 Professional (supports USB 2.0) • 100 MB free hard disk space • CD-ROM drive Installing the scanner Install the scanner in the following order: 1. Install the Kodak Driver Software on the PC. 2. Connect the power cord to the scanner. 3. Connect the USB cable between your - Kodak I1210 | User Guide - Page 12
3. The Kodak i1200/i1300 Series Scanner Installation window will be displayed. NOTE: This window may or may not be displayed depending upon what was previously installed on your computer. 4. Click Yes. The Welcome window will be displayed. 5. Click Next. 8 A-61560 January 2007 - Kodak I1210 | User Guide - Page 13
The Software License Agreement window will be displayed. 6. After reading the agreement, click I Agree to continue. The installation will start. 7. When the installation is complete, the Installation Completed window will be displayed. 8. Click Finish. A-61560 January 2007 9 - Kodak I1210 | User Guide - Page 14
power supply model or another manufacturer's power supply. After the drivers have been installed, connect the power supply and power cord to the scanner. Make sure that the power outlet is located within 1.52 metres (5 feet) of the scanner and is easily accessible. 1. Select the appropriate AC power - Kodak I1210 | User Guide - Page 15
IMPORTANT: If you have not installed the Kodak Driver Software, do that now before proceeding. The USB cable supplied with your scanner has two different ends. A B 1. Attach the B end of the USB cable to the scanner USB port, located on the back of the scanner. 2. Attach the A end of the USB - Kodak I1210 | User Guide - Page 16
the scanner and finalizing Kodak Driver Software installation When the USB cable and power connections have been made, and the Kodak Software Drivers have been properly installed, the installation will be complete when the scanner is turned on. 1. Use the power switch on the back of the scanner to - Kodak I1210 | User Guide - Page 17
packed with your scanner (e.g., Kodak Capture Software Lite, Nuance ScanSoft PaperPort 10 Software, Nuance ScanSoft OmniPage Pro 14 Software). You may also use other scanning applications not provided with the scanner. See the User Guides provided with these applications for instructions on how to - Kodak I1210 | User Guide - Page 18
documents longer than 8.5 x 11 inches (A4). LED Indicator - illuminates or flashes indicating scanner status. • Steady green: ready to scan • Flashing green: waiting/Energy Star; scanning/busy NOTE: The Start button, Scroll button and Function window are used with the smart touch functionality - Kodak I1210 | User Guide - Page 19
lever Scanner cover release lever Side guides - slide the guides back and forth to accommodate the size of documents you are scanning. Paper Present sensor - detects the presence of documents in the input tray. Feed module cover - this cover needs to be removed when cleaning or replacing the - Kodak I1210 | User Guide - Page 20
Locking the scanner Power switch Power port Security USB port Flatbed port lock port Power switch - turns the scanner on and off. Power port - connects the power cord to the scanner. USB port - connects the scanner to the PC. Flatbed port - connects the optional tethered flatbed accessory to the - Kodak I1210 | User Guide - Page 21
the green indicator light will remain on and constant and the function window will display "1". If the scanner is not connected to the host PC and the self-test completes, the red indicator will be on and the function window will be blank. The Kodak i1200 and i1300 Series Scanners are equipped with - Kodak I1210 | User Guide - Page 22
more scanning flexibility. See the following sections for information on adjusting the input and output trays. IMPORTANT: When using the tilt feature, be sure the scanner cover is closed. • Press the Tilt release button and rotate the scanner body into the desired position. 18 A-61560 January 2007 - Kodak I1210 | User Guide - Page 23
different positions to determine the one that best fits your needs. To remove the output tray from it's storage position underneath the scanner: • Press down on the release tabs and pull it out of position. • The output tray can be positioned so it lies flat on the table. This position works well - Kodak I1210 | User Guide - Page 24
extender is best used when the scanner is in the 25 degree position (see below). This setup is ideal for scanning large batches of mixed document sets. End stop Open to extend output tray • In addition, the output tray can be extended to accommodate documents up to 14 inches in length, and the - Kodak I1210 | User Guide - Page 25
easily installed by snapping it into place. Adjusting the input tray You can scan documents with the input tray open or closed. Feed documents with the input tray open if you are scanning a batch of documents. You can tilt the scanner body to a more upright position to save working space. Input - Kodak I1210 | User Guide - Page 26
Adjust the side guides slightly wider than the documents you are scanning. Start and stop scanning Before you start scanning, make sure the scanner is on and ready for operation, which is indicated by the green indicator light being on and constant. Scanning is controlled by software developed for - Kodak I1210 | User Guide - Page 27
are aligned and centered in the input tray; this allows the feeder to introduce documents into the scanner one at a time. • Staples and paper clips on documents may damage the scanner and documents. Damage resulting from scanning documents with staples, paper clips or other metallic objects - Kodak I1210 | User Guide - Page 28
is on and ready to scan. 1. Select Start>Programs>Kodak>Document Imaging>Scan Validation Tool. The Scan Validation Tool dialog box will be displayed. 2. Select TWAIN for the Driver Types and Kodak Scanner i12XX/ i13XX as the Driver. The Scan Validation Tool dialog box will be displayed. 3. Click - Kodak I1210 | User Guide - Page 29
. NOTE: When you access the main Kodak Scanner window, refer to Chapter 4, Image Processing for more information on how to get started using the TWAIN datasource or ISIS driver. 4. Select the Default Setting Shortcut. 5. Click OK. This resets the software to the factory-installed default settings - Kodak I1210 | User Guide - Page 30
your scanner as part of the Kodak Scanner Driver Software installation. The TWAIN datasource or ISIS driver links the scanner to your scanning application. Capture Application Driver: ISIS or TWAIN Kodak Scanner Kodak Scanner - scans and creates an electronic image of your paper documents. Scan - Kodak I1210 | User Guide - Page 31
from the smart touch function listing. Nine different functions can be assigned and performed. After the scanner, software drivers, and application software are properly installed and the PC has been restarted, a Scanner icon will be displayed on the system tray. NOTE: If the Scanner icon indicates - Kodak I1210 | User Guide - Page 32
smart touch icon from the system tray. The software will restart automatically the next time Windows start ups or if you scan documents using the Start button on the scanner. The software can be started manually by selecting Start>Programs>Kodak>Document Imaging>i1310,i1320 (or i1210, i1220)>Smart - Kodak I1210 | User Guide - Page 33
attachment. • Printer/Fax Printer: sends the scanned documents to the printer or fax printer. NOTE: If you select Printer/Fax Printer, the Scan To printing: if selected, the scanned images will be displayed in an Edit window to allow for editing. File Type - select one of these options based - Kodak I1210 | User Guide - Page 34
. File Name Prefix: when images are scanned, they are automatically assigned a unique file name. For example, if you choose to scan your documents as PDF files, the software automatically assigns the date and sequence number for each image: 2006-04-27(1).pdf (for the first PDF file created), 2006-04 - Kodak I1210 | User Guide - Page 35
detail in Chapter 4. Display settings prior to scanning: if selected, the Kodak Scanner window will be displayed before the document(s) are scanned, allowing you to select the scanner Settings Shortcut. The Kodak Scanner window will be displayed each time the function is run. Settings: displays the - Kodak I1210 | User Guide - Page 36
Configuring function numbers 1. Click the smart touch icon on the system tray to display the smart touch function listing and select Configure. The Configuration dialog box will be displayed. 2. Select the Task shortcut you want to configure from the Task Shortcut drop- - Kodak I1210 | User Guide - Page 37
based on the type of document you are scanning by selecting the Settings button on the Kodak Scanner window. 9. If you want to change your scanner Settings Shortcut before scanning, check Display settings prior to scanning from the smart touch Configuration dialog box. 10. Click Apply. 11. Modify - Kodak I1210 | User Guide - Page 38
Smart touch Edit window The smart touch Edit window allows you to view the scanned images before sending them to the final destination. As documents are scanned, the images will be displayed in the Edit window. From this window you can perform common editing tasks such as, rotating and deleting - Kodak I1210 | User Guide - Page 39
window. To use a tool, click on the icon and apply it to the desired image. Start - allows you to scan additional documents and append them to the current images. Stop - cancels the scanning of documents before the image is cropped. Blank - replaces the portion of the image inside the region - Kodak I1210 | User Guide - Page 40
by using the Start button on the scanner or from the smart touch function listing. Launching from the scanner: 1. Use the arrow button to scroll run. Launching from the smart touch function listing: 1. Display the function listing from the smart touch icon on the system tray. 2. Select the function - Kodak I1210 | User Guide - Page 41
scan into the input tray of the scanner. The documents should be placed with the side you want to scan facing the input tray. • If you have a Kodak i1220 or i1320 Scanner or are scanning twosided documents, place the documents in the input tray with the front side of the documents facing the input - Kodak I1210 | User Guide - Page 42
scanning. 1. Align the leading edges of the stacked documents. 2. Position the leading edge of the documents centered and facing the back of the scanner, as shown. Manual feeding 3. Adjust the input tray side guides. 4. Adjust the output tray position, if necessary. 5. Start scanning. Follow the - Kodak I1210 | User Guide - Page 43
of the scanning application you are using (i.e., Kodak Capture Software). 1. Select Start>Programs>Kodak>Document Imaging>Scan Validation Tool. 2. Select TWAIN (or ISIS) for the Driver Type and the Kodak Scanner i12XX/i13XX Scanner as the Driver. The Scan Validation Tool dialog box will be - Kodak I1210 | User Guide - Page 44
provided by Kodak. The SVT user interface allows access to all the features of the scanner and is a good way to verify that the scanner is working properly. The Scan Validation Tool allows you to verify scanner functionality using both the TWAIN datasource and the ISIS driver. Toolbar buttons - Kodak I1210 | User Guide - Page 45
the section entitled, "Using the ISIS driver" later in this chapter. For the purpose of this manual, all displayed windows assume the features available on the Kodak i1220 or i1320 Scanner (duplex scanner). If you have a Kodak i1210 or i1310 Scanner (simplex scanner) all options are limited to one - Kodak I1210 | User Guide - Page 46
you call will appear in the main Kodak Scanner window in italics with the word next to it. This is normal behavior for an application that does not use Setting Shortcuts and downloads its preferred individual settings to the scanner - Kodak I1210 | User Guide - Page 47
you are using an i1210 or i1310 Scanner, be sure to place the side of the document to be scanned facing the input tray. 4. If you want to see what your selected image processing options will look like and make on-screen changes, click Preview to review and adjust the image. NOTE: This only - Kodak I1210 | User Guide - Page 48
processing options, reload your document if necessary and click the Setting Shortcut you have selected by reviewing each setting on the General, Size, to a predefined default Setting Shortcut, click Save As on the main Kodak Scanner window. The Save As dialog box will be displayed. 7. Enter a new - Kodak I1210 | User Guide - Page 49
and select the appropriate tab. 6. On each tab, select the appropriate options or action you want the scanner to perform. 7. When finished: • Click Home to return to the main Kodak Scanner window and click Save to save your selections to your custom Setting Shortcut, or • Click Image to return to - Kodak I1210 | User Guide - Page 50
The main Kodak Scanner window The main Kodak Scanner window is the home window of the scanner's user interface. You can scan by simply selecting a Setting Shortcut and then selecting OK/Scan. Setting Shortcuts - provides a listing of the Setting Shortcuts currently set up. The supplied shortcuts - Kodak I1210 | User Guide - Page 51
. • One Sided - Back: scans only the back side of the document. NOTES: • Be sure to place your documents face down in the input tray. • The Two Sided and One Sided - Back options are only available for duplex scanner models. Save - saves any changes made to the current Setting Shortcut. Save As - Kodak I1210 | User Guide - Page 52
. NOTE: If this button is OK, any unsaved changes will remain in effect for the current scan session. Cancel - closes the main Kodak Scanner window without saving any changes. Information Icons About: displays the scanners' version and copyright information. Help: displays help information for the - Kodak I1210 | User Guide - Page 53
in Image Settings are saved in the selected Setting Shortcut. The Image Settings window includes the following tabs: General, Size, Adjustments and Enhancements. Side - options are only available for duplex scanner models. Advanced Image Setup: displays the Advanced tab. A-61560 January 2007 49 - Kodak I1210 | User Guide - Page 54
, you will be prompted to reinsert the document. NOTE: If you choose Document: Manually Select or Image: Part of a document on the Size tab, the preview area will also show the current Outline selections. Home - returns you to the main Kodak Scanner window. Device - displays the Device Settings - Kodak I1210 | User Guide - Page 55
as option is only available when Images per Side: One is selected on the Advanced tab. Document type - allows you to select the type of content on your documents. • Text with Graphics: the documents contain a mix of text, business graphics (bar graphs, pie charts, etc.) and line art. • Text: the - Kodak I1210 | User Guide - Page 56
Compression - allows you to reduce your electronic image size. • Type: the scanner will produce a color version of your document. - (none): no compression, which may produce a large image size. - Group-4: uses a CCITT standard to compress a black and white image, often used in conjunction with TIFF - Kodak I1210 | User Guide - Page 57
not be straightened. • Manually Detect: the scanner will return an image based on the area you specify with the Outline options. It is suggested that you only use this option for scan jobs that contain same-size documents. Image - allows you to select which part of the document you want for your - Kodak I1210 | User Guide - Page 58
- if you select Document: Manually Select, (x) is the distance from the left edge of the scanner's paper path and (y) is the distance from the first portion of the document detected by the scanner. - if you select Document: Automatically Detect and Straighten and Image: Part of Document, (x) is the - Kodak I1210 | User Guide - Page 59
options - allows you to select any rotation to be applied to the electronic image after it has been scanned. • (none) • Automatic - the scanner will analyze each document to determine how it was fed and will rotate the image to the proper orientation. • 90, 180, 270 degrees - the amount of - Kodak I1210 | User Guide - Page 60
effect how the scanner analyzes a grayscale version of the document which is used documents. Contrast - allows you to make an image sharper or softer. Decreasing this setting will make the image softer and reduce noise in the image. Increasing this setting will make the image clearer and make light - Kodak I1210 | User Guide - Page 61
white. Decreasing this setting will make the image appear lighter, and can be used to subdue background noise. Increasing this setting will make the image appear darker, and can be used to help pick up light information. The options range from 0 to 255. The default is 90. NOTE: This is not available - Kodak I1210 | User Guide - Page 62
softer. The values range from -50 to 50. The default is 0. Red - changes the amount of red in the color image. The values range from -50 to 50. The not apply to grayscale images. Background Smoothing - using this option for documents or forms with a background color will help produce images with a - Kodak I1210 | User Guide - Page 63
are only available for Method: Change to White. • Aggressiveness: allows you to adjust the extent at which the background(s) are determined. The values range from -10 to 10. The default is 0. A-61560 January 2007 59 - Kodak I1210 | User Guide - Page 64
Enhancements tab The options on the Enhancements tab depend on the Scan as selection on the General tab. Image Edge Fill - fills the edges of the final electronic image by covering the area with the specified color. • Color: allows you to select the color to fill the edges with. - (none) - White - - Kodak I1210 | User Guide - Page 65
boxes). For black and white images, these settings effect the grayscale version of the document which the scanner analyzes to produce that electronic image. • Color: select the desired dropout color. - (none) - Red - Green - Blue NOTE: The Color Dropout options are only available when the Scan as - Kodak I1210 | User Guide - Page 66
, the Advanced tab will be displayed. Input document is - select Two Sided, One sided - Front, or One sided - Back depending on what side(s) you want to configure. NOTE: The Two Sided and One Sided - Back options are only available for duplex scanner models. Different settings per side - by default - Kodak I1210 | User Guide - Page 67
settings per side option is only available for duplex scanner models. Images per side - indicates how many images the scanner will create for a side, based on you imaging selections. • One: indicates you want the scanner to create one image. • One - Based on Document Content: indicates you want the - Kodak I1210 | User Guide - Page 68
• Creating multiple images for each side of a document, Example 2. • Creating different settings for each side of a document, Example 3. When available, use the up and down arrows to select the order the images will be delivered by the scanner to the scanning application. Toolbar buttons: Add: adds - Kodak I1210 | User Guide - Page 69
compared with the Medium option, before they will be saved as color/grayscale images. Used for distinguishing documents containing medium- to large-size colorful photos from plain black text. Photos with neutral colors may require adjustments to the Color Threshold or Color Amount values in order to - Kodak I1210 | User Guide - Page 70
manually adjust Color Amount and/or Color Threshold. Custom also allows access to the Learn mode which provides a method for the scanner to analyze documents color documents scanned. Before selecting Learn, place at least 5 representative color documents in the input tray. The documents will be - Kodak I1210 | User Guide - Page 71
Setting Shortcut from the main Kodak Scanner window that closely describes your desired output. 2. Select Settings to display the Image Settings window. 3. Select the Advanced Image Setup icon on the Image Settings window to display the Advanced tab. 4. Select Input document is: Two Sided. 5. Select - Kodak I1210 | User Guide - Page 72
: Black and White (1bit). 10. Select Sides: Both: Black and White (1-bit). NOTE: Make any other adjustments to the black and white image settings on the rest of the tabs on the Image Settings window. 11. When finished, select Home to return to the main Kodak Scanner window and then select Save to - Kodak I1210 | User Guide - Page 73
both a color and a black and white image for each side of each document. 1. Select a Setting Shortcut from the main Kodak Scanner window that closely describes your desired output. 2. Select Settings to display the Image Settings window. 3. Select the Advanced Image Setup icon on the Image Settings - Kodak I1210 | User Guide - Page 74
on the Image Settings window. 10. Select Sides: Both: Black and White (1-bit). NOTE: Make any other adjustments to the black and white image settings on the rest of the tabs on the Image Settings window. 11. When finished, select Home to return to the main Kodak Scanner window and then select Save - Kodak I1210 | User Guide - Page 75
Setting Shortcut from the main Kodak Scanner window that closely describes your desired output. • Select Settings to display the Image Settings window. • Select the Advanced Image Setup icon on the Image Settings window to display the Advanced tab. 2. Select Input document is: Two Sided. 3. Turn on - Kodak I1210 | User Guide - Page 76
to the back side settings on the rest of the tabs on the Image Settings window. 10. When finished, select Home to return to the main Kodak Scanner window and then select Save to save your selections to the shortcut. NOTE: Steps 2 and 3 are only valid for duplex scanners. 72 A-61560 January 2007 - Kodak I1210 | User Guide - Page 77
electronic image of the front of your document, back of your document or both sides of your document and make the selection from the Input document is field. 3. Select Settings on the main Kodak Scanner window. The General tab of the Image Settings window will be displayed. A-61560 January 2007 73 - Kodak I1210 | User Guide - Page 78
settings by selecting Device on the Image Settings window to display the Device Settings window. 8. Review each tab and select the appropriate options or actions you want the scanner to perform. 9. Select Home to return to the main Kodak Scanner window. 10. Select Save As to display the Save As - Kodak I1210 | User Guide - Page 79
Setting Shortcut or continue working with the current Setting Shortcut by reviewing each tab within the Image Settings window again. Repeat this step as needed. 7. When finished, select Home to return to the main Kodak Scanner window and then select Save to save your selections to the shortcut - Kodak I1210 | User Guide - Page 80
window you can set all scanner-specific options, as well as diagnostics, by using the available tabs. The values used in Device Settings are saved in the selected Setting Shortcut. the Device Setting window includes the General and Multifeed tabs. Home - returns you to the main Kodak Scanner window - Kodak I1210 | User Guide - Page 81
: looks for paper in the document feeder first. If there are no documents in the input tray, the scanner will look for a document on the flatbed. • Document Feeder: when you are scanning documents from the input tray. • Flatbed: scanner will scan from the flatbed. Power Saver - allows you to set - Kodak I1210 | User Guide - Page 82
NOTE: Regardless of the setting, "sticky" notes may still be detected as multi-fed documents. Length Detection - allows you to select the maximum length of the documents in your job set. If the scanner detects a document of that length or longer, it will determine that a multifeed has occurred. You - Kodak I1210 | User Guide - Page 83
paper path) and control will return to the scanning application (i.e., ends the job). Clear any documents from the paper path prior to restarting the scan session from the scanning application. • Continue Scanning: the scanner will continue to scan. Play sound on PC - turn this option on if you want - Kodak I1210 | User Guide - Page 84
that are available. 5. For each option you want to use, make the appropriate selections you want the scanner to perform when scanning. 6. When finished, select Home to return to the main Kodak Scanner window and then select Save to save your selections to the shortcut. 80 A-61560 January 2007 - Kodak I1210 | User Guide - Page 85
to perform diagnostics on. The options are: Document Feeder or Flatbed. NOTE: This option is only available if you have the flatbed accessory attached when the scanning application connected to the scanner. Done - returns you to the Device Settings window. Diagnostics - General tab The General tab - Kodak I1210 | User Guide - Page 86
the communications between the scanner and a scanning application to a file for later review. Click the drop- Kodak support personnel. Flag - by default, this is 1. Leave the flag at 1 unless instructed to use another value by Kodak support personnel. Filter - captures only those items in the scanner - Kodak I1210 | User Guide - Page 87
of the Device Settings window. To view a particular log, click the drop-down box in the upper left-hand corner and select a log type. By default, only the General and Operator logs are displayed. Toolbar buttons Save As - saves all the logs for viewing by Kodak support personnel. When selected, you - Kodak I1210 | User Guide - Page 88
of the options on the tabs of the main ISIS Driver window and how to set these options. For the purpose of this manual, all displayed windows assume the features available on the Kodak i1220/i1320 Scanners. If you have a Kodak i1210 or i1310 Scanner, all options are limited to one-sided scanning - Kodak I1210 | User Guide - Page 89
Front Image #2, Back Image #1 and Back Image #2. The Kodak Scanner drivers allow you to control the camera settings independently. Some settings can control the scanner's output. Mode • Black and White: if you want your electronic image to represent all elements of your document in black and white - Kodak I1210 | User Guide - Page 90
options: • Automatic: dynamically adjusts the cropping window for different document sizes based on the edges of the documents may be scanned using the same image processing parameters and results in excellent scanned images. • iThresholding: allows the scanner to dynamically evaluate each document - Kodak I1210 | User Guide - Page 91
information in an image (i.e., text, graphics, lines, etc.) from the background information (i.e., white or non-white paper background). When using Adaptive Thresholding, Brightness and Contrast can be adjusted. Brightness - changes the amount of white in the color and grayscale image. Use the - Kodak I1210 | User Guide - Page 92
these options: Page Orientation - allows you to select the way you place your documents in the scanner, Top first, Bottom first, Left first or Right first. When using the Kodak i1200/i1300 Scanners, select Top first. Image Orientation • Automatic: if you select Automatic, the Page Orientation - Kodak I1210 | User Guide - Page 93
entitled "The main ISIS Driver tab" earlier in this chapter for descriptions. Document Type • Text: when the documents you want to scan the documents you want to scan are comprised mainly of photos. • Text with Photographs: when the documents you want to scan contain a mix of text and photos. - Kodak I1210 | User Guide - Page 94
10-degree skew angle at 300 dpi. This option is not available when Fixed to Transport or Relative to Document is selected. NOTE: To prevent data loss, the document , top and bottom edge of the image. Noise Filter • (none) • Lone Pixel: reduces random noise by converting a single black pixel to white - Kodak I1210 | User Guide - Page 95
options. Paper Source • ADF: if you are scanning documents from the input tray. • Flatbed: if you are scanning documents using the flatbed. Transport timeout - allows you to set the amount of time the scanner will wait after the last document enters the transport before the transport timeout action - Kodak I1210 | User Guide - Page 96
of how you want to the scanner to perform if it detects a multi-fed document. • Beep and continue: if selected, the scanner will beep, display and log the Kodak i1200/i1300 Scanners automatically calibrate. This option is available if a Kodak representative directs you to calibrate the scanner using - Kodak I1210 | User Guide - Page 97
with the Medium option, before they will be saved as color or grayscale images. Used for distinguishing documents containing medium- to large-size colorful photos from plain black text. Photos with neutral colors may require adjustments to the Color Threshold or Color Amount values in order to be - Kodak I1210 | User Guide - Page 98
option to manually adjust Color Amount and/or Color Threshold. Color Amount: the amount of color that needs to be present in a document before it . 2. Place at least 5 representative color documents in the input tray and click OK. These documents will be analyzed and the recommended color amount - Kodak I1210 | User Guide - Page 99
tab provides the following options. Color Adjustment Red - changes the amount of red in the color image. Green - changes text box or using the up/down arrows. Background Smoothing - using this option for documents or forms w with a background color will help produce images with a more uniform - Kodak I1210 | User Guide - Page 100
available for Method: Change to White. • Aggressiveness: allows you to adjust the extent at which the background(s) are determined. The values range from -10 to 10. The default is 0. Image Edge Fill - fills the edges of the final electronic image by covering the area with the specified color. Image - Kodak I1210 | User Guide - Page 101
was previously described. Refer to the section entitled, "The main ISIS Driver tab" earlier in this chapter for descriptions. The Dropout tab is the document which the scanner analyzes to produce that electronic image. Enable Dropout Color the i1200/i1300 Series Scanners can drop out red, green - Kodak I1210 | User Guide - Page 102
Log tab The Log tab provides a listing of any errors that have been encountered. About tab You can either save this information to a file by clicking the Save icon, or print the displayed information. Displays information about your scanner and driver. 98 A-61560 January 2007 - Kodak I1210 | User Guide - Page 103
selected for each of these in the main ISIS Driver window. The scan areas defined for all camera selections are independent. The Scan Area dialog box is only available when Fixed to Transport or Relative to Document is selected on the Scanner Settings dialog box. A-61560 January 2007 Page Size - Kodak I1210 | User Guide - Page 104
increments. This option is not available in Pixels mode. • X: the distance from the left end of the scanner to the left-edge of the scanning area. • Y: the position from the top end of the document to the top end of the scanning area. • Width: the width of the scanning area. • Height: the - Kodak I1210 | User Guide - Page 105
is time to clean your scanner. The section entitled, "Supplies and consumables" at the end of this chapter provide a listing of the supplies required to clean your scanner. IMPORTANT: Use only non-flammable cleaners such as those provided through Kodak Parts Services. Do not use household cleaners - Kodak I1210 | User Guide - Page 106
release lever and pull the scanner cover down. • When you finish cleaning the scanner or replacing a part, close the scanner cover. NOTE: The scanner cover cannot be opened when the input tray is in the closed position or when the output tray has the output tray extender attached to it. IMPORTANT - Kodak I1210 | User Guide - Page 107
and lift the separation module up and out of position. 2. Manually rotate and wipe the separation module tires with a roller cleaning pad. 3. Inspect the separation module. If the separation module tires show signs of wear or damage, replace the tires or the separation module. See the next section - Kodak I1210 | User Guide - Page 108
4. Insert the separation module by aligning the pins and placing it into position. 104 A-61560 January 2007 - Kodak I1210 | User Guide - Page 109
Replacing the separation 1. Push the separation module release lever down and lift the module tires separation module up and out of position. 2. Holding onto the separation module, rotate the release lever back so you can access the separation roller. NOTE: Use caution as the separation module is - Kodak I1210 | User Guide - Page 110
each tire by sliding the tire off the core. Replacing the preseparation pad 5. Install each new tire by gently pulling it over the core. 6. Replace the separation roller in the separation roller housing. Be sure the separation roller snaps into place. 7. Reinstall the separation module. 1. Remove - Kodak I1210 | User Guide - Page 111
-separation pad with the slots on the separation module. 8. Push the pre-separation pad firmly in the slots until the pre- separation pad flap rests lightly against the separation module tires. 9. Reinstall the separation module. 10. Close the scanner cover. A-61560 January 2007 107 - Kodak I1210 | User Guide - Page 112
Cleaning or replacing the feed module Degradation of feeder performance, multiple feeds, stoppages, ) can shorten the feed module life. For additional feed modules, see the section entitled, "Supplies and consumables" later in this chapter. NOTE: The paper present sensor is located to the right of - Kodak I1210 | User Guide - Page 113
and push it to the left to lift it out of position. 3. Manually rotate and wipe the feed module tires with a roller cleaning pad. 4. Inspect the feed module. If the feed module tires show signs of wear or damage, replace the tires or the feed module. See the next section for procedures. 5. Using - Kodak I1210 | User Guide - Page 114
. 1. Remove the feed module cover and feed module as outlined in the previous section. 2. Remove one core assembly by lifting up and out of position. 3. Replace each tire by sliding the tire off the core. Core assembly 4. Install each new tire by gently pulling it over the core. IMPORTANT:Do not - Kodak I1210 | User Guide - Page 115
the shaft to the right or left so the core fits properly within the feed module housing. Vacuuming the scanner Cleaning the imaging area Slide shaft 6. Repeat the replacement procedure outlined above for the other core assembly. 7. Reinstall the feed module. 8. Reinstall the feed module cover by - Kodak I1210 | User Guide - Page 116
produces whiter images. CAT No. 892 7717 • Kodak A4 Flatbed Accessory - the Kodak A4 Flatbed adds scanning capability for exception documents to your Kodak i1200/ i1300 Series Scanner. CAT No. 867 7288 • Kodak Black Background Accessory for A4 Flatbed - this flatbed cover can be used if you are - Kodak I1210 | User Guide - Page 117
0 USB cable is not connected. 1 - 5, 7 and 8 Call Service. 6 The scanner cover is open. 9 There is a document jam. NOTE: The numbers 1-9 may be displayed when the scanner's LED is green. These are not error codes; they are function numbers. Used together with the Start button and smart touch - Kodak I1210 | User Guide - Page 118
Clearing a document jam If your scanner stops scanning due to a document jam, follow the procedures below. IMPORTANT: Only use the tilt feature when the scanner cover is closed. 1. Open the scanner cover. 2. Remove any jammed documents from inside the scanner. 3. Close the cover. 114 A-61560 - Kodak I1210 | User Guide - Page 119
a guide to check possible solutions to problems you may encounter when using the Kodak i1200/i1300 Series Scanner. Problem Possible Solution Scanner will not scan/feed documents Make sure that: • the power cord is plugged securely into the back of scanner and the wall outlet. • the power supply - Kodak I1210 | User Guide - Page 120
Environmental Factors Power Consumption Acoustic Noise (Sound Pressure level) Bundled software Kodak i1210 Scanner - a simplex scanner which provides scanning at up to 30 pages per minute in color, grayscale or black and white at 200 dpi. Kodak i1220 Scanner - a duplex scanner which provides - Kodak I1210 | User Guide - Page 121
Processing Terminology If you have used previous scanners from Kodak, you will notice that the user interface has been updated. Many of One - based on document content When selected, the Content Settings tab will be displayed which contains the additional options. • Duplex Dual Stream (check Front - Kodak I1210 | User Guide - Page 122
• Fixed to Transport without Overscan • Document: Manually Select Border: (none) • Fixed to Transport with Overscan • Document: Manually Select Border: Add • Relative to Document • Document: Automatically Detect and Straighten Image: Part of Document Location: Imaging tab Options: • Polarity - Kodak I1210 | User Guide - Page 123
of a Kodak Scanner. Kodak Scanners are designed to provide end users with the highest performance and reliability. All Kodak Scanners are covered by the following Limited Warranty. Eastman Kodak Company provides the following Limited Warranty on Kodak Scanners (excluding spare parts and consumables - Kodak I1210 | User Guide - Page 124
or transportation, including (a) by a failure to properly package and ship the Scanner back to Kodak for warranty service in accordance with Kodak's then current Packaging and Shipping Guidelines, including failure to replace the shipping restraint prior to shipping, or by a failure to remove the - Kodak I1210 | User Guide - Page 125
will assist the end user in resolving the problem over the phone. The end user may be asked to run some simple, self-diagnostic tests and report the resulting status and error code messages. This will assist the Response Center in determining if the problem is the Kodak Scanner or another component - Kodak I1210 | User Guide - Page 126
remove and retain all "add-on" items, (i.e. adapters, cables, software, manuals, etc.). Kodak accepts no responsibility for these items and they will not be returned with the repaired or replacement Kodak Scanner. All products should be returned to Kodak in the original shipping container, or an - Kodak I1210 | User Guide - Page 127
with the use and care of the Kodak Scanner. Kodak is committed to providing its customers with quality, performance, reliability and service under the Limited Warranty. For the selected Kodak Scanner, and after the Response Center verifies a hardware problem, a service call will be opened and logged - Kodak I1210 | User Guide - Page 128
instructions for the malfunctioning product. The eligible purchaser will then receive a replacement product within 2 business days after the service call initiation and Kodak's receipt of the signed agreement. The malfunctioning product must be received by Kodak within ten (10) days of the end user - Kodak I1210 | User Guide - Page 129
normal use and must be replaced by the end user as needed. Consumables, supplies, other expendable items and those items identified as being the user's responsibility in the User's Guide are not covered under the Limited Warranty. If any of the above excluded parts or services are required, they may - Kodak I1210 | User Guide - Page 130
-
 1
1 -
 2
2 -
 3
3 -
 4
4 -
 5
5 -
 6
6 -
 7
7 -
8
-
9
-
10
-
11
-
12
-
13
-
14
-
15
-
16
-
17
-
18
-
19
-
20
-
21
-
22
-
23
-
24
-
25
-
26
-
27
-
28
-
29
-
30
-
31
-
32
-
33
-
34
-
35
-
36
-
37
-
38
-
39
-
40
-
41
-
42
-
43
-
44
-
45
-
46
-
47
-
48
-
49
-
50
-
51
-
52
-
53
-
54
-
55
-
56
-
57
-
58
-
59
-
60
-
61
-
62
-
63
-
64
-
65
-
66
-
67
-
68
-
69
-
70
-
71
-
72
-
73
-
74
-
75
-
76
-
77
-
78
-
79
-
80
-
81
-
82
-
83
-
84
-
85
-
86
-
87
-
88
-
89
-
90
-
91
-
92
-
93
-
94
-
95
-
96
-
97
-
98
-
99
-
100
-
101
-
102
-
103
-
104
-
105
-
106
-
107
-
108
-
109
-
110
-
111
-
112
-
113
-
114
-
115
-
116
-
117
-
118
-
119
-
120
-
121
-
122
-
123
-
124
-
125
-
126
-
127
-
128
-
129
-
130
 |
 |
