Konica Minolta bizhub 215 bizhub 215 Quick Guide - Page 59
Copying on custom sized paper
 |
View all Konica Minolta bizhub 215 manuals
Add to My Manuals
Save this manual to your list of manuals |
Page 59 highlights
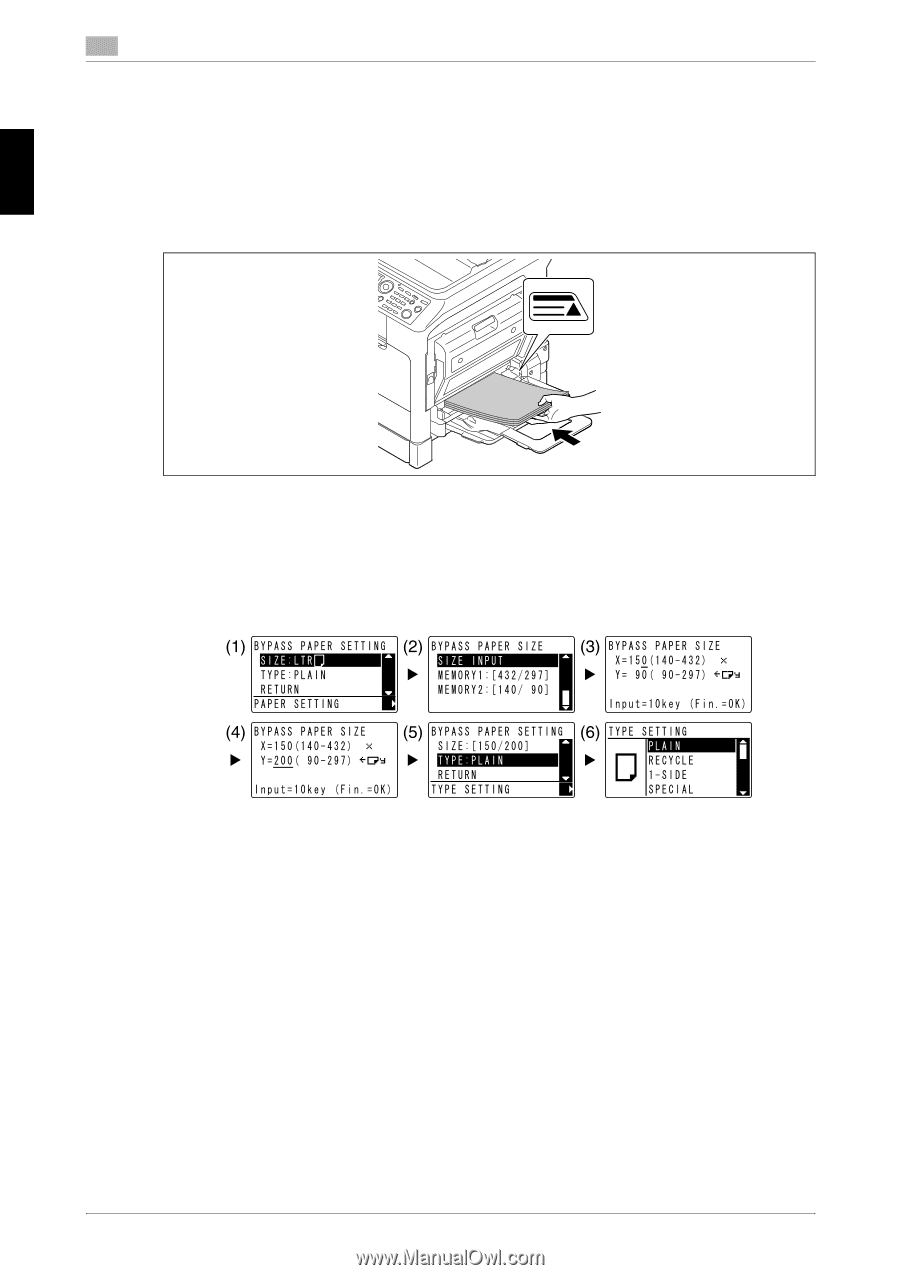
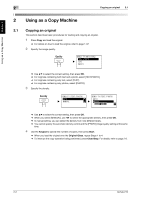
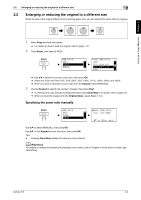
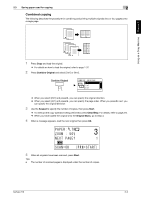
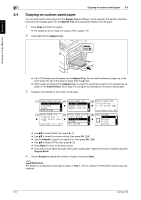
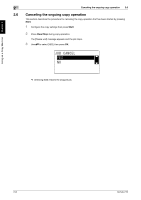
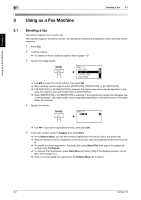
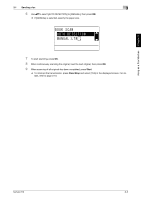
Using as a Copy Machine Chapter 2 2 2.4 Copying on custom sized paper 2.4 Copying on custom sized paper You can load custom sized paper into the Bypass Tray and Tray 1. As an example, this section describes procedures for loading paper into the Bypass Tray and copying the original onto the paper. 1 Press Copy and load the original. % For details on how to load the original, refer to page 1-37. 2 Load paper into the Bypass Tray. % Up to 100 sheets can be loaded into the Bypass Tray. Do not load the sheets of paper up to the point where the top of the stack is higher than the + mark. % When paper is loaded into the Bypass Tray, a screen for selecting the paper in the bypass tray appears on the Control Panel. Go to Step 3 to configure the settings for the custom sized paper. 3 Configure the settings for the custom sized paper. % Use +, to select [SIZE], then press ). (1) % Use +, to select the correct setting, then press OK. (2)(6) % Use the Keypad to specify the paper size, then press OK. (3)(4) % Use +, to select [TYPE], then press ). (5) % Press Back to return to the basic screen. % If you are not sure about the size of the custom sized paper, measure the X and Y lengths using the Original Scale. 4 Use the Keypad to specify the number of copies, then press Start. d Reference For details on configuring the settings for paper in Tray 1, refer to Chapter 6 of the [User's Guide Copy Operations]. 2-6 bizhub 215
-
 1
1 -
2
-
3
-
4
-
5
-
6
-
7
-
8
-
9
-
10
-
11
-
12
-
13
-
14
-
15
-
16
-
17
-
18
-
19
-
20
-
21
-
22
-
23
-
24
-
25
-
26
-
27
-
28
-
29
-
30
-
31
-
32
-
33
-
34
-
35
-
36
-
37
-
38
-
39
-
40
-
41
-
42
-
43
-
44
-
45
-
46
-
47
-
48
-
49
-
50
-
51
-
52
-
53
-
 54
54 -
 55
55 -
 56
56 -
 57
57 -
 58
58 -
 59
59 -
 60
60 -
 61
61 -
 62
62 -
 63
63 -
 64
64 -
65
-
66
-
67
-
68
-
69
-
70
-
71
-
72
-
73
-
74
-
75
-
76
-
77
-
78
-
79
-
80
-
81
-
82
-
83
-
84
-
85
-
86
-
87
-
88
-
89
-
90
-
91
-
92
-
93
-
94
-
95
-
96
-
97
-
98
-
99
-
100
-
101
-
102
-
103
-
104
-
105
-
106
-
107
-
108
-
109
-
110
-
111
-
112
-
113
-
114
-
115
-
116
-
117
-
118
-
119
-
120
-
121
-
122
-
123
-
124
-
125
-
126
 |
 |