Kyocera ECOSYS M3145idn M3655idn/M3660idn/M3145idn/M3645idn Fax Operation Guid
Kyocera ECOSYS M3145idn Manual
 |
View all Kyocera ECOSYS M3145idn manuals
Add to My Manuals
Save this manual to your list of manuals |
Kyocera ECOSYS M3145idn manual content summary:
- Kyocera ECOSYS M3145idn | M3655idn/M3660idn/M3145idn/M3645idn Fax Operation Guid - Page 1
PRINT COPY SCAN FAX ECOSYS M3645idn ECOSYS M3655idn ECOSYS M3660idn FAX OPERATION GUIDE - Kyocera ECOSYS M3145idn | M3655idn/M3660idn/M3145idn/M3645idn Fax Operation Guid - Page 2
This Guide 1-2 About this Operation Guide 1-3 Legal Notice ...1-3 FCC PART 68 REQUIREMENTS 1-3 IMPORTANT SAFETY INSTRUCTIONS 1-4 Choosing by One Touch Key 3-10 Using the Speed Dial key 3-10 Broadcast Transmission 3-11 Login/Logout ...3-13 Logging in when User Accounting has been Enabled 3-13 - Kyocera ECOSYS M3145idn | M3655idn/M3660idn/M3145idn/M3645idn Fax Operation Guid - Page 3
FAX Direct Transmission ...3-18 Cancelling Direct Transmission 3-18 Manual Send ...3-19 FAX Delayed Transmission 3-20 Cancelling and 5-8 Registering a Sub Address Box 5-9 Changing/Deleting Sub Address Box 5-10 Printing Originals from a Sub Address Box 5-11 Checking Details ...5-12 Deleting - Kyocera ECOSYS M3145idn | M3655idn/M3660idn/M3145idn/M3645idn Fax Operation Guid - Page 4
Reception 5-30 DRD Reception (Available for some countries 5-32 Manual Send ...5-34 Manual Reception ...5-35 Remote Switch Function 5-36 6 Sending Faxes FAX Driver 6-3 Uninstalling the FAX Driver 6-6 Basic Transmission ...6-7 Configuring the Driver Default Settings 6-10 Default Settings - Kyocera ECOSYS M3145idn | M3655idn/M3660idn/M3145idn/M3645idn Fax Operation Guid - Page 5
When Turning Power OFF 9-3 Messages ...9-4 Error Code List ...9-5 Troubleshooting ...9-8 Common inquiries ...9-10 10 Appendix 10-1 Character Entry Method ...10-2 Entry Screens ...10-2 Entering Characters 10-4 Specifications ...10-5 Menu Map ...10-7 Received FAX Sizes and Paper Priority (Metric - Kyocera ECOSYS M3145idn | M3655idn/M3660idn/M3145idn/M3645idn Fax Operation Guid - Page 6
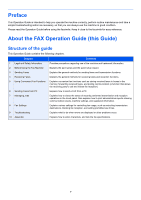
easy reference. About the FAX Operation Guide (this Guide) Structure of the guide This Operation Guide contains the following chapters. Chapter Contents prohibited use times. 9 Troubleshooting Explains what to do when errors are displayed or other problems occur. 10 Appendix Explains how to - Kyocera ECOSYS M3145idn | M3655idn/M3660idn/M3145idn/M3645idn Fax Operation Guid - Page 7
Conventions Used in This Guide Adobe Reader X is used as an example in the explanations below do not appear, refer to Adobe Reader Help. Certain items are indicated in this guide by the conventions described below. Convention [Bold] "Regular" Indicates keys and buttons. Indicates a message - Kyocera ECOSYS M3145idn | M3655idn/M3660idn/M3145idn/M3645idn Fax Operation Guid - Page 8
for operating the machine In this Operation Guide, continuous operation of the keys on the touch panel is as follows: Actual procedure Select the [System Menu/Counter] key Select [ ] Select [Common Settings] Select [Sound] Procedure indicated in this guide [System Menu/Counter] key > [Common - Kyocera ECOSYS M3145idn | M3655idn/M3660idn/M3145idn/M3645idn Fax Operation Guid - Page 9
information on the following topics. Notice ...1-2 Safety Conventions in This Guide ...1-2 About this Operation Guide ...1-3 Legal Notice ...1-3 FCC PART 68 REQUIREMENTS ...1-3 IMPORTANT SAFETY INSTRUCTIONS 1-4 IMPORTANTES MESURES DE SECURITE 1-4 CANADIAN IC REQUIREMENTS ...1-5 CONDITIONS DE L'IC - Kyocera ECOSYS M3145idn | M3655idn/M3660idn/M3145idn/M3645idn Fax Operation Guid - Page 10
This Guide The sections of this handbook and parts of the facsimile marked with symbols are safety warnings meant to protect the user, other Please contact your service representative to order a replacement if the safety warnings in this Operation Guide are illegible or if the guide itself is missing - Kyocera ECOSYS M3145idn | M3655idn/M3660idn/M3145idn/M3645idn Fax Operation Guid - Page 11
Guide for your machine for information regarding the sections listed below. Environment Precautions for Use Loading Paper Toner Container Replacement Waste Toner is also compliant. See installation instructions for details. 4 The REN that temporary discontinuance of service may be required. But - Kyocera ECOSYS M3145idn | M3655idn/M3660idn/M3145idn/M3645idn Fax Operation Guid - Page 12
problem is resolved. 8 This equipment cannot be used on public coin service provided by the telephone company. Connection to Party line service manual. Do not dispose of batteries in a fire. They may explode. Check with local codes for possible special disposal instructions. SAVE THESE INSTRUCTIONS - Kyocera ECOSYS M3145idn | M3655idn/M3660idn/M3145idn/M3645idn Fax Operation Guid - Page 13
les piles dans le feu: elles peuvent exploser. Se conformer aux règlements pertinents quant à l'élimination des piles. CONSERVER CES INSTRUCTIONS CANADIAN IC REQUIREMENTS "This product meets the applicable Innovation, Science and Economic Development Canada technical specifications." "The Ringer - Kyocera ECOSYS M3145idn | M3655idn/M3660idn/M3145idn/M3645idn Fax Operation Guid - Page 14
requirements for pan-European approval for connection to the analogue Public Switched Telephone Networks (PSTNs) of TE (excluding TE supporting the voice telephony service) in which network addressing, if provided, is by means of Dual Tone Multi Frequency (DTMF) signalling. This terminal equipment - Kyocera ECOSYS M3145idn | M3655idn/M3660idn/M3145idn/M3645idn Fax Operation Guid - Page 15
Safety Information > Notice Trademark Information • Microsoft, Windows, Windows Server, Internet Explorer, Excel and PowerPoint are Corporation. All other company and product names in this Operation Guide are trademarks or registered trademarks of their respective companies. The designations™ - Kyocera ECOSYS M3145idn | M3655idn/M3660idn/M3145idn/M3645idn Fax Operation Guid - Page 16
...2-6 Quick Setup Wizard (Fax Setup) ...2-7 Fax setup items ...2-7 Fax setup procedure ...2-8 Setting Date and Time ...2-9 PBX Setting (Europe only) ...2-10 Registering Destinations in the Address Book 2-11 Adding a Destination (Address Book) ...2-11 Adding a Destination on One Touch Key 2-17 2-1 - Kyocera ECOSYS M3145idn | M3655idn/M3660idn/M3145idn/M3645idn Fax Operation Guid - Page 17
machine is used as a fax machine. For the parts required when functions other than FAX are used, refer to the following: Machine's Operation Guide 1 3 4 2 1 Operation panel 2 Power switch 3 TEL connector 4 LINE connector Perform the fax operation with this panel. Set this switch to the ON side - Kyocera ECOSYS M3145idn | M3655idn/M3660idn/M3145idn/M3645idn Fax Operation Guid - Page 18
Using the Fax Machine > Part Names and Functions Document Processor 5 9 8 6 7 5 Top cover 6 Opening handle 7 Original table 8 Original eject table 9 Original width guides Open this cover when the original jammed in the Document Processor. Hold this handle when opening or closing the Document - Kyocera ECOSYS M3145idn | M3655idn/M3660idn/M3145idn/M3645idn Fax Operation Guid - Page 19
page 8-6) Select the function. Home Admin 10:10 Logout Copy Send FAX Job Box Removable and symbols. Authenticates user switching, and exits the operation for the current user (i.e. log out in Sleep Mode. Returns settings to their default states. Cancels or pauses the job in progress. Starts - Kyocera ECOSYS M3145idn | M3655idn/M3660idn/M3145idn/M3645idn Fax Operation Guid - Page 20
. Machine's Operation guide 1 Select the function. Home 2 8 7 Admin 10:10 6 Logout 5 user. This is displayed when user login administration is enabled. 6 Login User Name Displays the logged-in user name. This is displayed when user login administration is enabled. Selecting "Login User - Kyocera ECOSYS M3145idn | M3655idn/M3660idn/M3145idn/M3645idn Fax Operation Guid - Page 21
function as the key with the Enter mark ( ), such as the [OK ] key and the [Close ]. System Menu/Counter. Date/Time - Time Hour Minute : 10:10 Second : : Cancel < Back OK Using the [Quick No. Search] key ( ) The [Quick No. Search] key is used when using the numeric keys to directly - Kyocera ECOSYS M3145idn | M3655idn/M3660idn/M3145idn/M3645idn Fax Operation Guid - Page 22
let phone ring before switching the FAX 8-9 and the phone. Set the number of redials. 8-8 NOTE The settings can be changed in the system menu. Default fax settings (page 8-2) 2-7 - Kyocera ECOSYS M3145idn | M3655idn/M3660idn/M3145idn/M3645idn Fax Operation Guid - Page 23
If the user authentication screen appears, enter your login user name and login password and select [Login]. The factory default login user name and login password are set as shown below. Login User Name: Login Password: ECOSYS M3645idn 4500 4500 ECOSYS M3655idn 5500 5500 ECOSYS M3660idn 6000 - Kyocera ECOSYS M3145idn | M3655idn/M3660idn/M3145idn/M3645idn Fax Operation Guid - Page 24
in by referring to the machine's Operation Guide for Administrator User Name and Password. The factory default login user name and login password are set as shown below. Login User Name: Login Password: ECOSYS M3645idn 4500 4500 ECOSYS M3655idn 5500 5500 ECOSYS M3660idn 6000 6000 1 Display the - Kyocera ECOSYS M3145idn | M3655idn/M3660idn/M3145idn/M3645idn Fax Operation Guid - Page 25
Selection Outside call number setting Setting value PSTN PBX 0-9 00-99 Description Use when connecting this machine to a public switched telephone network (default). Use when connecting this machine to PBX. Set a number to access an outside line. For the number, contact the PBX administrator - Kyocera ECOSYS M3145idn | M3655idn/M3660idn/M3145idn/M3645idn Fax Operation Guid - Page 26
done in Command Center RX. Machine's Operation Guide Adding a Destination (Address Book) Add a for each destination. NOTE If user login administration is enabled, you character entry, refer to the following: Character Entry Method (page 10-2) 2 To specify an Address Number, select [Address Number]. - Kyocera ECOSYS M3145idn | M3655idn/M3660idn/M3145idn/M3645idn Fax Operation Guid - Page 27
. Use the numeric keys to enter a number. Character Entry Method (page 10-2) Key Pause Space < > Backspace Description Selecting this key adds about three 33,600 bps, 14,400 bps, and 9,600 bps. NOTE Normally the default setting should be used. ECM is a communication mode specified by the ITU-T - Kyocera ECOSYS M3145idn | M3655idn/M3660idn/M3145idn/M3645idn Fax Operation Guid - Page 28
and password must be registered. 1 Select [Sub Address]. 2 Select [Sub Address] and [Password] and must be added first. NOTE If user login administration is enabled, you can only entry, refer to the following: Character Entry Method (page 10-2) 2 To specify an Address Number, select [Address Number - Kyocera ECOSYS M3145idn | M3655idn/M3660idn/M3145idn/M3645idn Fax Operation Guid - Page 29
Before Using the Fax Machine > Registering Destinations in the Address Book 3 Select the members (destinations). 1 [Member] > [+] Member 10:10 1/1 Menu End 2 Select destinations (contacts) to add to the group. NOTE Select the checkbox to select the desired destination from the list. The - Kyocera ECOSYS M3145idn | M3655idn/M3660idn/M3145idn/M3645idn Fax Operation Guid - Page 30
Menu End 4 To add the destination, select [+]. Select the members to be added to add them. Member Sales department 1 Support department 0123456 0234567 10:10 1/1 Menu End 5 After you have completed the change of members, select [End]. 6 After you have completed the changes, [Save] > [Yes - Kyocera ECOSYS M3145idn | M3655idn/M3660idn/M3145idn/M3645idn Fax Operation Guid - Page 31
Before Using the Fax Machine > Registering Destinations in the Address Book Printing Address List You can print the list of destinations registered in the Address Book. You can sort the list in the order of index or address numbers of the destinations. 1 Display the screen. [System Menu/Counter] key - Kyocera ECOSYS M3145idn | M3655idn/M3660idn/M3145idn/M3645idn Fax Operation Guid - Page 32
001 None 002 None 003 None 004 None 007 None 010 None 005 None 008 None 011 None 006 None 009 None 012 None Menu 2 10:10 1 1/9 End 2 Select one destination (contact or group) from the Address Book. NOTE Destinations can be sorted or searched by destination name or address number. Choosing - Kyocera ECOSYS M3145idn | M3655idn/M3660idn/M3145idn/M3645idn Fax Operation Guid - Page 33
001 AAA 002 BBB 003 CCC 004 None 007 None 010 None 005 None 008 None 011 None 006 None 009 None 012 None Menu 10:10 1/9 End 2 Select [Yes]. 2-18 - Kyocera ECOSYS M3145idn | M3655idn/M3660idn/M3145idn/M3645idn Fax Operation Guid - Page 34
by One Touch Key ...3-10 Using the Speed Dial key ...3-10 Broadcast Transmission ...3-11 Login/Logout ...3-13 Logging in when User Accounting has been Enabled 3- Direct Transmission ...3-18 Cancelling Direct Transmission ...3-18 Manual Send ...3-19 FAX Delayed Transmission ...3-20 Cancelling and - Kyocera ECOSYS M3145idn | M3655idn/M3660idn/M3145idn/M3645idn Fax Operation Guid - Page 35
. For placing originals, refer to the following: Machine's Operation Guide 3 Select the transmission method. There are two transmission methods: memory before communication starts. Memory transmission is selected by default. Direct transmission: The destination is dialed and communication starts - Kyocera ECOSYS M3145idn | M3655idn/M3660idn/M3145idn/M3645idn Fax Operation Guid - Page 36
Sending Faxes > Basic transmission procedure 6 Send Start. Press the [Start] key. When scanning finishes, transmission starts. When originals are placed in the document processor After originals placed in the document processor are scanned and stored in the memory, the receiving system is dialed. - Kyocera ECOSYS M3145idn | M3655idn/M3660idn/M3145idn/M3645idn Fax Operation Guid - Page 37
Sending Faxes > Basic transmission procedure Checking the Send Status 1 Select the [Status/Job Cancel] key. 2 Display the send job status screen. Select [Send Job Status]. The list of accepted time, destination, and status are displayed for each job. Priority Override Send A fax job waiting to be - Kyocera ECOSYS M3145idn | M3655idn/M3660idn/M3145idn/M3645idn Fax Operation Guid - Page 38
Sending Faxes > Basic transmission procedure Cancelling the Transmission The method for cancelling communication with this machine differs depending on the transmission method (memory transmission or direct transmission) and communication form. Methods of cancelling in various cases are explained - Kyocera ECOSYS M3145idn | M3655idn/M3660idn/M3145idn/M3645idn Fax Operation Guid - Page 39
Sending Faxes > Basic transmission procedure Using redial Redial is a function allowing you to dial the last entered number once again. Use this when the receiving system does not respond when you have tried to send a fax. When you want to send the fax to the same receiving system, select [Recall], - Kyocera ECOSYS M3145idn | M3655idn/M3660idn/M3145idn/M3645idn Fax Operation Guid - Page 40
not possible to directly enter a fax number. Select the destination from the Address Book or the One Touch Key. New Destination Entry(FAX) (page 8-10) 1 Display the fax number entry screen. Select [Add Dest.]. NOTE Pressing the number with the numeric keys changes the screen to the fax number entry - Kyocera ECOSYS M3145idn | M3655idn/M3660idn/M3145idn/M3645idn Fax Operation Guid - Page 41
of the receiving system using the numeric keys. Manual Send (page 3-19) Sub Address Set this NOTE Normally this should be used with the default setting. ECM ECM is a communication mode specified same FAX number and select [OK]. Machine's Operation Guide Select [Next Dest.] to enter the next fax - Kyocera ECOSYS M3145idn | M3655idn/M3660idn/M3145idn/M3645idn Fax Operation Guid - Page 42
the external address book, refer to the following: Command Center RX User Guide 1 Display the screen. Select [Address Book]. 2 Select the destination 789012 003 ABCDEF 567890 004 GHIJKL Menu 111111 Cancel < Back 1 10:10 3 1/1 OK 1 Searches by destination name. 2 Advanced search by - Kyocera ECOSYS M3145idn | M3655idn/M3660idn/M3145idn/M3645idn Fax Operation Guid - Page 43
. 2 Enter the One Touch Key number (speed dial number) with the numeric keys. 3 Select [OK]. The entered destination is selected. 4 Select [OK]. Accept the destinations. 3-10 - Kyocera ECOSYS M3145idn | M3655idn/M3660idn/M3145idn/M3645idn Fax Operation Guid - Page 44
from the Address Book or the One Touch Key. New Destination Entry(FAX) (page 8-10) 1 Select [Add Dest.]. 2 Enter the fax number of the receiving system. . Re-enter the same FAX number and select [OK]. Machine's Operation Guide Select the destination from the Address Book 1 Select [Address Book]. 2 - Kyocera ECOSYS M3145idn | M3655idn/M3660idn/M3145idn/M3645idn Fax Operation Guid - Page 45
Touch Key]. 2 Select all destinations and select [OK]. NOTE For details of One Touch Key, refer to the following: Choosing by One Touch Key (page 3-10) 3 After selecting all the destinations, press the [Start] key. 3-12 - Kyocera ECOSYS M3145idn | M3655idn/M3660idn/M3145idn/M3645idn Fax Operation Guid - Page 46
Login Select the user to login. 01 A 02 B 03 C 10:10 04 None 05 None 06 None 1/3 07 None 08 None 09 None Menu If this screen is displayed during operations, select a user and log in. NOTE If a user password is required, an input screen will be displayed. Machine's Operation Guide - Kyocera ECOSYS M3145idn | M3655idn/M3660idn/M3145idn/M3645idn Fax Operation Guid - Page 47
, select the [Authentication/Logout] key to return to the login user name/login password entry screen. Logging in when Job Accounting has been Enabled When job accounting has been enabled, you need to enter an Account ID when using the machine. Login 1 In the screen below, enter the account ID - Kyocera ECOSYS M3145idn | M3655idn/M3660idn/M3145idn/M3645idn Fax Operation Guid - Page 48
Dest. Address Book Functions Ext Address Book One Touch Key Favorites Ready to send. Functions Quiet Mode Original Size Original Orientation Duplex Close 10:10 Off A4 1/4 Top Edge on Top 1-sided Add/Edit Shortcut Function Description Reference Page Quiet Mode Lower print and scan speed for - Kyocera ECOSYS M3145idn | M3655idn/M3660idn/M3145idn/M3645idn Fax Operation Guid - Page 49
10, Envelope #9, Envelope #6, Envelope Monarch, Envelope DL, Envelope C5, Hagaki (Cardstock), Oufuku Hagaki (Return postcard), Youkei 4, Youkei 2, or Custom*. * For instructions on how to specify the custom original size, refer to the following: Machine's Operation Guide NOTE Be - Kyocera ECOSYS M3145idn | M3655idn/M3660idn/M3145idn/M3645idn Fax Operation Guid - Page 50
8 point (example: Resolution Resolution) 200 × 100 dpi Normal when sending originals with standard size characters Typical character size: 10.5 point (example: Resolution Resolution) NOTE The default setting is [200 × 100 dpi Normal]. The higher the resolution, the clearer the image, but the fax - Kyocera ECOSYS M3145idn | M3655idn/M3660idn/M3145idn/M3645idn Fax Operation Guid - Page 51
on the operation panel or [Cancel] on the touch panel. The originals that have been scanned are ejected, and the screen returns to the send default screen. When originals remain in the document processor, take them out. NOTE In some cases, transmission may take place even if the [Stop] key or - Kyocera ECOSYS M3145idn | M3655idn/M3660idn/M3145idn/M3645idn Fax Operation Guid - Page 52
Sending Faxes > Manual Send Manual Send This method allows you to send originals by pressing the [Start] key after confirming that the telephone line has connected to the receiving system. - Kyocera ECOSYS M3145idn | M3655idn/M3660idn/M3145idn/M3645idn Fax Operation Guid - Page 53
to be sent to the same destination are set to the same transmission start time with delayed transmission, you can send up to 10 groups of originals using batch transmission. This function prevents repeated communication to the same destination and reduces the communication cost. NOTE You cannot - Kyocera ECOSYS M3145idn | M3655idn/M3660idn/M3145idn/M3645idn Fax Operation Guid - Page 54
When On is selected in Dest. Check before Send, a destination confirmation screen is displayed when you press the [Start] key. Confirmation Screen of Destinations (page 7-10) 5 When the communication is completed, the scheduled transmission will begin. 3-21 - Kyocera ECOSYS M3145idn | M3655idn/M3660idn/M3145idn/M3645idn Fax Operation Guid - Page 55
is selected in Dest. Check before Send, a destination confirmation screen is displayed when you press the [Start] key. Confirmation Screen of Destinations (page 7-10) To cancel transmission while waiting for interrupt send, select the [Stop] key on the operation panel or [Cancel] on the touch panel - Kyocera ECOSYS M3145idn | M3655idn/M3660idn/M3145idn/M3645idn Fax Operation Guid - Page 56
(page 8-4) File Name Entry Add a file name. Additional information such as Job No. and Date and Time can also be set. Machine's Operation Guide Long Original Reads long-sized original documents using a document processor. (Value: [Off] / [On]) NOTE Only a single side of a long original cannot be - Kyocera ECOSYS M3145idn | M3655idn/M3660idn/M3145idn/M3645idn Fax Operation Guid - Page 57
Sending Faxes > Using chain dial Using chain dial Chain dial is a function that allows you to dial by linking fax numbers of the receiving systems with a chain number created with a number common to several destinations. By setting multiple phone numbers from several telephone companies to a chain - Kyocera ECOSYS M3145idn | M3655idn/M3660idn/M3145idn/M3645idn Fax Operation Guid - Page 58
Entry Check for New Dest., a confirmation screen is displayed for the entered FAX number. Re-enter the same FAX number and select [OK]. Machine's Operation Guide 3-25 - Kyocera ECOSYS M3145idn | M3655idn/M3660idn/M3145idn/M3645idn Fax Operation Guid - Page 59
wizard format, you can check each setting when transmitting. For the procedure for registering a favorites, refer to the following: Machine's Operation Guide 1 Select [Favorites] on the Home screen. 2 Select a favorite. When using the wizard mode 1 The registered screens are displayed in order. Make - Kyocera ECOSYS M3145idn | M3655idn/M3660idn/M3145idn/M3645idn Fax Operation Guid - Page 60
Reception Method ...4-2 Checking and Changing the Reception Method 4-2 Flow of reception ...4-3 Canceling reception (Disconnection of communication 4-3 Manual Reception ...4-4 Flow of reception ...4-4 Fax reception functions ...4-5 Fax reception settings ...4-6 Duplex Printing ...4-6 2 in 1 Print - Kyocera ECOSYS M3145idn | M3655idn/M3660idn/M3145idn/M3645idn Fax Operation Guid - Page 61
faxes on the machine are shown below. • Auto (Normal) • Auto (FAX/TEL) (Refer to 5-28.) • Auto (Answering machine) (Refer to 5-30.) • Manual (Refer to 4-4.) • Auto (DRD) (Available for some countries.) (Refer to 5-32.) Checking and Changing the Reception Method 1 Display the screen. [System Menu - Kyocera ECOSYS M3145idn | M3655idn/M3660idn/M3145idn/M3645idn Fax Operation Guid - Page 62
. To print the received originals, supply paper or remove jammed paper. For the Status screen, refer to the following: Machine's Operation Guide 2 Reception Print Received faxes are output to the inner tray with the printed side facing down. Canceling reception (Disconnection of communication) When - Kyocera ECOSYS M3145idn | M3655idn/M3660idn/M3145idn/M3645idn Fax Operation Guid - Page 63
is a fax machine, you will hear soft beep sounds. If a person answers, you can talk to that person. 4 [FAX] on the Home screen > [On Hook] > [Manual RX] Reception will start. NOTE When using a telephone set that can send tone signals, use the telephone to start the reception of originals with the - Kyocera ECOSYS M3145idn | M3655idn/M3660idn/M3145idn/M3645idn Fax Operation Guid - Page 64
Printing page 4-6 2 in 1 Print page 4-6 Batch Print page 4-6 Reception Date/Time page 4-6 Media Type for Print Output page 4-7 PBX Setting (Europe only) page 2-10 Forward Settings page 5-2 Sub Address Box Function page 5-8 Polling Communication page 5-15 Encryption page 5-23 4-5 - Kyocera ECOSYS M3145idn | M3655idn/M3660idn/M3145idn/M3645idn Fax Operation Guid - Page 65
the data. On Print on both sides. Off Do not print on both sides. For more information about configuring settings, refer to the following: Default fax settings (page 8-2) 2 in 1 Print When you receive a multi-page Statement or A5 size original, this function prints 2 pages of the original at - Kyocera ECOSYS M3145idn | M3655idn/M3660idn/M3145idn/M3645idn Fax Operation Guid - Page 66
for print output of the received fax. Supported paper types All Media Types, Plain, Rough configuring settings, refer to the following: Default fax settings (page 8-2) Setting the the paper size, refer to the following: Machine's Operation Guide 3 Selecting the paper type. 1 Select [Media Type]. - Kyocera ECOSYS M3145idn | M3655idn/M3660idn/M3145idn/M3645idn Fax Operation Guid - Page 67
...5-8 Registering a Sub Address Box ...5-9 Changing/Deleting Sub Address Box ...5-10 Printing Originals from a Sub Address Box 5-11 Checking Details ...5-12 Deleting 30 DRD Reception (Available for some countries 5-32 Manual Send ...5-34 Manual Reception ...5-35 Remote Switch Function ...5-36 5-1 - Kyocera ECOSYS M3145idn | M3655idn/M3660idn/M3145idn/M3645idn Fax Operation Guid - Page 68
FAX] > [Forward Settings] > [Forward Destination] 2 Configure the function. 1 Select [+]. System Menu/Counter. Forward Settings - Forward Destination te test 10:10 1/1 Menu End Display the add destination screen and follow the procedure below to register the forwarding destination. Only one - Kyocera ECOSYS M3145idn | M3655idn/M3660idn/M3145idn/M3645idn Fax Operation Guid - Page 69
Entry (Folder)] is selected for the forwarding destination, enter the address. Machine's Operation Guide NOTE For details on character entry, refer to the following: Character Entry Method (page 10-2) 3 Select [End]. Changing and Deleting Registration Contents Use the procedure below to change - Kyocera ECOSYS M3145idn | M3655idn/M3660idn/M3145idn/M3645idn Fax Operation Guid - Page 70
functions are available. If the optional OCR Scan Activation Kit is installed, you can create a text-searchable PDF. Machine's Operation Guide File Separation When sending by e-mail transmission, folder (SMB) transmission, or folder (FTP) transmission, specify whether File Separation is performed - Kyocera ECOSYS M3145idn | M3655idn/M3660idn/M3145idn/M3645idn Fax Operation Guid - Page 71
FTP encryption when you send data. NOTE To use FTP encryption, set SSL to [On] in the Secure Protocol settings. Machine's Operation Guide 1 Display the screen. [System Menu/Counter] key > [FAX] > [Forward Settings] > [FTP Encrypted TX] 2 Configure the function. Select [On] or [Off]. Print Setting - Kyocera ECOSYS M3145idn | M3655idn/M3660idn/M3145idn/M3645idn Fax Operation Guid - Page 72
file name. NOTE For details on character entry, refer to the following: Character Entry Method (page 10-2) Please note that when you have not add any additional information, file names become the same, and digit job number + year/month/day/hour/minute/second +file format (default setting is .pdf) 5-6 - Kyocera ECOSYS M3145idn | M3655idn/M3660idn/M3145idn/M3645idn Fax Operation Guid - Page 73
machine. For information on the network settings, refer to the followings: Machine's Operation Guide Accessing Command Center RX 1 Display Command Center RX. 1 Open the web browser. remember to enter the correct user name and password when trying to access the relevant screens. Command Center RX - Kyocera ECOSYS M3145idn | M3655idn/M3660idn/M3145idn/M3645idn Fax Operation Guid - Page 74
a Sub Address Box page 5-9 • Changing/Deleting Sub Address Box page 5-10 For the method for manipulating a received fax stored in a Sub Address Box, see of functional communication. When registering a sub address and sub address password in the Address Book and One Touch Key, you can omit - Kyocera ECOSYS M3145idn | M3655idn/M3660idn/M3145idn/M3645idn Fax Operation Guid - Page 75
the following: Character Entry Method (page 10-2) 3 Enter the sub address, and select Password] and [Confirm Password]. Automatically delete a document from the box once printing is complete. To delete the document, select [On]. To retain the document, select [Off]. * Displayed when the user login - Kyocera ECOSYS M3145idn | M3655idn/M3660idn/M3145idn/M3645idn Fax Operation Guid - Page 76
to 16 characters in both [Box Password] and [Confirm Password]. Automatically delete a document from the box once printing is complete. To delete the document, select [On]. To retain the document, select [Off]. * Displayed when the user login administration is enabled. Deleting 1 [Menu] > [Delete - Kyocera ECOSYS M3145idn | M3655idn/M3660idn/M3145idn/M3645idn Fax Operation Guid - Page 77
set to a Sub Address Box, you need to enter the password in the following situations: If user login is disabled If user login is enabled but the Sub Address Box has been selected by another user when you login with user privileges 2 Select the document you want to print. 3 Select [Print]. 3 Print - Kyocera ECOSYS M3145idn | M3655idn/M3660idn/M3145idn/M3645idn Fax Operation Guid - Page 78
the document whose details you want to check. The details of the selected document are displayed. Document Box. Box:Box doc00006420100908144604 10:10 1/1 Menu Cancel < Back Print Deleting Originals after Printing from a Sub Address Box To automatically delete the originals printed form the - Kyocera ECOSYS M3145idn | M3655idn/M3660idn/M3145idn/M3645idn Fax Operation Guid - Page 79
delete, and select [ ]. Document Box. Box:Box doc00006420100908144604 1 210:10 1/1 Menu Cancel < Back Print 3 Select [Yes]. The original is number of pages is displayed. NOTE The list can be printed when user login has been enabled and the machine is logged in with administrator privileges. - Kyocera ECOSYS M3145idn | M3655idn/M3660idn/M3145idn/M3645idn Fax Operation Guid - Page 80
check that a sub address and password have been set in the receiving to enter a sub address. 3 Select [Password]. 4 Enter the sub address password using the numeric keys, and then enter the ' (space)', '#' and '*' characters to enter a sub address password. 5 [OK] > [OK] 5 Send Start. Check the - Kyocera ECOSYS M3145idn | M3655idn/M3660idn/M3145idn/M3645idn Fax Operation Guid - Page 81
reception of originals to its own circumstances. This machine supports both polling transmission and polling reception. IMPORTANT Because the Originals After Polling Transmission (page 5-15) NOTE You can store up to 10 originals for polling transmission. You can also add to or overwrite originals up - Kyocera ECOSYS M3145idn | M3655idn/M3660idn/M3145idn/M3645idn Fax Operation Guid - Page 82
by an e-mail when a transmission is complete. For each of the functions, refer to the following: Sending Faxes (page 3-1) Machine's Operation Guide 5 Start storing. Press the [Start] key. The originals are scanned and stored in the Polling box. Cancelling Polling Transmissions To cancel a polling - Kyocera ECOSYS M3145idn | M3655idn/M3660idn/M3145idn/M3645idn Fax Operation Guid - Page 83
-party machine. (On this machine, the sub address and sub address password.) Sub Address: 3333 External FAX IMPORTANT The recipient's machine must also Some fax machines cannot store originals and some do not support polling transmission. Check both the sending and receiving machines beforehand - Kyocera ECOSYS M3145idn | M3655idn/M3660idn/M3145idn/M3645idn Fax Operation Guid - Page 84
when you press the [Start] key. Confirmation Screen of Destinations (page 7-10) Using Polling Reception with Sub Addresses For polling reception, enter the sub address (on this machine, sub address and sub address password) set at the sending machine. This communication is still possible when the - Kyocera ECOSYS M3145idn | M3655idn/M3660idn/M3145idn/M3645idn Fax Operation Guid - Page 85
screen is displayed when you press the [Start] key. Confirmation Screen of Destinations (page 7-10) Printing from a Polling Box Use this procedure to print an original stored in a Polling functions, refer to the following: Machine's Operation Guide 2 Press the [Start] key. Printing starts. 5-19 - Kyocera ECOSYS M3145idn | M3655idn/M3660idn/M3145idn/M3645idn Fax Operation Guid - Page 86
you want to check. 2 Select [...]. The details of the selected document are displayed. Document Box. Polling Box doc00006520100908150414 doc00006620100908151210 10:10 1/1 Menu Cancel Store File Deleting Originals in a Polling Box Use this procedure to delete an original stored in a Polling - Kyocera ECOSYS M3145idn | M3655idn/M3660idn/M3145idn/M3645idn Fax Operation Guid - Page 87
faxes, select [Detail]. 3 [ ] > Check the contents of a received fax. The preview screen are shown below. 3 2 Document Box. Reception Date/Time: 08/10/2017 10:10 1 10:10 100% 1/2 4 Detail Close Print This File 1 Zoom in 2 Zoom out 3 When you have zoomed in, you can use these keys to - Kyocera ECOSYS M3145idn | M3655idn/M3660idn/M3145idn/M3645idn Fax Operation Guid - Page 88
Using Convenient Fax Functions > FAX Memory RX Box 4 Select [Print This File]. Printing starts. NOTE If you will not use preview, select the received fax you want to print > [Print]. How to delete a fax from the FAX Memory RX Box Use the following procedure to delete an unneeded fax from the FAX - Kyocera ECOSYS M3145idn | M3655idn/M3660idn/M3145idn/M3645idn Fax Operation Guid - Page 89
Using Convenient Fax Functions > Encryption Encryption This method allows you to communicate with originals encrypted by the sending system. Therefore, even when a third party tries to view the originals in the middle of communication by some means, the third party is prevented from knowing the - Kyocera ECOSYS M3145idn | M3655idn/M3660idn/M3145idn/M3645idn Fax Operation Guid - Page 90
function. 1 Select [...] for the unregistered encryption key. System Menu/Counter. TX/RX Common - Encryption Key Registration Key01 Key02 Key03 Key04 Menu 10:10 1/5 End 2 Enter the 16-digit encryption key. NOTE Use numbers (0 to 9) and alphabetical letters (A to F) to register the encryption key - Kyocera ECOSYS M3145idn | M3655idn/M3660idn/M3145idn/M3645idn Fax Operation Guid - Page 91
[...] for the encryption key you want to change. System Menu/Counter. TX/RX Common - Encryption Key Registration Key01 Key02 Key03 Key04 Menu 10:10 1/5 End 2 Enter the new encryption key. 3 [OK] > [Yes] Deleting 1 Select the encryption key you want to delete, and select [ ]. System Menu/Counter - Kyocera ECOSYS M3145idn | M3655idn/M3660idn/M3145idn/M3645idn Fax Operation Guid - Page 92
Using Convenient Fax Functions > Encryption Using the Encrypted Transmission When sending originals by encrypted transmission, use the Address Book registered for encryption or set encrypted transmission when dialing directly using the numeric keys. NOTE Encrypted transmission can be also used in - Kyocera ECOSYS M3145idn | M3655idn/M3660idn/M3145idn/M3645idn Fax Operation Guid - Page 93
Check before Send, a destination confirmation screen is displayed when you press the [Start] key. Confirmation Screen of Destinations (page 7-10) Setting the Encrypted Reception To conduct encryption communication operating the receiving system, follow the steps below. 1 Register the encryption key - Kyocera ECOSYS M3145idn | M3655idn/M3660idn/M3145idn/M3645idn Fax Operation Guid - Page 94
is calling from a telephone, the machine makes a ringing tone urging the user to respond. IMPORTANT In order to use FAX/TEL Auto Switch Reception, with automatic send FAX When the other party has sent originals with manual send Telephone When the other party is calling from a telephone Receives - Kyocera ECOSYS M3145idn | M3655idn/M3660idn/M3145idn/M3645idn Fax Operation Guid - Page 95
times the ringing tone rings. Rings(FAX/TEL) (page 8-9) 2 Answer the call. When the call is from a telephone 1 The machine makes a ringing tone urging the user to respond. Lift the handset of the telephone within 30 seconds. NOTE If you do not lift the handset within 30 seconds, the machine switches - Kyocera ECOSYS M3145idn | M3655idn/M3660idn/M3145idn/M3645idn Fax Operation Guid - Page 96
the connected answering machine. Therefore, when the user is absent, the other party can leave such as responding to messages, refer to the Operation Guide of each answering machine. Set the number of rings to the other party has sent originals with manual send Telephone When the other party is - Kyocera ECOSYS M3145idn | M3655idn/M3660idn/M3145idn/M3645idn Fax Operation Guid - Page 97
set is still making the ringing tone, the machine enters a status the same as manual reception. Manual Reception (page 5-35) 2 The answering machine responds. When the call is from a telephone, but the user is absent The answering machine plays a response message, and starts recording the other - Kyocera ECOSYS M3145idn | M3655idn/M3660idn/M3145idn/M3645idn Fax Operation Guid - Page 98
> Using a Connected Telephone DRD Reception (Available for some countries.) This reception mode utilizes the Distinctive Ring Pattern service available through some telephone companies. With this service, you can use two or more fax numbers on a single telephone line. Thus, you can use this fax - Kyocera ECOSYS M3145idn | M3655idn/M3660idn/M3145idn/M3645idn Fax Operation Guid - Page 99
you lift the handset while the telephone is still ringing, the machine will deal with the call in the same manner as standard Manual FAX Reception. Manual Reception (page 5-35) 2 Answer the call. The machine will then ring using the predetermined ring pattern. When the call is from a telephone Lift - Kyocera ECOSYS M3145idn | M3655idn/M3660idn/M3145idn/M3645idn Fax Operation Guid - Page 100
Using Convenient Fax Functions > Using a Connected Telephone Manual Send When you want to talk to the person at the receiving system or the receiving system needs to switch to fax, use this method - Kyocera ECOSYS M3145idn | M3655idn/M3660idn/M3145idn/M3645idn Fax Operation Guid - Page 101
is a fax machine, you will hear soft beep sounds. If a person answers, you can talk to that person. 4 [FAX] on the Home screen > [On Hook] > [Manual RX] Reception will start. NOTE When using a telephone set that can send tone signals, use the telephone to start the reception of originals with the - Kyocera ECOSYS M3145idn | M3655idn/M3660idn/M3145idn/M3645idn Fax Operation Guid - Page 102
telephone set. For details, contact our agent or the store where you purchased this machine. The remote switch dial is set to 55 at the factory. The remote switch dial number can be changed. Remote SW Dial (page 8-9) Using the Remote Switch Dial To start fax reception by operation from the - Kyocera ECOSYS M3145idn | M3655idn/M3660idn/M3145idn/M3645idn Fax Operation Guid - Page 103
FAX Sending ...6-2 Flow of Network FAX Receiving ...6-2 Setup ...6-3 Installing the FAX Driver ...6-3 Uninstalling the FAX Driver ...6-6 Basic Transmission ...6-7 Configuring the Driver Default Settings 6-10 Default Settings Dialog Box ...6-11 Changing Transmit Settings ...6-14 Using Cover Pages - Kyocera ECOSYS M3145idn | M3655idn/M3660idn/M3145idn/M3645idn Fax Operation Guid - Page 104
Sending Faxes from PC > Flow of Network FAX Sending The Network FAX function enables any PC, which is networked to the machine, to perform sending and receiving of faxes. Its primary features include the following. • PC-prepared document can be sent and received by fax without being printed out. • - Kyocera ECOSYS M3145idn | M3655idn/M3660idn/M3145idn/M3645idn Fax Operation Guid - Page 105
a network cable. Machine's Operation guide Machine Registration Using the memory transmission Driver The procedure for installing the FAX Driver is explained below. (The screens in Windows 8.1 are shown.) 1 Insert the Product Library disc. NOTE Installation on Windows must be done by a user - Kyocera ECOSYS M3145idn | M3655idn/M3660idn/M3145idn/M3645idn Fax Operation Guid - Page 106
it is turned on and click (Refresh). • If the desired device does not appear, select [Add custom device] to directly select the device. 2 Select [FAX Driver]. 1 2 3 3 Click [Install]. 6-4 - Kyocera ECOSYS M3145idn | M3655idn/M3660idn/M3145idn/M3645idn Fax Operation Guid - Page 107
Sending Faxes from PC > Setup 5 Finish the installation. If a system restart message appears, restart the computer by following the screen prompts. This completes the FAX driver installation procedure. 6-5 - Kyocera ECOSYS M3145idn | M3655idn/M3660idn/M3145idn/M3645idn Fax Operation Guid - Page 108
Driver NOTE Uninstallation on Windows must be done by a user logged on with administrator privileges. 1 Display the screen. Click [Search] in charms, and enter "Uninstall Kyocera Product Library" in the search box. Select [Uninstall Kyocera the on-screen instructions to uninstall the software. 6-6 - Kyocera ECOSYS M3145idn | M3655idn/M3660idn/M3145idn/M3645idn Fax Operation Guid - Page 109
following screen is an example. The actual dialog box will vary depending on the application that you are using. 3 Click [Properties] to open the Properties window. 6-7 - Kyocera ECOSYS M3145idn | M3655idn/M3660idn/M3145idn/M3645idn Fax Operation Guid - Page 110
the FAX Setting tab, and click [OK]. 1 2 For detailed information on the settings on the tab, refer to the following: Configuring the Driver Default Settings (page 6-10) 2 You will return to the Print dialog box for the application. Click [OK]. The Transmit Settings dialog box will appear. 4 Select - Kyocera ECOSYS M3145idn | M3655idn/M3660idn/M3145idn/M3645idn Fax Operation Guid - Page 111
Sending Faxes from PC > Basic Transmission 6 Set the destination. 1 Use the keyboard to enter the destination fax number in the [Address Setting] tab. • Maximum number of characters that can be entered: 64 characters • Characters that can be entered: 0 to 9, #, *, -, space (a space or "-" CANNOT be - Kyocera ECOSYS M3145idn | M3655idn/M3660idn/M3145idn/M3645idn Fax Operation Guid - Page 112
Sending Faxes from PC > Basic Transmission Configuring the Driver Default Settings Use the FAX Setting tab of the print settings screen to set the Fine, Ultra fine FAX TX Setting Click [FAX TX Setting] to change the default settings for fax transmission. The Default Settings dialog box will appear - Kyocera ECOSYS M3145idn | M3655idn/M3660idn/M3145idn/M3645idn Fax Operation Guid - Page 113
. The Default Settings dialog box can be accessed by the following procedure: 1 Display the screen. 1 In charms on Desktop, click [Settings], [Control Panel], and then [Devices and Printers]. NOTE In Windows 7, click [Start] button on the Windows, and then click [Devices and Printers]. In Windows 10 - Kyocera ECOSYS M3145idn | M3655idn/M3660idn/M3145idn/M3645idn Fax Operation Guid - Page 114
is set to User Login, select either Use Specific Login User Name or Prompt for Login User Name as desired. Use Specific Login User Name: Enter the Login User Name and Password. Transmission will be performed using the entered Login User Name and Password. Prompt for Login User Name: A screen for - Kyocera ECOSYS M3145idn | M3655idn/M3660idn/M3145idn/M3645idn Fax Operation Guid - Page 115
the e-mail address makes it possible to receive the transmission results report by e-mail. The fax machine must be set to transmit e-mail. Machine's Operation Guide 6-13 - Kyocera ECOSYS M3145idn | M3655idn/M3660idn/M3145idn/M3645idn Fax Operation Guid - Page 116
the Address Book registered in the fax machine, select [Address Book/XXXX (model name)] from the drop-down menu. NOTE To use the Windows Address Book, select [Windows Address Book]. For adding an Address Book for Network FAX data file (.fdt), select the [Refer to Address Book], click on the [Add - Kyocera ECOSYS M3145idn | M3655idn/M3660idn/M3145idn/M3645idn Fax Operation Guid - Page 117
Sending Faxes from PC > Basic Transmission 3 Select the Destination. The destinations registered in the Address Book are shown in the list on the left side of the dialog box. To select a group of destinations, select [Group] from the filter's drop-down menu. Select the desired destination and click - Kyocera ECOSYS M3145idn | M3655idn/M3660idn/M3145idn/M3645idn Fax Operation Guid - Page 118
box. Click on the [Option Settings] button in the [Address Setting] tab of the [Transmit Settings] dialog box. 2 Enter the sub-address and password as it is registered in the destination fax. • Maximum number of characters that can be entered: 20 characters • Characters that can be entered: 0 to - Kyocera ECOSYS M3145idn | M3655idn/M3660idn/M3145idn/M3645idn Fax Operation Guid - Page 119
Sending Faxes from PC > Basic Transmission (3) Cover Page Settings A Cover Page can be set as the first page of a fax transmission. In addition to the standard templates for Cover Pages, original templates can be created and used. To attach and transmit a Cover Page, place a check in the check box - Kyocera ECOSYS M3145idn | M3655idn/M3660idn/M3145idn/M3645idn Fax Operation Guid - Page 120
Sending Faxes from PC > Basic Transmission (5) Transmitting Terminal Information Data The settings that were selected in "(4) Sender Information Tab" can be changed by clicking the [Sender Information tab]. 6-18 - Kyocera ECOSYS M3145idn | M3655idn/M3660idn/M3145idn/M3645idn Fax Operation Guid - Page 121
Page contains such destination information and sender information as that shown below. Sample of English template 01 1 3 2 4 5 7 6 8 9 10 No. 1 2 3 4 5 6 7 8 9 10 Item Recipient Name Destination Company Name Destination Department Name Destination Fax number Sender Name Sender Company Name - Kyocera ECOSYS M3145idn | M3655idn/M3660idn/M3145idn/M3645idn Fax Operation Guid - Page 122
Sending Faxes from PC > Basic Transmission Attaching and Transmitting a Cover Page 1 Open the Transmit Settings dialog box. Perform Steps 1 to 7 of the Basic Transmission method to display the Transmit Settings dialog box. Basic Transmission (page 6-7) When selecting the destination from an - Kyocera ECOSYS M3145idn | M3655idn/M3660idn/M3145idn/M3645idn Fax Operation Guid - Page 123
maximum of 32 characters can be entered. A maximum of 32 characters can be entered. 3 When the sender information is not set in the [Default Settings] dialog box, click on the [Sender Information] tab and set the sender information. (4) Sender Information Tab (page 6-13) . Item Company Department - Kyocera ECOSYS M3145idn | M3655idn/M3660idn/M3145idn/M3645idn Fax Operation Guid - Page 124
Settings, then the action of selecting the Cover Page for each transmission can be omitted. Cover Page Registration (Default Settings) (page 6-24) Original Cover Page templates can be created. Creating New Cover Page Templates (page 6-26) 7 Check the contents of the Cover Page. 1 Click - Kyocera ECOSYS M3145idn | M3655idn/M3660idn/M3145idn/M3645idn Fax Operation Guid - Page 125
Sending Faxes from PC > Basic Transmission 2 Click on the [Close] button. 8 Edit the Message. 1 Click on the [Edit Message] button. 2 Enter the message to be added to the Cover Page and click on the [OK] button. Item Message Description A maximum of 1,000 characters can be entered. 9 Transmit. - Kyocera ECOSYS M3145idn | M3655idn/M3660idn/M3145idn/M3645idn Fax Operation Guid - Page 126
the Cover Page template to be registered in the Default Settings. The registration method is as follows. 1 Open the Default Settings dialog box. Perform the Default Settings Dialog Box procedure, open the [Default Settings] dialog box. Default Settings Dialog Box (page 6-11) 2 Attach a Cover Page - Kyocera ECOSYS M3145idn | M3655idn/M3660idn/M3145idn/M3645idn Fax Operation Guid - Page 127
Sending Faxes from PC > Basic Transmission 4 Check the contents of the Cover Page. 1 Click on the [Preview] button. A preview of the currently selected template will be displayed. To display a different template, use the drop-down menu at the top of the dialog box or click on the [] or [] button. - Kyocera ECOSYS M3145idn | M3655idn/M3660idn/M3145idn/M3645idn Fax Operation Guid - Page 128
Perform the following procedure to create an original Cover Page template. 1 Open the Default Settings dialog box. Perform the Default Settings Dialog Box procedure, open the [Default Settings] dialog box. Default Settings Dialog Box (page 6-11) 2 Edit the Cover Page templates. 1 Place a check in - Kyocera ECOSYS M3145idn | M3655idn/M3660idn/M3145idn/M3645idn Fax Operation Guid - Page 129
font point size so that the inserted information will fit in the field box. NOTE When a fax is transmitted, the information entered in the Default Settings and Destination Settings will automatically be entered in the fields. The following field boxes can be used. Use them as required. Menu Item - Kyocera ECOSYS M3145idn | M3655idn/M3660idn/M3145idn/M3645idn Fax Operation Guid - Page 130
Sending Faxes from PC > Basic Transmission Menu Item Sender Company Department Name FAX Number Telephone Number Comment Template Display Sender - Company Sender - Department Sender - Name Sender - FAX Number Sender - Telephone Number Comment Inserted Information Sender information company - Kyocera ECOSYS M3145idn | M3655idn/M3660idn/M3145idn/M3645idn Fax Operation Guid - Page 131
. Once a fax transmission starts being processed, a Transmission Control icon will be displayed in the Windows Task Bar. 1 Double-click on that icon to access the Transmission Control window which indicates the status of all transmissions being processed. To terminate any transmission, select that - Kyocera ECOSYS M3145idn | M3655idn/M3660idn/M3145idn/M3645idn Fax Operation Guid - Page 132
Report (Outgoing FAX Report and Incoming FAX Report 7-7 Printing Activity Reports ...7-7 Automatic Printout ...7-7 Status Page ...7-8 Reporting FAX Receipt Result by E-mail ...7-9 Confirmation Screen of Destinations ...7-10 7-1 - Kyocera ECOSYS M3145idn | M3655idn/M3660idn/M3145idn/M3645idn Fax Operation Guid - Page 133
Managing Jobs > Various Tools for Checking Transmission Results and Registration Status Various Tools for Checking Transmission Results and Registration Status Check the fax transmission results and registration status using the following tools. Tool FAX job history check Send result report / - Kyocera ECOSYS M3145idn | M3655idn/M3660idn/M3145idn/M3645idn Fax Operation Guid - Page 134
ID. For details of the job history check, refer to the following: Machine's Operation Guide Displaying Job Log Screen 1 Display the screen. [Status/Job Cancel] key > [FAX Job 0013 Broadcast : 2 0012 Broadcast : 2 10:10 Completed Canceled 1/3 Canceled Canceled Close 2 Select [Close] to exit. 7-3 - Kyocera ECOSYS M3145idn | M3655idn/M3660idn/M3145idn/M3645idn Fax Operation Guid - Page 135
Managing Jobs > Printing Administrative Reports (Result Report Setting) Printing Administrative Reports (Result Report Setting) You can print various administrative reports to check the results of fax transmission or the status of the functional setup. Send Result Reports Each time you send a fax, - Kyocera ECOSYS M3145idn | M3655idn/M3660idn/M3145idn/M3645idn Fax Operation Guid - Page 136
Managing Jobs > Printing Administrative Reports (Result Report Setting) Report for Job Canceled before Sending Print a send result report when the job is canceled before being sent. NOTE This is not displayed if E-mail/Folder and Fax are both set to [Off] in Send Result Reports. 1 Display the screen - Kyocera ECOSYS M3145idn | M3655idn/M3660idn/M3145idn/M3645idn Fax Operation Guid - Page 137
Managing Jobs > Printing Administrative Reports (Result Report Setting) FAX RX Result Reports Each time you receive a fax, you can print a report to confirm whether the fax was received successfully. NOTE Fax receipt can also be notified by e-mail instead of checking the receipt result report. - Kyocera ECOSYS M3145idn | M3655idn/M3660idn/M3145idn/M3645idn Fax Operation Guid - Page 138
Managing Jobs > Activity Report (Outgoing FAX Report and Incoming FAX Report) Activity Report (Outgoing FAX Report and Incoming FAX Report) Activity reports are reports of both the sent faxes and the received faxes. Each report lists the history of the latest 50 sent or received fax data. When - Kyocera ECOSYS M3145idn | M3655idn/M3660idn/M3145idn/M3645idn Fax Operation Guid - Page 139
Managing Jobs > Status Page Status Page A status page provides information on a number of user setups. FAX-related information includes the Local FAX Number, Local FAX Name, fax line setting, etc. You can print it out as necessary. 1 Display the - Kyocera ECOSYS M3145idn | M3655idn/M3660idn/M3145idn/M3645idn Fax Operation Guid - Page 140
1 [E-mail] > [+] > [Address Entry] 2 Enter the address of the destination and select [OK]. For details on character entry, refer to the following: Character Entry Method (page 10-2) 7-9 - Kyocera ECOSYS M3145idn | M3655idn/M3660idn/M3145idn/M3645idn Fax Operation Guid - Page 141
of destinations appears after pressing the [Start] key. Machine's Operation Guide Follow the steps below to confirm the destinations. 1 Check all destinations Check 2 123 123 13333 44444 3333 44444 99999 Menu 99999 Cancel 10:10 1/2 Check 2 Select [Yes]. The destination is deleted. Add a - Kyocera ECOSYS M3145idn | M3655idn/M3660idn/M3145idn/M3645idn Fax Operation Guid - Page 142
8 Fax Settings This chapter explains the following topics: Default fax settings ...8-2 Operation method ...8-2 System Menu Settings ...8-3 Report ...8-4 Cassette/MP Tray Settings ...8-5 Common Settings ...8-5 Document Box ...8-6 FAX ...8-7 Transmission Restriction ...8-11 Registering Permit FAX No - Kyocera ECOSYS M3145idn | M3655idn/M3660idn/M3145idn/M3645idn Fax Operation Guid - Page 143
Time Zone Auto Panel Reset 10:10 10/10/2012 10:10 DD/MM/YY 1/4 Guide for Administrator User Name and Password. The factory default login user name and login password are set as shown below. ECOSYS M3645idn ECOSYS M3655idn ECOSYS M3660idn Login User Name: 4500 5500 6000 Login Password - Kyocera ECOSYS M3145idn | M3655idn/M3660idn/M3145idn/M3645idn Fax Operation Guid - Page 144
Fax Settings > Default fax settings System Menu Settings Settings for the fax function in the system menu are shown below. NOTE For settings other than fax settings, refer to the following: Machine's Operation Guide Item Quick Setup Wizard FAX Setup Report Cassette/MP Tray Settings Common Settings - Kyocera ECOSYS M3145idn | M3655idn/M3660idn/M3145idn/M3645idn Fax Operation Guid - Page 145
reports to check the machine settings and status. Default settings for printing the result reports can also be FAX Report Incoming FAX Report Description A status page provides information on a number of user setups. FAX-related information includes the Local FAX Number, Local FAX Name, fax line - Kyocera ECOSYS M3145idn | M3655idn/M3660idn/M3145idn/M3645idn Fax Operation Guid - Page 146
Fax Settings > Default fax settings Cassette/MP Tray Settings Select paper size and media type for Cassette 1 to 5. Cassette1 (to 5) Item Description Paper Size Set the paper size - Kyocera ECOSYS M3145idn | M3655idn/M3660idn/M3145idn/M3645idn Fax Operation Guid - Page 147
scanning resolution. Value: 400×400dpi Ultra Fine, 200×400dpi Super Fine, 200×200dpi Fine, 200×100dpi Normal Set the continuous scan defaults. Value: Off, On Display Status/Log Item Display FAX Log Description Set the display method of the Status/Log. Value: Show All, Hide All Function - Kyocera ECOSYS M3145idn | M3655idn/M3660idn/M3145idn/M3645idn Fax Operation Guid - Page 148
5-23) If a problem arises with this machine and you contact our service representative, this feature enables our Service Center computer to access transmission, number of pages sent, name and fax number. This machine enables the user to select if the TTI is printed out on the fax on the receiving - Kyocera ECOSYS M3145idn | M3655idn/M3660idn/M3145idn/M3645idn Fax Operation Guid - Page 149
Fax Settings > Default fax settings Item Dialing Mode (Inch version only) Start Speed. Value: 9600bps, 14400bps, 33600bps NOTE Normally this should be used with the default setting. Set the default settings for Continuous Scan, used when the original is placed on the platen for transmission. Value - Kyocera ECOSYS M3145idn | M3655idn/M3660idn/M3145idn/M3645idn Fax Operation Guid - Page 150
Fax Settings > Default fax settings Item 2 in 1 Print Batch Print Rings(Normal) Rings with some countries. Select the reception mode. Value: Auto (Normal), Auto (FAX/TEL), Auto (Answering Machine), Manual, Auto (DRD) If Auto (DRD) is selected, select the DRD Pattern. Value: Pattern 1 (Normal Ring), - Kyocera ECOSYS M3145idn | M3655idn/M3660idn/M3145idn/M3645idn Fax Operation Guid - Page 151
Fax Settings > Default fax settings TX/RX Restriction This function allows you to send or receive originals only when communication requirements are met. entry of destination. When this option is set to [Prohibit], you cannot enter the destination directly. Value: Permit, Prohibit 8-10 - Kyocera ECOSYS M3145idn | M3655idn/M3660idn/M3145idn/M3645idn Fax Operation Guid - Page 152
Local digits of the dialed number FAX IDs of other parties. match the last 4 digits of the recipient's Local FAX Number. (Excludes manual transmissions.) • Register Permitted FAX numbers or Permitted ID numbers.** Registering Permit FAX No. (page 8-12) • The sender's Local FAX Number matches - Kyocera ECOSYS M3145idn | M3655idn/M3660idn/M3145idn/M3645idn Fax Operation Guid - Page 153
key > [FAX] > [TX/RX Restriction] > [Permit No. List] 2 Add a permit fax number. 1 Select [+]. System Menu/Counter. TX/RX Restriction - Permit No. List 6764 10:10 1/1 Menu End 2 Use the numeric keys to enter Permit FAX No. Up to 20 digits can be entered. NOTE Select [Pause] to insert a pause - Kyocera ECOSYS M3145idn | M3655idn/M3660idn/M3145idn/M3645idn Fax Operation Guid - Page 154
[...] for Permit FAX No. you want to change, and enter the new number. System Menu/Counter. TX/RX Restriction - Permit No. List 6764 10:10 1/1 Menu End NOTE For the procedure for entering a number, refer to the following: Registering Permit FAX No. (page 8-12) 2 [OK] > [Yes] The registration - Kyocera ECOSYS M3145idn | M3655idn/M3660idn/M3145idn/M3645idn Fax Operation Guid - Page 155
] key > [FAX] > [TX/RX Restriction] > [Reject No. List] 2 Add a Reject FAX No. 1 Select [+]. System Menu/Counter. TX/RX Restriction - Reject No. List 6543 10:10 1/1 Menu End 2 Use the numeric keys to enter Reject FAX No. Up to 20 digits can be entered. NOTE Select [Pause] to insert a pause - Kyocera ECOSYS M3145idn | M3655idn/M3660idn/M3145idn/M3645idn Fax Operation Guid - Page 156
2 Change/Delete. Changing 1 Select [...] for Reject FAX No. you want to change. System Menu/Counter. TX/RX Restriction - Reject No. List 6543 10:10 1/1 Menu End 2 Enter the new number. NOTE For the procedure for entering a number, refer to the following: Registering Reject FAX No. (page 8-14 - Kyocera ECOSYS M3145idn | M3655idn/M3660idn/M3145idn/M3645idn Fax Operation Guid - Page 157
key > [FAX] > [TX/RX Restriction] > [Permit ID List] 2 Add a Permit ID No. 1 Select [+]. System Menu/Counter. TX/RX Restriction - Permit ID List 1111 10:10 1/1 Menu End 2 Use [+]/[-] or the numeric keys to enter Permit ID No. (0000 to 9999). 3 Select [OK]. 3 To register another Permit ID No - Kyocera ECOSYS M3145idn | M3655idn/M3660idn/M3145idn/M3645idn Fax Operation Guid - Page 158
] 2 Change/Delete. Changing 1 Select [...] for Permit ID No. you want to change. System Menu/Counter. TX/RX Restriction - Permit ID List 1111 10:10 1/1 Menu End 2 Enter the new number. NOTE For the procedure for entering a number, refer to the following: Registering Permit ID No. (page 8-16 - Kyocera ECOSYS M3145idn | M3655idn/M3660idn/M3145idn/M3645idn Fax Operation Guid - Page 159
Fax Settings > Transmission Restriction Setting Send Restriction Restrict the other parties to which you send originals only to the ones registered in Permit FAX No. and Permit ID No. as well as the ones registered in the Address Book. To change the sending restriction, follow the steps below. 1 - Kyocera ECOSYS M3145idn | M3655idn/M3660idn/M3145idn/M3645idn Fax Operation Guid - Page 160
in by referring to the machine's Operation Guide for Administrator User Name and Password. The factory default login user name and login password are set as shown below. Login User Name: Login Password: ECOSYS M3645idn 4500 4500 ECOSYS M3655idn 5500 5500 ECOSYS M3660idn 6000 6000 1 Display the - Kyocera ECOSYS M3145idn | M3655idn/M3660idn/M3145idn/M3645idn Fax Operation Guid - Page 161
Login/Logout (page 3-13) Description of User Accounting Item Registration of User Enable/Disable User accounting Description Register user access privileges, User ID and Password. Enable User accounting. NOTE Machine's Operation Guide of used sheets You can reset the counting, referring to the - Kyocera ECOSYS M3145idn | M3655idn/M3660idn/M3145idn/M3645idn Fax Operation Guid - Page 162
the following operations. • Normal transmission • Delayed transmission • Broadcast transmission • Sub address transmission • Output from Sub address Box • Encrypted transmission • Manual send when dialed from this machine to the receiving system • Polling reception • Sending Faxes from PC When job - Kyocera ECOSYS M3145idn | M3655idn/M3660idn/M3145idn/M3645idn Fax Operation Guid - Page 163
9 Troubleshooting This chapter explains the following topics: Indicators During Sending/Receiving Operation 9-2 Responding to an Attention Indicator Flashes 9-2 Precautions When Turning Power OFF ...9-3 Messages ...9-4 Error Code List ...9-5 Troubleshooting ...9-8 Common inquiries ...9-10 9-1 - Kyocera ECOSYS M3145idn | M3655idn/M3660idn/M3145idn/M3645idn Fax Operation Guid - Page 164
Troubleshooting > Indicators During Sending/Receiving Operation Indicators During Sending/Receiving Operation The [Processing] and [Memory] indicators show the Does the destination FAX Send again. - machine respond? Is there an error other than above? Contact your Service Representative. - 9-2 - Kyocera ECOSYS M3145idn | M3655idn/M3660idn/M3145idn/M3645idn Fax Operation Guid - Page 165
Troubleshooting > Precautions When Turning Power OFF Precautions When Turning Power OFF To power off the machine, press the Power switch. You cannot automatically receive a fax when - Kyocera ECOSYS M3145idn | M3655idn/M3660idn/M3145idn/M3645idn Fax Operation Guid - Page 166
Troubleshooting > Messages Messages When an error occurs, the display may show one of the messages listed below. These will help you identify and correct the problem User Guide. Internal error has occurred. Make a note ― of the error code displayed on the screen, and contact your Service - Kyocera ECOSYS M3145idn | M3655idn/M3660idn/M3145idn/M3645idn Fax Operation Guid - Page 167
Troubleshooting > Error Code List Error Code List When a transmission error occurs, not sent correctly. Send again. If you still have trouble, reduce TX Start Speed and send again. NOTE If the communication error occurs frequently, change the default setting of TX Start Speed in System Menu. Page - Kyocera ECOSYS M3145idn | M3655idn/M3660idn/M3145idn/M3645idn Fax Operation Guid - Page 168
Troubleshooting > Error have trouble, reduce TX Start Speed and send again. NOTE If the communication error occurs frequently, change the default setting of other party during polling reception. Communication was interrupted because the password was incorrect. 2 The other party's machine is an our - Kyocera ECOSYS M3145idn | M3655idn/M3660idn/M3145idn/M3645idn Fax Operation Guid - Page 169
Troubleshooting > Error Code List Error Code U05300 U14000 U14100 U19000 U19100 U19300 Possible Cause/Action Reception was rejected by the recipient because communication requirements are not - Kyocera ECOSYS M3145idn | M3655idn/M3660idn/M3145idn/M3645idn Fax Operation Guid - Page 170
Troubleshooting > Troubleshooting Troubleshooting When a problem occurs, first check the following. If the problem persists, contact your dealer or service . Refer to the operation manual of your phone set. Is the remote switching number Check the registration. (Default: 55) 8-9 correct? No - Kyocera ECOSYS M3145idn | M3655idn/M3660idn/M3145idn/M3645idn Fax Operation Guid - Page 171
Troubleshooting > Troubleshooting Symptom Cannot perform memory forwarding using a sub address. Checkpoint in the recipient fax machine? Cannot output from a Sub Address Box. Is the box password been set? Cannot use polling reception. Is polling transmission being used correctly on the sending - Kyocera ECOSYS M3145idn | M3655idn/M3660idn/M3145idn/M3645idn Fax Operation Guid - Page 172
Troubleshooting > Common inquiries Common inquiries The following are the inquiries that are frequently received after this product has been purchased. Question Answer 1 stamps. 2 I want to send and receive faxes in color. Fax images are transmitted and received in black and white. 9-10 - Kyocera ECOSYS M3145idn | M3655idn/M3660idn/M3145idn/M3645idn Fax Operation Guid - Page 173
10 Appendix This chapter explains the following topics: Character Entry Method ...10-2 Specifications ...10-5 Menu Map ...10-7 Received FAX Sizes and Paper Priority (Metric Model 10-13 Received FAX Sizes and Paper Priority (Inch Model 10-14 10-1 - Kyocera ECOSYS M3145idn | M3655idn/M3660idn/M3145idn/M3645idn Fax Operation Guid - Page 174
how to change layouts, refer to the following: Machine's Operation Guide QWERTY layout is used here as an example. You may use another layout following the same steps. Entry Screens Lower-case Letter Entry Screen 12 11 10 9 8 1 Add - Name Abc ABC A/a Input: Limit: 3 32 Del. 2 7 - Kyocera ECOSYS M3145idn | M3655idn/M3660idn/M3145idn/M3645idn Fax Operation Guid - Page 175
enter a number or symbol not shown in the keyboard, select the cursor key and scroll the screen to view other numbers or symbols to enter. 10-3 - Kyocera ECOSYS M3145idn | M3655idn/M3660idn/M3145idn/M3645idn Fax Operation Guid - Page 176
display [Symbol]. 3 Register the characters you entered. Add - Name List A-1 Symbol ņ Input: Limit: 8 32 Del. Cancel < Back Next > Select [Next>]. The entered characters are registered. 10-4 - Kyocera ECOSYS M3145idn | M3655idn/M3660idn/M3145idn/M3645idn Fax Operation Guid - Page 177
51"/216 mm, Max. length: 36.03"/915 mm Automatic Document Feed ECOSYS M3645idn: Max. 75 sheets (with document processor) ECOSYS M3655idn/ECOSYS M3660idn: Max. 100 sheets (with document processor) Resolution Scan: 200 Send result report, FAX RX result report, Activity report, Status page 10-5 - Kyocera ECOSYS M3145idn | M3655idn/M3660idn/M3145idn/M3645idn Fax Operation Guid - Page 178
User Name and Password in the Network FAX Driver when User Login, is turn ON in the fax machine. Requires the input of an Account ID in the Network FAX Driver when Job Accounting, is turned ON in the fax machine. A format can be selected using the Network FAX Driver or a template can be created. 10 - Kyocera ECOSYS M3145idn | M3655idn/M3660idn/M3145idn/M3645idn Fax Operation Guid - Page 179
㻲㻭㼄 Ext. Address Book (refer to Command Center RX User Guide) One Touch Key (page 3-10) Functions Quiet Mode (page 3-16) Original Size (page TX Report (page 3-23) Add/Edit Shortcut (refer to the machine's Operation Guide) Sub Address Box (page 5-8) Polling Box (page 5-15) FAX Memory RX - Kyocera ECOSYS M3145idn | M3655idn/M3660idn/M3145idn/M3645idn Fax Operation Guid - Page 180
RX Box (refer to the machine's Operation Guide) FAX Line Off (page 3-5) Manual RX (page 4-4) Toner Status (refer to the machine's Operation Guide) Paper Status (refer to the machine's Operation Guide) Removable Memory (refer to the machine's Operation Guide) USB Keyboard (refer to the machine - Kyocera ECOSYS M3145idn | M3655idn/M3660idn/M3145idn/M3645idn Fax Operation Guid - Page 181
Status Page (page 7-8) Font List (refer to the machine's Operation Guide) Network Status (refer to the machine's Operation Guide) Service Status (refer to the machine's Operation Guide) Accounting Report (refer to the machine's Operation Guide) Sub Address Box List (page 5-13) FAX List (Index - Kyocera ECOSYS M3145idn | M3655idn/M3660idn/M3145idn/M3645idn Fax Operation Guid - Page 182
Paper Settings (refer to the machine's Operation Guide) Function Defaults FAX TX Resolution (page 8-6) Continuous Scan (FAX) (page 8-6) Preset Limit (refer to the machine's Operation Guide) Error Handling (refer to the machine's Operation Guide) Color Toner Empty Action (refer to the machine - Kyocera ECOSYS M3145idn | M3655idn/M3660idn/M3145idn/M3645idn Fax Operation Guid - Page 183
Book (page 3-9) One Touch Key (page 3-10) Address Book Defaults Sort (refer to the machine's Operation Guide) Address Book (refer to the machine's Operation Guide) Edit Restriction (refer to the machine's Operation Guide) Print List (page 2-16) User Login/Job Accounting (refer to the machine - Kyocera ECOSYS M3145idn | M3655idn/M3660idn/M3145idn/M3645idn Fax Operation Guid - Page 184
2-9) Date Format (refer to the machine's Operation Guide) Time Zone (page 2-9) Auto Panel Reset (refer to the machine's Operation Guide) Panel Reset Timer (refer to the machine's Operation Guide) Low Power Timer (refer to the machine's Operation Guide) Sleep Level (Except for Europe) (refer to - Kyocera ECOSYS M3145idn | M3655idn/M3660idn/M3145idn/M3645idn Fax Operation Guid - Page 185
using the matching paper source. Media Type for Print Output (page 4-7) If [All Media Types] is selected, a paper type cannot be specified for fax printouts. 10-13 - Kyocera ECOSYS M3145idn | M3655idn/M3660idn/M3145idn/M3645idn Fax Operation Guid - Page 186
using the matching paper source. Media Type for Print Output (page 4-7) If [All Media Types] is selected, a paper type cannot be specified for fax printouts. 10-14 - Kyocera ECOSYS M3145idn | M3655idn/M3660idn/M3145idn/M3645idn Fax Operation Guid - Page 187
10-2 Checking Transmission Results and Registration Status 7-2 Common inquiries 9-10 Confirmation Screen of Destinations 7-10 Continuous Scan 3-18 D Date 2-9 Default 18 Cancel 3-18 FAX Driver Basic Transmission 6-7 Flow of Receiving 6-2 Flow of Sending 6-2 Installing the FAX Driver 6-3 Setup 6-3 FAX - Kyocera ECOSYS M3145idn | M3655idn/M3660idn/M3145idn/M3645idn Fax Operation Guid - Page 188
(Names) 2-2 Manual Reception 4-4, 5-35 Manual Send 3-19, 5-34 Media Type for Print Output 4-7, 8-8 Memory Reception 4-3 Memory Transmission 3-2 Cancel 3-5 Menu Map 10-7 Messages 9-4 N Network FAX Basic Transmission 6-7 Flow of Receiving 6-2 Flow of Sending 6-2 Installing the FAX Driver 6-3 Setup - Kyocera ECOSYS M3145idn | M3655idn/M3660idn/M3145idn/M3645idn Fax Operation Guid - Page 189
8-11 Reception Rejection Requirements 8-12 Reception Restriction Setting 8-18 Reject FAX No. 8-14 Send Restriction Setting 8-18 Unknown Number Reception 8-18 Troubleshooting 9-8 TX Start Speed 8-8 U Unusable Time 8-19 User Accounting 8-20 Contents 8-20 Login 3-13 Using favorites 3-26 Index-3 - Kyocera ECOSYS M3145idn | M3655idn/M3660idn/M3145idn/M3645idn Fax Operation Guid - Page 190
- Kyocera ECOSYS M3145idn | M3655idn/M3660idn/M3145idn/M3645idn Fax Operation Guid - Page 191
Rev.1 2018.2 2V3KDEN501
-
 1
1 -
 2
2 -
 3
3 -
 4
4 -
 5
5 -
 6
6 -
 7
7 -
8
-
9
-
10
-
11
-
12
-
13
-
14
-
15
-
16
-
17
-
18
-
19
-
20
-
21
-
22
-
23
-
24
-
25
-
26
-
27
-
28
-
29
-
30
-
31
-
32
-
33
-
34
-
35
-
36
-
37
-
38
-
39
-
40
-
41
-
42
-
43
-
44
-
45
-
46
-
47
-
48
-
49
-
50
-
51
-
52
-
53
-
54
-
55
-
56
-
57
-
58
-
59
-
60
-
61
-
62
-
63
-
64
-
65
-
66
-
67
-
68
-
69
-
70
-
71
-
72
-
73
-
74
-
75
-
76
-
77
-
78
-
79
-
80
-
81
-
82
-
83
-
84
-
85
-
86
-
87
-
88
-
89
-
90
-
91
-
92
-
93
-
94
-
95
-
96
-
97
-
98
-
99
-
100
-
101
-
102
-
103
-
104
-
105
-
106
-
107
-
108
-
109
-
110
-
111
-
112
-
113
-
114
-
115
-
116
-
117
-
118
-
119
-
120
-
121
-
122
-
123
-
124
-
125
-
126
-
127
-
128
-
129
-
130
-
131
-
132
-
133
-
134
-
135
-
136
-
137
-
138
-
139
-
140
-
141
-
142
-
143
-
144
-
145
-
146
-
147
-
148
-
149
-
150
-
151
-
152
-
153
-
154
-
155
-
156
-
157
-
158
-
159
-
160
-
161
-
162
-
163
-
164
-
165
-
166
-
167
-
168
-
169
-
170
-
171
-
172
-
173
-
174
-
175
-
176
-
177
-
178
-
179
-
180
-
181
-
182
-
183
-
184
-
185
-
186
-
187
-
188
-
189
-
190
-
191
 |
 |

FAX
OPERATION GUIDE
PRINT
COPY
SCAN
FAX
ECOSYS M3645idn
ECOSYS M3655idn
ECOSYS M3660idn