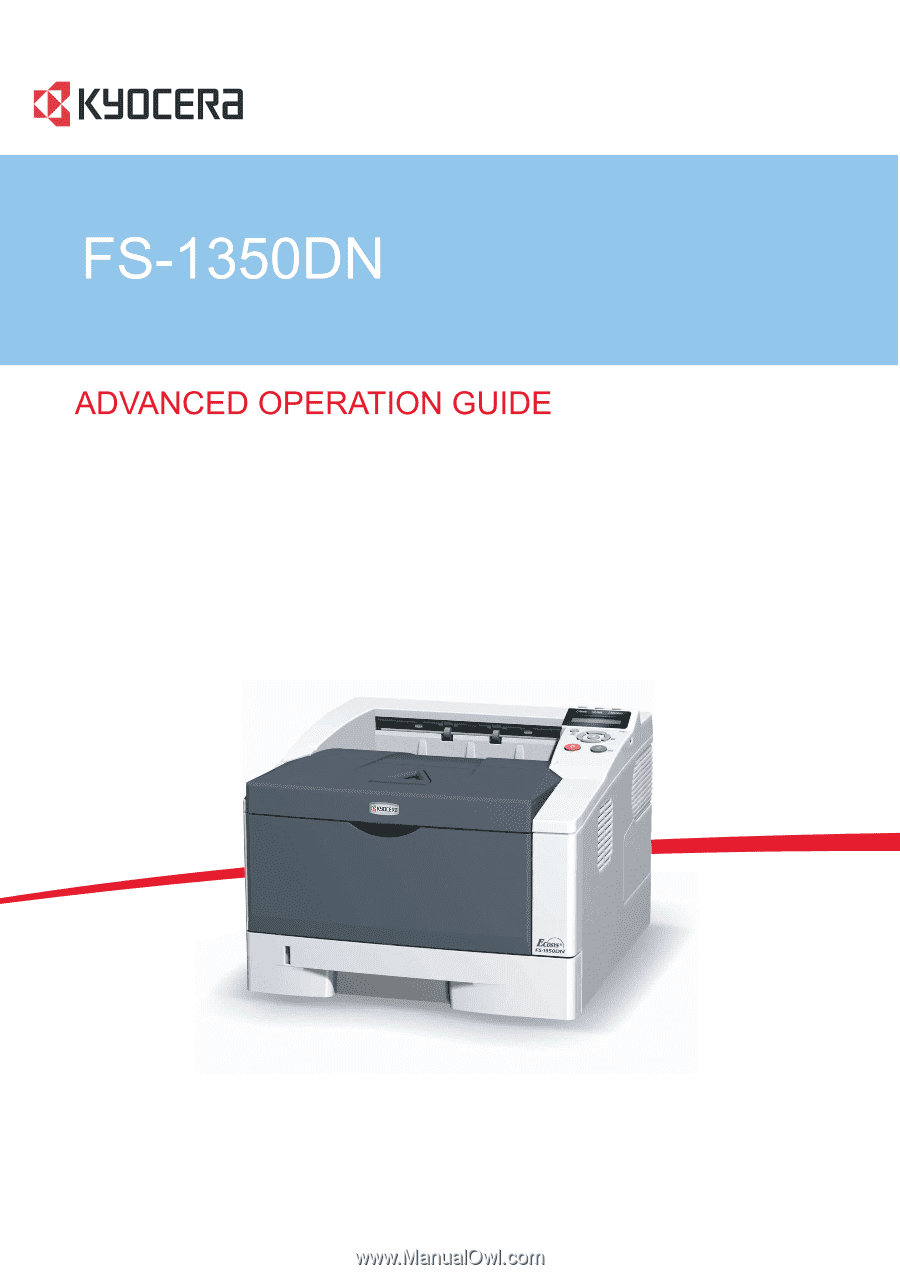
Kyocera FS-1350DN FS-1350DN Operation Guide Rev-1 (Advanced)
Kyocera FS-1350DN Manual
 |
View all Kyocera FS-1350DN manuals
Add to My Manuals
Save this manual to your list of manuals |
Kyocera FS-1350DN manual content summary:
- Kyocera FS-1350DN | FS-1350DN Operation Guide Rev-1 (Advanced) - Page 1
- Kyocera FS-1350DN | FS-1350DN Operation Guide Rev-1 (Advanced) - Page 2
- Kyocera FS-1350DN | FS-1350DN Operation Guide Rev-1 (Advanced) - Page 3
Report Print 2-11 USB Memory (USB flash memory selection 2-16 Counter (Viewing the counter value 2-18 Paper Settings 2-19 Print Settings 2-27 Network (Network settings 2-39 Device Common (Selecting/Setting the common device) .... 2-44 Security 2-55 Admin (Administrator settings 2-63 Adjust - Kyocera FS-1350DN | FS-1350DN Operation Guide Rev-1 (Advanced) - Page 4
ii - Kyocera FS-1350DN | FS-1350DN Operation Guide Rev-1 (Advanced) - Page 5
This guide has the following chapters: 1 Paper Handling This chapter explains how choose, handle and load paper. 2 Using the Operation Panel This chapter explains how to use the operation panel to configure the printer. 3 Option This chapter explains the options for this printer. 4 Computer - Kyocera FS-1350DN | FS-1350DN Operation Guide Rev-1 (Advanced) - Page 6
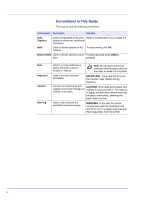
and may be easily overlooked, deterring the paper jam recovery. Used to alert users to the possibility of personal injury. WARNING If you ship the printer, remove and pack the developer unit and drum unit in a plastic bag and ship them separately from the - Kyocera FS-1350DN | FS-1350DN Operation Guide Rev-1 (Advanced) - Page 7
1 Paper Handling This chapter explains paper specifications for this printer. General Guidelines Selecting the Right Paper Paper Type 1-2 1-4 1-11 Paper Handling 1-1 - Kyocera FS-1350DN | FS-1350DN Operation Guide Rev-1 (Advanced) - Page 8
printer cannot produce highquality results when the wrong paper is used. Low-priced paper is not economical in the long run if it causes printing problems are given on the following pages: Item Specifications Weight Thickness Cassette: 60 to 120 g/m² (16 to 31.9 lb/ream) MP tray: 60 to 220 g/m² - Kyocera FS-1350DN | FS-1350DN Operation Guide Rev-1 (Advanced) - Page 9
Sizes The minimum and maximum paper sizes are as follows. For the paper smaller than JIS B6, postcards, and envelopes, the MP tray must be used. Paper cassette MP tray Minimum Paper Size Minimum Paper Size 356mm (14 inches) 148mm (5-13/16 inches) 356mm (14 inches) 148mm (5-13/16 inches) 105mm - Kyocera FS-1350DN | FS-1350DN Operation Guide Rev-1 (Advanced) - Page 10
for the length and width. The angle at the corners must be 90° ±0.2°. MP Tray: Envelope Monarch, Envelope #10, Envelope #9, Envelope #6, Envelope C5, Envelope DL, Legal, Letter, Statement, Oficio cause multiple feeding and fogging problems. (Fogging is a gray background effect.) 1-4 Paper Handling - Kyocera FS-1350DN | FS-1350DN Operation Guide Rev-1 (Advanced) - Page 11
cause multiple-sheet feeding or print quality problems such as blurring because of poor toner fusing. The recommended basis weight is between 60 and 120g/m² (16 to 31.9 lib/ream) for the cassette and between 60 and 220g/m² (16 to 59 lib/ream) for the MP tray. Paper Weight Equivalence Table The paper - Kyocera FS-1350DN | FS-1350DN Operation Guide Rev-1 (Advanced) - Page 12
When paper passes through the fixing unit, it curls upward a little. To produce flat printouts, load the paper so that the upward pressure toner. The paper must be able to release this charge so that printed sheets do not cling together in the Output Tray. Whiteness: The contrast of the printed page - Kyocera FS-1350DN | FS-1350DN Operation Guide Rev-1 (Advanced) - Page 13
a sample on the machine and check that printing quality is satisfactory. Transparency This printer is available for monochrome printing on transparencies. Transparencies must be fed to the MP Tray. One transparency can be loaded at a time. Transparencies must be able to withstand the heat of fusing - Kyocera FS-1350DN | FS-1350DN Operation Guide Rev-1 (Advanced) - Page 14
the machine. Adhesive paper sticking to the drum or rollers will damage the machine. peel off, causing serious paper jam problems. Some label paper is manufactured with to 10 postcards can be loaded at a time. Fan the stack of postcards and align the edges before loading them in the MP tray. Make - Kyocera FS-1350DN | FS-1350DN Operation Guide Rev-1 (Advanced) - Page 15
MP tray. • To avoid jams caused by curled envelopes, stack no more than 10 printed envelopes on the output tray. Thick Paper Fan the stack of paper and align the edges before loading them in the MP tray white bond paper. Refer to Paper Specifications on page 1-2.The preprinted ink must be able to - Kyocera FS-1350DN | FS-1350DN Operation Guide Rev-1 (Advanced) - Page 16
Paper Select recycled paper that meets the same specifications as the white bond paper except for whiteness. Refer to Paper Specifications on page 1-2. Note Before purchasing recycled paper, test a sample on the machine and check that the printing quality is satisfactory. 1-10 Paper Handling - Kyocera FS-1350DN | FS-1350DN Operation Guide Rev-1 (Advanced) - Page 17
you to define and select customized paper types. Refer to Type Adjust (Creating custom paper type) on page 2-25. The following types of paper can be used. Paper source Paper Type Plain MP tray Paper Cassette Yes Yes Paper Weight Range 70 to 90g/m2 Display in Operation Panel Normal2 Duplex - Kyocera FS-1350DN | FS-1350DN Operation Guide Rev-1 (Advanced) - Page 18
1-12 Paper Handling - Kyocera FS-1350DN | FS-1350DN Operation Guide Rev-1 (Advanced) - Page 19
Report Print 2-11 USB Memory (USB flash memory selection) 2-16 Counter (Viewing the counter value) 2-18 Paper Settings 2-19 Print Settings 2-27 Network (Network settings) 2-39 Device Common (Selecting/Setting the common device) 2-44 Security 2-55 Admin (Administrator settings) 2-63 - Kyocera FS-1350DN | FS-1350DN Operation Guide Rev-1 (Advanced) - Page 20
need to configure the Ecosys printer. In general you need to use the operation panel only to make default settings. You can make most changes to the printer settings using the printer driver through the application software. Note Changes to printer settings made using a software application override - Kyocera FS-1350DN | FS-1350DN Operation Guide Rev-1 (Advanced) - Page 21
Understanding the Operation Panel The operation panel on the top of the printer has a 2-line by 16-character liquid crystal display (LCD), eight keys, and three indicators (LED). Messages that appear on the display and functions of indicators - Kyocera FS-1350DN | FS-1350DN Operation Guide Rev-1 (Advanced) - Page 22
details on Auto Sleep, refer to Sleep Timer (Sleep timer timeout time) on page 2-52. Jobs inside the printer are being canceled. To cancel a job, refer to Canceling a Printing Job on page 2-6. Error Codes Refer to the Troubleshooting section in the Operation Guide. 2-4 Using the Operation Panel - Kyocera FS-1350DN | FS-1350DN Operation Guide Rev-1 (Advanced) - Page 23
from a CompactFlash (CF) card, RAM disk, or USB flash memory. Flashing. Indicates that the printer requires maintenance or is warming up. On. Indicates the occurrence of a problem or an error. For details, refer to the Troubleshooting section in the Operation Guide. Using the Operation Panel 2-5 - Kyocera FS-1350DN | FS-1350DN Operation Guide Rev-1 (Advanced) - Page 24
[OK]. Canceling data appears on the message display and printing stops after the current page is printed. MENU Key [MENU] lets you enter the menu system to change the setup and printing environment of the printer. Pressing this key during a menu selection will terminate the selection and return the - Kyocera FS-1350DN | FS-1350DN Operation Guide Rev-1 (Advanced) - Page 25
Cursor Keys The four cursor keys are used in the menu system to access an item or enter numeric values. Use U and V to change menus, and Y and Z to move to the sub menu. The cursor key with the question mark ( ) may be pressed when the paper jam message has appeared on the message display. A help - Kyocera FS-1350DN | FS-1350DN Operation Guide Rev-1 (Advanced) - Page 26
settings to your specific needs. Settings can be made when Ready is indicated on the printer message display. Note Settings that are received from application software and the printer driver will take priority over settings made in the operation panel. Entering the Mode Selection Menu Press [MENU - Kyocera FS-1350DN | FS-1350DN Operation Guide Rev-1 (Advanced) - Page 27
Paper Settings > Selecting a Menu The mode selection menu is hierarchical. Press U or V to display the desired menu. If the selected menu has a sub-menu, > is displayed after the menu. Press Z to move to the sub-menu or Y to go back. Indicates that there is a sub-menu >Type Adjust > > is - Kyocera FS-1350DN | FS-1350DN Operation Guide Rev-1 (Advanced) - Page 28
time you press U or V, the selection changes. • Report Print • USB Memory • Counter • Paper Settings • Print Settings • Network • Device Common • Security • Admin • Adjust/Maintenance Note If you use the mode first selected when the printer is turned on, Report Print is displayed. For the second - Kyocera FS-1350DN | FS-1350DN Operation Guide Rev-1 (Advanced) - Page 29
Print Status Page • Print Fonts List • Print RAM Disk File List • Print Mem. Card File List 1 Press [MENU]. Report Print > 2 Press U or V repeatedly until Report Print > appears. >Print Menu Map ? Note that menus shown in the list may vary depending on which optional units installed in the printer - Kyocera FS-1350DN | FS-1350DN Operation Guide Rev-1 (Advanced) - Page 30
Menu Map Sample 2-12 Using the Operation Panel - Kyocera FS-1350DN | FS-1350DN Operation Guide Rev-1 (Advanced) - Page 31
may vary depending on the printer's firmware version. Status Page Printer Firmware version 1 Paper Settings Interface Block 5 Group Settings 2 Memory Print Settings 6 Device Common Settings Emulation Option Status 3 7 Network Counters 4 8 Toner Gauge 9 Using the Operation Panel - Kyocera FS-1350DN | FS-1350DN Operation Guide Rev-1 (Advanced) - Page 32
: • MP tray paper size and type • Paper cassette size and type • Sleep time • Formfeed timeout time 3 Installed Options This item shows the option installed in the printer: • Memory card (CompactFlash card) 4 Network Status This item shows the IP address, subnet mask address, and default gateway - Kyocera FS-1350DN | FS-1350DN Operation Guide Rev-1 (Advanced) - Page 33
Mem. Card File List This allows you to print a list of the files on a CompactFlash (memory) card. IMPORTANT This message will be displayed when the CompactFlash (CF) card installed in the printer. 1 Press Z while Report Print > is displayed. 2 Press U or V repeatedly until >Print Mem. Card File List - Kyocera FS-1350DN | FS-1350DN Operation Guide Rev-1 (Advanced) - Page 34
(external device) block setting) on page 2-56. The options available in USB flash memory are as follows: • Print File memory) 1 Press [MENU]. 2 Press U or V repeatedly until USB Memory > appears. Note that menus shown in the list may vary depending on which optional units installed in the printer - Kyocera FS-1350DN | FS-1350DN Operation Guide Rev-1 (Advanced) - Page 35
menus shown in the list may vary depending on which optional units installed in the printer. 2 Press [OK]. The message Processing appears and the printer prints a file stored in a USB flash memory. >Remove Device ? Remove Device (Removing the USB flash memory) Specifies the setting for USB flash - Kyocera FS-1350DN | FS-1350DN Operation Guide Rev-1 (Advanced) - Page 36
You cannot change the displayed number. 1 Press [MENU]. > 2 Press U or V repeatedly until Counter > appears. >Printed Pages 0002000 3 Press Z. >Printed Pages appears as he total number of pages printed. (E.g.: 2000) 4 Press [MENU]. The display returns to Ready. 2-18 Using the Operation Panel - Kyocera FS-1350DN | FS-1350DN Operation Guide Rev-1 (Advanced) - Page 37
and cassettes from which paper is supplied. The options available in Paper Settings are as follows: • MP Tray Size (Setting MP tray paper size) • MP Tray Type (Setting the MP tray paper type) • Cassette (1 to 3) Size (Setting the cassette paper size) • Cassette (1 to 3) Type (Setting the cassette - Kyocera FS-1350DN | FS-1350DN Operation Guide Rev-1 (Advanced) - Page 38
can use this to set the paper type that can be supplied from the MP tray. The default setting is PLAIN. For more information about paper types that you can feed from the MP tray, refer to Paper Specifications on page 1-2. 1 Press Z while Paper Settings > is displayed. 2 Press U or V repeatedly until - Kyocera FS-1350DN | FS-1350DN Operation Guide Rev-1 (Advanced) - Page 39
>MP Tray Type store that definition in the printer. For more information, refer to Type Adjust (Creating custom paper type) on page 2-25. 5 Press [ load paper into the paper feeder cassettes. 1 Pull the cassette out of the printer. Using the Operation Panel 2 Adjust the position of the width guides - Kyocera FS-1350DN | FS-1350DN Operation Guide Rev-1 (Advanced) - Page 40
Panel Use the operation panel to set the size of paper loaded in the cassette on the printer. 1 Press Z while Paper Settings > is displayed. 2 sure to set the unit of measurement and the dimensions of the paper as described in the following sections. Select the units of measurement as described in - Kyocera FS-1350DN | FS-1350DN Operation Guide Rev-1 (Advanced) - Page 41
can be selected between millimeters and inches. The current unit of measurement is displayed (the default setting is mm). 3 Press [OK]. A blinking question mark (?) appears. 4 Select mm or inch using U or V. 5 Press [OK]. Set the dimensions of the paper as described in the next section. Entering - Kyocera FS-1350DN | FS-1350DN Operation Guide Rev-1 (Advanced) - Page 42
paper cassette according to the paper type you command on the printer driver. The default setting is plain paper for all paper cassettes. If the PF type and store that definition in the printer. For more information, refer to Type Adjust (Creating custom paper type) on page 2-25. 5 Press [OK]. 6 - Kyocera FS-1350DN | FS-1350DN Operation Guide Rev-1 (Advanced) - Page 43
describes the procedure used to set a user-defined paper type for the printer. Eight custom user settings may be registered. After having been set, any to Paper Weight (Setting the paper weight) on page 2-25, and Duplex Path (Setting the duplex path) on page 2-26) after selecting the paper type to - Kyocera FS-1350DN | FS-1350DN Operation Guide Rev-1 (Advanced) - Page 44
U or V to display the desired paper thickness. The display changes as shown below. For details of the default setting for each paper type, refer to Paper Specifications on page 1-2. Light Normal 1 Normal 2 Normal 3 Heavy 1 Heavy 2 Heavy 3 Extra Heavy 5 Press [OK]. 6 Press [MENU]. The display returns - Kyocera FS-1350DN | FS-1350DN Operation Guide Rev-1 (Advanced) - Page 45
Page Set (Setting pagination) Print Settings > 1 Press [MENU]. 2 Press U or V repeatedly until Print Settings > appears. >Paper Source ? Cassette 1 Paper Source (Selecting the paper feed source) You can select the paper source, from which the printer feeds paper as the default ): MP tray Cassette - Kyocera FS-1350DN | FS-1350DN Operation Guide Rev-1 (Advanced) - Page 46
printer The default setting Load Cassette 1 is displayed, press U or V repeatedly until Use alternative? appears. 2 Press U or V repeatedly until the desired paper source and size appears. Each time you press U or V, another paper cassette or the paper size that can currently be fed from the MP tray - Kyocera FS-1350DN | FS-1350DN Operation Guide Rev-1 (Advanced) - Page 47
the paper. The duplexer is mounted underneath the printer. Duplex printing is available for the following paper MP tray does not match the paper size and paper type of the current paper feed source cassette, a paper jam may occur. Binding Modes Binding refers to the manner in which printed pages - Kyocera FS-1350DN | FS-1350DN Operation Guide Rev-1 (Advanced) - Page 48
in use. 3 Press [OK]. A blinking question mark (?) appears. 4 Press U or V repeatedly until the desired emulation mode is displayed. PCL 6 (default) KPDL KPDL (AUTO) Line Printer IBM Proprinter DIABLO 630 EPSON LQ-850 5 Press [OK]. 6 Press [MENU]. The display returns to Ready. 2-30 Using the - Kyocera FS-1350DN | FS-1350DN Operation Guide Rev-1 (Advanced) - Page 49
Emulation KPDL is Kyocera's implementation of the PostScript language. The KPDL (AUTO) emulation enables the printer to automatically change Printing KPDL errors) The printer can print error descriptions when printing error occurs during KPDL emulation. The default changes according to the - Kyocera FS-1350DN | FS-1350DN Operation Guide Rev-1 (Advanced) - Page 50
default font) You can select the default font for the current interface. The default font can be one of the internal fonts or a font that is downloaded to the printer memory font numbers of the internal fonts, refer to Print Fonts List on page 215. 6 When the desired font is displayed, press [OK]. 7 - Kyocera FS-1350DN | FS-1350DN Operation Guide Rev-1 (Advanced) - Page 51
to Ready. Changing the Default Font Size You can change the size of the default font. If you selected repeatedly until >Font Select > appears. >>Pitch 10.00 cpi 3 Make sure that Internal is displayed 99.99 characters per inch, in 0.01 character-per-inch increments. Use Z or Y - Kyocera FS-1350DN | FS-1350DN Operation Guide Rev-1 (Advanced) - Page 52
> appears. KIR Mode (Selecting the KIR mode) This printer incorporates the KIR (Kyocera Image Refinement) smoothing function. KIR users the software to enhance resolution, resulting in high quality printing at resolution of 600 dpi and 300 dpi. The default is On. KIR has no effect on the printing - Kyocera FS-1350DN | FS-1350DN Operation Guide Rev-1 (Advanced) - Page 53
By enabling EcoPrint mode, you can minimize the amount of toner used during printing. Because images printed in this mode may be display returns to Ready. Resolution (Selecting the print resolution) You can set the default print resolution in four ways: 300dpi, 600dpi, Fast 1200 mode and Fine 1200 - Kyocera FS-1350DN | FS-1350DN Operation Guide Rev-1 (Advanced) - Page 54
Set > appears. >>Copies 001 Copies (Number of copies) You can set the number of copies of each page to be printed for the current interface. 1 Press Z while >Page Set > is displayed. 2 Press U or V repeatedly until >>Copies appears. 3 Press [OK]. A blinking cursor (_) appears. 4 Press U or V to - Kyocera FS-1350DN | FS-1350DN Operation Guide Rev-1 (Advanced) - Page 55
) This procedure instructs the printer what to do when it receives a linefeed code (0AH). • LF only: Linefeed is performed (Default). • CR page (78 characters at 10 pitch) and Letter size page (80 characters at 10 pitch). This setting is only effective in PCL 6 emulation. 1 Press Z while >Page - Kyocera FS-1350DN | FS-1350DN Operation Guide Rev-1 (Advanced) - Page 56
>>Wide A4 ? Off 3 Press [OK]. A blinking question mark (?) appears. 4 Select On or Off using U or V. 5 Press [OK]. 6 Press [MENU]. The display returns to Ready. 2-38 Using the Operation Panel - Kyocera FS-1350DN | FS-1350DN Operation Guide Rev-1 (Advanced) - Page 57
Network (Network settings) This printer supports TCP/IP and TCP/IP (IPv6) protocols. IP is an abbreviation for Internet Protocol. This printer . IPv6 was developed to expand the range of available IP addresses by using 128-bit IP addresses. The options available in the Network settings are as - Kyocera FS-1350DN | FS-1350DN Operation Guide Rev-1 (Advanced) - Page 58
the IP address of the local node and the default router (the router in the host's own network system) and the DNS (Domain Name System) server Ready. IP Address (IP address setting) An IP address is the address of a network device such as a computer and is included in IP packets as needed for the - Kyocera FS-1350DN | FS-1350DN Operation Guide Rev-1 (Advanced) - Page 59
"24" in the address "133.210.2.0/24". In this way, "133.210.2.0/24" denotes the IP address "133.210.2.0" with a 24-bit prefix (network section). This new network address section (originally part of the host address) made possible by the subnet mask is referred to as the subnet address. Note When you - Kyocera FS-1350DN | FS-1350DN Operation Guide Rev-1 (Advanced) - Page 60
. If you install Bonjour on Windows XP Service Pack 2 or later, the Windows firewall will be set up correctly space, which resolves the problem of the lack of addresses are displayed when TCP/IP (IPv6) is enabled. 1 Press Z while Network > is displayed. 2 Press U or V repeatedly until >TCP/IP ( - Kyocera FS-1350DN | FS-1350DN Operation Guide Rev-1 (Advanced) - Page 61
the next-generation of the Internet's Dynamic Host Configuration Protocol and supports IPv6. It extends the BOOTP startup protocol that defines the protocols used for transferring configuration information to hosts on the network. DHCPv6 permits the DHCP server to use its expanded functionality to - Kyocera FS-1350DN | FS-1350DN Operation Guide Rev-1 (Advanced) - Page 62
the procedure given below. You can optionally download messages in other languages. Contact your service representative for information. 1 Press Z while Device Common > is displayed. 2 Press U or V repeatedly until >MSG Language appears. The default message language is English. 3 To change the - Kyocera FS-1350DN | FS-1350DN Operation Guide Rev-1 (Advanced) - Page 63
to notify the user of printer operations and the printer status. This setting is useful, for example, when the printer is located some distance from On is selected in this setting, a tone sounds each time a key is used. The default setting is On. 1 Press Z while >Buzzer > is displayed. 2 Press U or - Kyocera FS-1350DN | FS-1350DN Operation Guide Rev-1 (Advanced) - Page 64
to Ready. Error (Error tone setting) When On is selected in this setting, a tone sounds when a problem such as running out of paper or a paper jam occurs during printing. The default setting is On. 1 Press Z while >Buzzer > is displayed. 2 Press U or V repeatedly until >>Error appears. 3 Press [OK - Kyocera FS-1350DN | FS-1350DN Operation Guide Rev-1 (Advanced) - Page 65
to perform the following operations on the RAM disk. Note The printer also supports CF card as a storage device. The CF card is installed into the dedicated slot of the printer. The RAM disk is an allocated part of the printer's memory. IMPORTANT The RAM disk stores data only temporarily. When the - Kyocera FS-1350DN | FS-1350DN Operation Guide Rev-1 (Advanced) - Page 66
CF card, refer to CompactFlash (CF) Card on page 3-6. IMPORTANT The Memory Card menu options are only displayed when a CF card is installed in the printer. 1 Press Z while Device Common > is displayed. >Memory Card > 2 Press U or V repeatedly until >Memory Card > appears. 2-48 Using the Operation - Kyocera FS-1350DN | FS-1350DN Operation Guide Rev-1 (Advanced) - Page 67
card. Formatting of the CF card must be executed from the printer. When a new CF card is inserted in the printer's slot, Format error Memory card will appear on the message display. 1 Press Z while >Memory Card > is displayed. 2 >>Format appears. 3 Press [OK]. A question mark (?) appears. 4 Press - Kyocera FS-1350DN | FS-1350DN Operation Guide Rev-1 (Advanced) - Page 68
Duplex (Duplex printing error detection setting) If the error detection setting for duplex printing has been turned On, and you attempt to print onto a paper size and paper type that cannot be used for duplex printing, the Duplex disabled Press GO error message will be displayed and printing will - Kyocera FS-1350DN | FS-1350DN Operation Guide Rev-1 (Advanced) - Page 69
Feed Time Out (Automatic form feed timeout setting) If the printer receives no data for a certain period, it will time out and release the current interface. It prints whatever data it has in its buffer and feeds out the page. The default form feed timeout time is 30 seconds. 1 Press Z while >Timer - Kyocera FS-1350DN | FS-1350DN Operation Guide Rev-1 (Advanced) - Page 70
a print job, the operation panel is operated, or one of the exterior covers is opened. The default time is 15 minutes. Note Calibration is automatically executed before the printer reverts to normal operation mode. 1 Press Z while >Timer > is displayed. 2 Press U or V repeatedly until >>Sleep Timer - Kyocera FS-1350DN | FS-1350DN Operation Guide Rev-1 (Advanced) - Page 71
is shared over a network as a network printer and one person causes one of the above errors, after the set period of time elapses, the data sent from the next person is printed. The default setting is Off (Auto Error Clear disabled). The auto clear errors are: • Memory overflow Press GO • Print - Kyocera FS-1350DN | FS-1350DN Operation Guide Rev-1 (Advanced) - Page 72
[MENU]. The display returns to Ready. Auto Sleep (Setting the sleep timer) The printer has a sleep timer that is used to conserve power when the printer is not printing, processing, or receiving data. The default setting is On. 1 Press Z while >Timer > is displayed. 2 Press U or V repeatedly until - Kyocera FS-1350DN | FS-1350DN Operation Guide Rev-1 (Advanced) - Page 73
printer operation and the print data. The options available in Security are as follows: • ID (Administrator ID input) • Password (Administrator password information on how to set the administrator ID, refer to Admin (Administrator settings) on page 2-63. 1 Press Z while Security > is displayed. ID - Kyocera FS-1350DN | FS-1350DN Operation Guide Rev-1 (Advanced) - Page 74
input) To set up the Security functions, you must enter an administrator ID and administrator password. For information on how to set the administrator password, refer to Admin (Administrator settings) on page 2-63. 1 When you entered the ID in the previous step (ID (Administrator ID input)), the - Kyocera FS-1350DN | FS-1350DN Operation Guide Rev-1 (Advanced) - Page 75
>>USB Device ? Unblock USB Device (USB interface setting) This locks and protects the USB interface. The default setting is Unblock. 1 Press Z while >I/F Block > is displayed. >>USB Device appears. 2 Press [OK]. A blinking question mark (?) appears. 3 Select Block or Unblock using U or V. 4 Press [ - Kyocera FS-1350DN | FS-1350DN Operation Guide Rev-1 (Advanced) - Page 76
the ability of NLMs to load and unload flexibly and dynamically is a major advantage of this system. The default setting is On. Note Check with your network administrator when selecting network settings. > 1 After entering the administrator ID and password, press U or V repeatedly until >NetWare - Kyocera FS-1350DN | FS-1350DN Operation Guide Rev-1 (Advanced) - Page 77
out via routers on printers in remote locations. It also supports the HTTP authentication mechanisms along with SSL server and client authentication as well as encryption. The default setting is Off. Note Check with your network administrator when selecting network settings. 1 After entering the - Kyocera FS-1350DN | FS-1350DN Operation Guide Rev-1 (Advanced) - Page 78
. SSL servers use this protocol to authenticate servers and clients. The default setting is Off. Note Check with your network administrator when selecting network settings. 1 After entering the administrator ID and password, press U or V > repeatedly until >SSL Server > appears. 2 Press [OK - Kyocera FS-1350DN | FS-1350DN Operation Guide Rev-1 (Advanced) - Page 79
Ready. AES (SSL Server AES setting) AES (Advanced Encryption Standard) was developed to replace DES as the standard encryption as the safety of DES has declined users and servers in network printing. To use IPP over SSL, both server and client must support the protocol. The default setting is Off. 1 - Kyocera FS-1350DN | FS-1350DN Operation Guide Rev-1 (Advanced) - Page 80
32-bit IP addresses and IPv6 uses 128-bit IP addresses. The default setting is Off. Note Check with your network administrator when selecting network settings. 1 After entering the administrator ID and password, press U or V repeatedly until >IPSec appears. 2 Press [OK]. A blinking question mark - Kyocera FS-1350DN | FS-1350DN Operation Guide Rev-1 (Advanced) - Page 81
> 2 Press U or V repeatedly until Admin > appears. ID _ Password _ >Change ID 00000001 Using the Operation Panel ID (Administrator ID input) You can use this to set the administrator ID. The default setting is the numeric part of your printer's model name. The default setting is "1350". 1 Press - Kyocera FS-1350DN | FS-1350DN Operation Guide Rev-1 (Advanced) - Page 82
to Ready. Change ID (Administrator ID change) You can use this to change the administrator ID. 1 In step 3 in Password (Administrator Password input) above, press U or V while the Admin (Change) screen is displayed until >Change ID appears. (E.g.: Where the administrator ID is 001) >Change ID _ OK - Kyocera FS-1350DN | FS-1350DN Operation Guide Rev-1 (Advanced) - Page 83
> appears. >Restart Printer ? Restart Printer The procedure described below resets the printer's temporary conditions, such as the current page orientation, font, etc., set by commands to their default values. Downloaded fonts and macros are deleted from the printer's memory. 1 Press Z while - Kyocera FS-1350DN | FS-1350DN Operation Guide Rev-1 (Advanced) - Page 84
are as follows: • Print Status Page (Printing the service status page) • Print Network Status Page (Printing the network status page) • Print Test Page • Developer (Initializing the developer unit) IMPORTANT Service is primarily a menu used by service representative for maintenance work. There is - Kyocera FS-1350DN | FS-1350DN Operation Guide Rev-1 (Advanced) - Page 85
display returns to Ready. Developer (Initializing the developer unit) The replaced developer can be automatically fill up the toner using this menu when a toner container is installed and the printer is turned on. This is primarily used for maintenance by service representative. Using the Operation - Kyocera FS-1350DN | FS-1350DN Operation Guide Rev-1 (Advanced) - Page 86
2-68 Using the Operation Panel - Kyocera FS-1350DN | FS-1350DN Operation Guide Rev-1 (Advanced) - Page 87
3 Option This chapter explains the options for this printer. General Information 3-2 Expansion Memory Modules 3-3 Paper Feeder (PF-100) 3-5 CompactFlash (CF) Card 3-6 USB Flash Memory 3-6 Option 3-1 - Kyocera FS-1350DN | FS-1350DN Operation Guide Rev-1 (Advanced) - Page 88
General Information The printers have the following options available to satisfy your printing requirements. Note Install the memory module before installing the optional paper feeder (PF-100). For instructions on installing individual options, refer to the documentation included with the option. - Kyocera FS-1350DN | FS-1350DN Operation Guide Rev-1 (Advanced) - Page 89
module (dual in line memory module) in the memory slot provided on the printer main controller board. You can select additional memory module from 128, 256, 512, or 1024 MB. The maximum memory size is 1152 MB. Note The expansion memory should only be installed by your service technician. We shall - Kyocera FS-1350DN | FS-1350DN Operation Guide Rev-1 (Advanced) - Page 90
memory module, remove the right cover and the memory slot cover from the printer. Then, carefully push out the two socket clamps. Ease the memory module out of the socket to remove. Verifying the expanded memory To verify that the memory module is working properly, test it by printing a status page - Kyocera FS-1350DN | FS-1350DN Operation Guide Rev-1 (Advanced) - Page 91
Paper Feeder (PF-100) The PF-100 allows you to add two more paper cassette to the bottom of the printer for continuous feeding of a large volume of paper. Each paper cassette can hold up to approximately 250 sheets of ISO A4, ISO A5, JIS B5, - Kyocera FS-1350DN | FS-1350DN Operation Guide Rev-1 (Advanced) - Page 92
cover. 4 Insert the CF Card. 5 Secure the optional interface slot cover with the screws removed in step 3. 6 Connect the power cord and printer cable and turn on the printer. USB Flash Memory See your dealer for purchasing information of this optional device that are best suited for use with this - Kyocera FS-1350DN | FS-1350DN Operation Guide Rev-1 (Advanced) - Page 93
4 Computer Interface This chapter contains explanations on the following topics: General Information 4-2 USB Interface 4-2 Network Interface 4-3 Computer Interface 4-1 - Kyocera FS-1350DN | FS-1350DN Operation Guide Rev-1 (Advanced) - Page 94
General Information This chapter explains the connector specifications of USB and network interfaces. USB Interface This printer supports the Hi-Speed USB. USB (Universal Serial Bus) interface specifications are as follows. Specifications Basic specification Complies with the Universal Serial Bus - Kyocera FS-1350DN | FS-1350DN Operation Guide Rev-1 (Advanced) - Page 95
priority based data transmission. Supports IPSec Supports IPSec, the security protocol that authenticates and encrypts in the network layer (IP layer). Specifications Connector 10 Base-T/100 Base-TX Operating Systems Windows 2000/XP/Vista/Server2003, MacOS 10.x Network protocols • IPv6: HTTP, LPD - Kyocera FS-1350DN | FS-1350DN Operation Guide Rev-1 (Advanced) - Page 96
EMI Countermeasures VCCI Class B, FCC Class B (U.S.), CE (Europe) IMPORTANT When IPv6 functions are used, the devices used on the network (routers, PCs, etc) must support IPv6. 4-4 Computer Interface - Kyocera FS-1350DN | FS-1350DN Operation Guide Rev-1 (Advanced) - Page 97
the memory capacity of this machine. For DIMM that can be used in this machine, contact your service technician. AppleTalk AppleTalk offers file sharing and printer sharing and it also enables you to utilize application software that is on another computer on the same AppleTalk network. Default - Kyocera FS-1350DN | FS-1350DN Operation Guide Rev-1 (Advanced) - Page 98
a specific computer in a network. The format of an IP Address is four numbers separated by dots, e.g. 192.168.110.171. Each number should be a decimal between 0 and 255. KPDL KPDL is Kyocera's implementation of the PostScript page description language Level3. MP Tray This tray is used instead of the - Kyocera FS-1350DN | FS-1350DN Operation Guide Rev-1 (Advanced) - Page 99
designed to define the way computers and other devices communicate with each other over a network. USB (Universal Serial Bus) An interface standard for low to middle speed serial interfaces. This printer supports Hi-Speed USB. The maximum transfer rate is 480 Mbps and the maximum cable length - Kyocera FS-1350DN | FS-1350DN Operation Guide Rev-1 (Advanced) - Page 100
Glossary-4 - Kyocera FS-1350DN | FS-1350DN Operation Guide Rev-1 (Advanced) - Page 101
ID 2-55, 2-63 Change 2-64 Administrator Password 2-56, 2-63 Change 2-64 AES setting page 2-14 Setting 2-30 Envelope 1-9 Error Detection Duplex printing 2-50 Paper mismatch 2-50 Setting 2-49 Expansion memory module option 3-2 F Features Network interface 4-3 Font select Selecting default - Kyocera FS-1350DN | FS-1350DN Operation Guide Rev-1 (Advanced) - Page 102
Menu 2-8 MP tray basis weight 1-5 minimum and maximum paper sizes 1-3 Paper size 1-4, 2-20 Paper type 1-11, 2-20 N NetWare 2-58 Network Settings 2-39 TCP/IP (IPv4 2-39 TCP/IP (IPv6 2-42 Network Interface 4-3 Setting Network interface card (NIC 2-57 Number of copies USB flash memory 2-17 - Kyocera FS-1350DN | FS-1350DN Operation Guide Rev-1 (Advanced) - Page 103
Transparency 1-7 U Unit of measurement 2-23 Selecting 2-23 USB Interface 4-2 USB interface Interface block 2-57 USB Memory 2-16 USB memory slot Interface block 2-56 V Verifying expanded memory 3-4 Viewing counter value 2-18 Index-3 - Kyocera FS-1350DN | FS-1350DN Operation Guide Rev-1 (Advanced) - Page 104
Index-4 - Kyocera FS-1350DN | FS-1350DN Operation Guide Rev-1 (Advanced) - Page 105
We recommend the use of our own brand supplies. We will not be liable for any damage caused by the use of third party supplies in this machine. A1 - Kyocera FS-1350DN | FS-1350DN Operation Guide Rev-1 (Advanced) - Page 106
- Kyocera FS-1350DN | FS-1350DN Operation Guide Rev-1 (Advanced) - Page 107
2008 is a trademark of Kyocera Corporation - Kyocera FS-1350DN | FS-1350DN Operation Guide Rev-1 (Advanced) - Page 108
First edition 2008.10
-
 1
1 -
 2
2 -
 3
3 -
 4
4 -
 5
5 -
 6
6 -
 7
7 -
8
-
9
-
10
-
11
-
12
-
13
-
14
-
15
-
16
-
17
-
18
-
19
-
20
-
21
-
22
-
23
-
24
-
25
-
26
-
27
-
28
-
29
-
30
-
31
-
32
-
33
-
34
-
35
-
36
-
37
-
38
-
39
-
40
-
41
-
42
-
43
-
44
-
45
-
46
-
47
-
48
-
49
-
50
-
51
-
52
-
53
-
54
-
55
-
56
-
57
-
58
-
59
-
60
-
61
-
62
-
63
-
64
-
65
-
66
-
67
-
68
-
69
-
70
-
71
-
72
-
73
-
74
-
75
-
76
-
77
-
78
-
79
-
80
-
81
-
82
-
83
-
84
-
85
-
86
-
87
-
88
-
89
-
90
-
91
-
92
-
93
-
94
-
95
-
96
-
97
-
98
-
99
-
100
-
101
-
102
-
103
-
104
-
105
-
106
-
107
-
108
 |
 |