Kyocera FS 1920 FS-1920 Installation Guide Rev 1.1 - Page 22
Correcting a Paper Jam
 |
View all Kyocera FS 1920 manuals
Add to My Manuals
Save this manual to your list of manuals |
Page 22 highlights
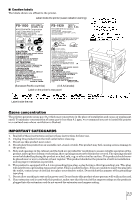
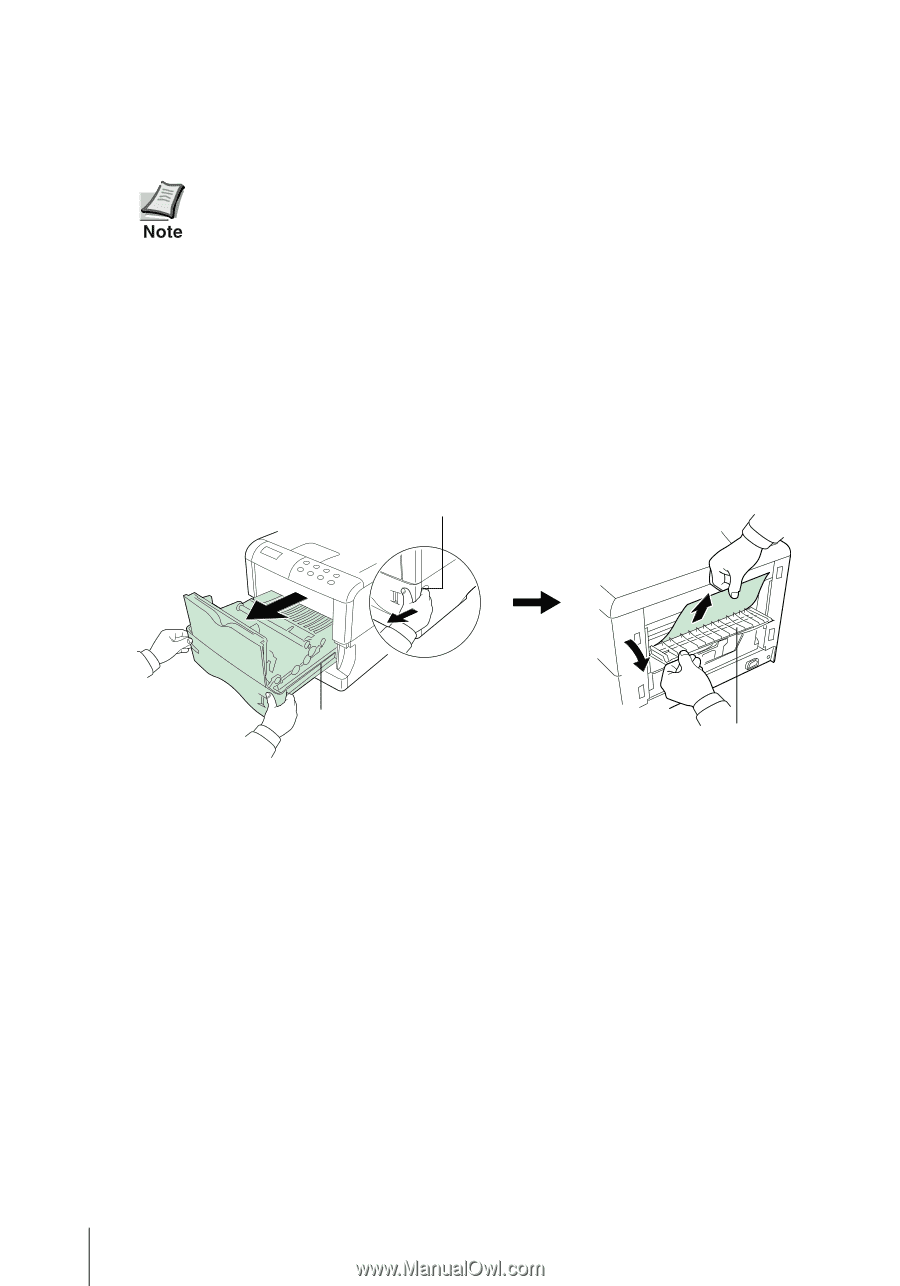
Correcting a Paper Jam If a paper jam occurs while you are printing, remove the jammed paper as described below. After you have removed the jammed paper, open and close the top cover or the paper transfer unit. When pulling the paper, pull it gently so as not to tear it. Torn pieces of paper are difficult to remove and may be easily overlooked, deterring the jam recovery. Jam at the Rear Cover 1 While pulling the paper transfer unit release lever (green colored), pull out the paper transfer unit. 2 Open the rear cover and remove the jammed paper as shown in the figure. Paper Transfer Unit Release Lever (green colored) Paper Transfer Unit Rear Cover 20
-
 1
1 -
2
-
3
-
4
-
5
-
6
-
7
-
8
-
9
-
10
-
11
-
12
-
13
-
14
-
15
-
16
-
 17
17 -
 18
18 -
 19
19 -
 20
20 -
 21
21 -
 22
22 -
 23
23 -
 24
24 -
 25
25 -
 26
26 -
 27
27 -
28
-
29
-
30
-
31
-
32
-
33
-
34
-
35
-
36
 |
 |
20
Correcting a Paper Jam
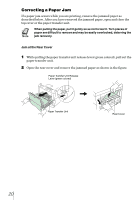
If a paper jam occurs while you are printing, remove the jammed paper as
described below. After you have removed the jammed paper, open and close the
top cover or the paper transfer unit.
When pulling the paper, pull it gently so as not to tear it. Torn pieces of
paper are difficult to remove and may be easily overlooked, deterring the
jam recovery.
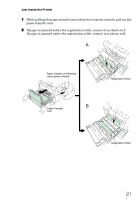
Jam at the Rear Cover
1
While pulling the paper transfer unit release lever (green colored), pull out the
paper transfer unit.
2
Open the rear cover and remove the jammed paper as shown in the figure.
Paper Transfer Unit
Paper Transfer Unit Release
Lever (green colored)
Rear Cover