Kyocera FS 9520DN FS-9120DN/9520DN Operation Guide Rev-2 - Page 107
Setting the RS-232C Parameters, Windows XP, proceed as follows:, Windows 95/98/ME
 |
View all Kyocera FS 9520DN manuals
Add to My Manuals
Save this manual to your list of manuals |
Page 107 highlights
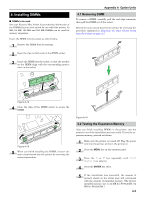
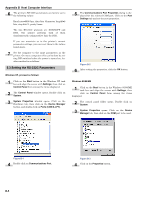
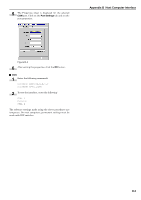
Appendix B Host Computer Interface 6 The printer's RS-232C parameters are factory-set to the following values: Baud rate=9600 bps, data bits (character length)=8 bits, stop bits=1, parity=none The two RS-232C protocols are XON/XOFF and DTR. The printer performs both of them simultaneously, using positive logic for DTR. If you are uncertain as to the printer's current parameter settings, you can reset them to the values listed above. 7 Set the computer to the same parameters as the printer. On many computers this can be done by setting DIP switches before the power is turned on. Another method is as follows: 5.3 Setting the RS-232C Parameters Windows XP, proceed as follows: 1 Click on the Start button in the Windows XP task bar and align the cursor with Settings, then click on Control Panel from among the items displayed. 2 The Control Panel window opens. Double click on System. 3 System Properties window opens. Click on the Hardware tab, then click on the Device Manager button, and double click on Ports (COM & LPT). 5 The Communications Port Properties dialog is displayed for the selected COM port. Click on the Port Settings tab and set the port properties. Figure B-2 6 After setting the properties, click the OK button. Windows 95/98/ME 1 Click on the Start button in the Windows 95/98/ME task bar and align the cursor with Settings, then click on Control Panel from among the items displayed. 2 The control panel folder opens. Double click on System. 3 System Properties opens. Click on the Device Manager tab, then click on the COM port to be used. Figure B-1 4 Double click on Communications Port. Figure B-3 4 Click on the Properties button. B-5
-
 1
1 -
2
-
3
-
4
-
5
-
6
-
7
-
8
-
9
-
10
-
11
-
12
-
13
-
14
-
15
-
16
-
17
-
18
-
19
-
20
-
21
-
22
-
23
-
24
-
25
-
26
-
27
-
28
-
29
-
30
-
31
-
32
-
33
-
34
-
35
-
36
-
37
-
38
-
39
-
40
-
41
-
42
-
43
-
44
-
45
-
46
-
47
-
48
-
49
-
50
-
51
-
52
-
53
-
54
-
55
-
56
-
57
-
58
-
59
-
60
-
61
-
62
-
63
-
64
-
65
-
66
-
67
-
68
-
69
-
70
-
71
-
72
-
73
-
74
-
75
-
76
-
77
-
78
-
79
-
80
-
81
-
82
-
83
-
84
-
85
-
86
-
87
-
88
-
89
-
90
-
91
-
92
-
93
-
94
-
95
-
96
-
97
-
98
-
99
-
100
-
101
-
 102
102 -
 103
103 -
 104
104 -
 105
105 -
 106
106 -
 107
107 -
 108
108 -
 109
109 -
 110
110 -
 111
111 -
 112
112 -
113
-
114
-
115
 |
 |
