Kyocera KM-2560 KM-NET Viewer Operation Guide Rev-5.2-2010.10 - Page 9
Automatic Device Discovery, Excluded Devices, Excluding a Device from Discovery, Including a Device
 |
View all Kyocera KM-2560 manuals
Add to My Manuals
Save this manual to your list of manuals |
Page 9 highlights
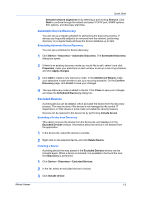
KMnet Viewer Quick Start Selected network segments list by selecting it and clicking Remove. Click Next to continue through the wizard and select TCP/IP port, SNMP options, SSL options, and discovery start time. Automatic Device Discovery You can set up a regular schedule for performing the discovery process. If devices are frequently added to or removed from the network, performing discovery on a regular basis will keep the device database up to date. Scheduling Automatic Device Discovery You can set a schedule for device discovery. 1 Click Device > Discovery > Automatic Discovery. The Scheduled Discovery dialog box opens. 2 If there is an existing discovery mode you would like to edit, select it and click Properties, make your selections in each window to set up a recurring schedule and click Apply changes. 3 Click Add to create a new discovery mode. In the Add Device Wizard, make your selections in each window to set up a recurring schedule. On the Confirm Discovery page, click Finish to save your changes. 4 The new discovery mode is added to the list. Click Close to save your changes and close the Scheduled Discovery dialog box. Excluded Devices A printing device can be deleted, which excludes the device from the discovery process. This may be done if the device is not managed by the central IT department, or if the device is to be made not visible for security reasons. Devices can be restored to the device list by performing Include device. Excluding a Device from Discovery This option removes the device from the device list, and displays it in the Excluded Devices window. Information about the device is not deleted from the application. 1 In the device list, select the device to exclude. 2 Right-click on the selected device, and click Delete Device. Including a Device A printing device that was placed in the Excluded Devices window can be included again. When a device is included, it is available to be found the next time Discovery is performed. 1 Click Device > Discovery > Excluded Devices. 2 In the list, select an excluded device to include. 3 Click Include device. 1-3
-
 1
1 -
2
-
3
-
 4
4 -
 5
5 -
 6
6 -
 7
7 -
 8
8 -
 9
9 -
 10
10 -
 11
11 -
 12
12 -
 13
13 -
 14
14 -
15
-
16
-
17
-
18
-
19
-
20
-
21
-
22
-
23
-
24
-
25
-
26
-
27
-
28
-
29
-
30
-
31
-
32
-
33
-
34
-
35
-
36
-
37
-
38
-
39
-
40
-
41
-
42
-
43
-
44
-
45
-
46
-
47
-
48
-
49
-
50
-
51
-
52
-
53
-
54
-
55
-
56
-
57
-
58
-
59
-
60
-
61
-
62
-
63
-
64
-
65
-
66
-
67
-
68
-
69
-
70
-
71
-
72
-
73
-
74
-
75
-
76
-
77
-
78
-
79
 |
 |