Kyocera TASKalfa 4500i Fax System (V) Operation Guide - Page 199
i-FAX POP3 Settings, POP3 Port Number
 |
View all Kyocera TASKalfa 4500i manuals
Add to My Manuals
Save this manual to your list of manuals |
Page 199 highlights
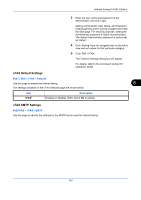
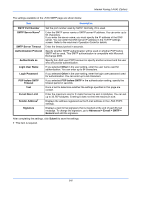
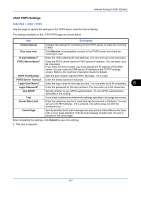
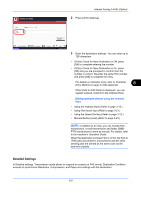
Internet Faxing (i-FAX) (Option) i-FAX POP3 Settings FAX/i-FAX > i-FAX > POP3 Use this page to specify the settings for the POP3 server used for Internet faxing. The settings available on the i-FAX POP3 page are shown below. Item Description Check Interval Displays the interval for connecting to the POP3 server to check for incoming E-mail. Run once now E-mail Address† POP3 Server Name† Click Receive to immediately connect to the POP3 server and check for incoming E-mail. Enter the i-FAX address (E-mail address). You can enter up to 64 characters. Enter the POP3 server name or POP3 server IP address. You can enter up to 64 characters. If you enter the server name, you must specify the IP address of the DNS server. You can enter the DNS server IP address in the TCP/IP settings screen. Refer to the machine's Operation Guide for details. POP3 Port Number Sets the port number used by POP3. Normally, 110 is used. POP3 Server Timeout Enter the timeout period in seconds. Login User Name† Enter the login name for the user account. You can enter up to 64 characters. 8 Login Password† Enter the password for the user account. You can enter up to 64 characters. Use APOP Specify whether to use APOP authentication. To use APOP authentication, select On in this setting. Test Runs a test to determine whether the settings specified in this page are correct. E-mail Size Limit Enter the maximum size for E-mails that can be received in kilobytes. You can set up to 32,767 kilobytes. If 0 is entered, the setting does not limit the maximum size. Cover Page Specify whether the E-mail messages are also printed. Select On to print faxes with a cover page attached. If the E-mail message includes text, the text is printed on the cover page. After completing the settings, click Submit to save the settings. † This item is required. 8-7
-
 1
1 -
2
-
3
-
4
-
5
-
6
-
7
-
8
-
9
-
10
-
11
-
12
-
13
-
14
-
15
-
16
-
17
-
18
-
19
-
20
-
21
-
22
-
23
-
24
-
25
-
26
-
27
-
28
-
29
-
30
-
31
-
32
-
33
-
34
-
35
-
36
-
37
-
38
-
39
-
40
-
41
-
42
-
43
-
44
-
45
-
46
-
47
-
48
-
49
-
50
-
51
-
52
-
53
-
54
-
55
-
56
-
57
-
58
-
59
-
60
-
61
-
62
-
63
-
64
-
65
-
66
-
67
-
68
-
69
-
70
-
71
-
72
-
73
-
74
-
75
-
76
-
77
-
78
-
79
-
80
-
81
-
82
-
83
-
84
-
85
-
86
-
87
-
88
-
89
-
90
-
91
-
92
-
93
-
94
-
95
-
96
-
97
-
98
-
99
-
100
-
101
-
102
-
103
-
104
-
105
-
106
-
107
-
108
-
109
-
110
-
111
-
112
-
113
-
114
-
115
-
116
-
117
-
118
-
119
-
120
-
121
-
122
-
123
-
124
-
125
-
126
-
127
-
128
-
129
-
130
-
131
-
132
-
133
-
134
-
135
-
136
-
137
-
138
-
139
-
140
-
141
-
142
-
143
-
144
-
145
-
146
-
147
-
148
-
149
-
150
-
151
-
152
-
153
-
154
-
155
-
156
-
157
-
158
-
159
-
160
-
161
-
162
-
163
-
164
-
165
-
166
-
167
-
168
-
169
-
170
-
171
-
172
-
173
-
174
-
175
-
176
-
177
-
178
-
179
-
180
-
181
-
182
-
183
-
184
-
185
-
186
-
187
-
188
-
189
-
190
-
191
-
192
-
193
-
 194
194 -
 195
195 -
 196
196 -
 197
197 -
 198
198 -
 199
199 -
 200
200 -
 201
201 -
 202
202 -
 203
203 -
 204
204 -
205
-
206
-
207
-
208
-
209
-
210
-
211
-
212
-
213
-
214
-
215
-
216
-
217
-
218
-
219
-
220
-
221
-
222
-
223
-
224
-
225
-
226
-
227
-
228
-
229
-
230
-
231
-
232
-
233
-
234
-
235
-
236
-
237
-
238
-
239
-
240
-
241
-
242
-
243
-
244
-
245
-
246
-
247
-
248
-
249
-
250
-
251
-
252
 |
 |