Kyocera TASKalfa 5551ci Kyocera Command Center RX User Guide Rev-2013.02 - Page 13
Document Box, Custom box, Adding a New Custom Box, Editing a Custom Box, Working with a Custom Box
 |
View all Kyocera TASKalfa 5551ci manuals
Add to My Manuals
Save this manual to your list of manuals |
Page 13 highlights
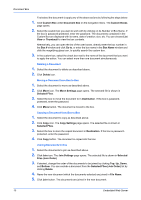
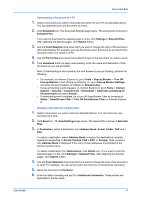
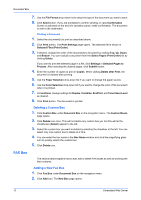
4 Document Box Document Box This page is accessible when you have logged in using a general user or administrator account. It allows you to add or delete a document box, as well as deleting documents in a document box. A general user is not allowed to add or delete a document box. There are several types of document boxes, which vary depending on models: Custom Box, FAX Box, Sub Address Box, Polling Box, and Job Box as described below. Note that FAX Box, Sub Address Box, and Polling Box are available only if the device is equipped with a FAX kit. The users with a general user account can delete the documents which were created and added in their own document boxes. Custom box The section below explains how to add, edit or delete custom boxes as well as working with their contents. Adding a New Custom Box 1. Click Custom Box under Document Box on the navigation menu. The Custom Boxes page opens. 2. Click Add icon. The New Box - Property page will open. 3. Make entries required to define the custom box, such as Number, Name, etc. 4. Click Submit button. Editing a Custom Box 1. Click Custom Box under Document Box on the navigation menu. The Custom Boxes page opens. 2. Select the custom box you want to edit by clicking on its Number or Box Name. The documents contained in the Custom Box are displayed with its name, date of creation, size, etc. You can choose List View or Thumbnail to view the box contents. Alternatively, you can open the list of the user boxes, directly enter the box number in the Box # window and click Go to, or enter the box name in the Box Name window and click the magnifying glass icon, to quickly search the custom box. 3. Click Box Property. The Property page will appear. 4. Make entries required to modify the custom box properties such as Number, Name, etc. 5. Click Submit button. Working with a Custom Box You can delete, move, copy, join, download, E-mail or print documents in the custom box. User Guide 9
-
 1
1 -
2
-
3
-
4
-
5
-
6
-
7
-
 8
8 -
 9
9 -
 10
10 -
 11
11 -
 12
12 -
 13
13 -
 14
14 -
 15
15 -
 16
16 -
 17
17 -
 18
18 -
19
-
20
-
21
-
22
-
23
-
24
-
25
-
26
-
27
-
28
-
29
-
30
-
31
-
32
-
33
-
34
-
35
-
36
-
37
-
38
-
39
-
40
-
41
-
42
-
43
-
44
-
45
-
46
-
47
-
48
-
49
-
50
-
51
-
52
-
53
-
54
-
55
-
56
-
57
-
58
-
59
-
60
-
61
-
62
-
63
-
64
-
65
-
66
-
67
-
68
-
69
-
70
-
71
-
72
-
73
-
74
-
75
-
76
-
77
-
78
-
79
-
80
-
81
-
82
-
83
-
84
-
85
-
86
-
87
-
88
-
89
-
90
-
91
-
92
-
93
-
94
-
95
-
96
 |
 |