Kyocera TASKalfa 820 TASKalfa 620/820 Print Driver Users Guide Rev 8.1 - Page 46
Stapling a Print Job, Punch, Setting Punch Options, Punch Unit Settings
 |
View all Kyocera TASKalfa 820 manuals
Add to My Manuals
Save this manual to your list of manuals |
Page 46 highlights
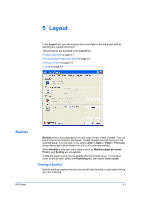
Finishing Punch 6-2 Stapling a Print Job The Staple feature in the Finishing tab enables you to create stapled document sets. You must first select a finisher under Device options in the Device Settings tab. Staple will make Separation and Transparency interleaving unavailable. The maximum number of sheets depends upon the finisher model and the selected Page size or Media type. The Gutter features enables to increase the top and left margins to accommodate the location of the staples. 1 In the Finishing tab, select Staple. 2 In the Staple feature, select Position and Count. Two options are available for count: All sheets to a maximum of 50 and every number of pages so that each number set is stapled separately. 3 Click OK to return to the Print dialog box. 4 Click OK to start printing. The Punch feature places punches along the edge of the printed pages so that the pages can be bound together or placed in a binder. Punch is available when a multi-finisher is selected in Device options in the Device Settings tab. When you select the check box for a finishing device shown in blue in the Device options list, the Punch Unit Settings dialog box appears. If the device listing is already selected, double-click the option to open the Punch Unit Settings dialog box. Punch cannot be used when Booklet is selected in the Layout tab. Setting Punch Options Before using the Punch option in the Finishing tab, you must set punch options in the Device Settings tab. The selected option is available under Punch in the Finishing tab. 1 In the Device Settings tab, under Device options, select Multi finisher. Or if already selected, double-click the blue text. 2 Depending on the punch unit attached, select one option: None No punch option available in the Finishing tab. 2 hole 2 hole option available in the Finishing tab. 2 & 3 hole 2 hole and 3 hole options available in the Finishing tab (inches based). 2 & 4 hole 2 hole and 4 hole options available in the Finishing tab (metric based). 3 Click OK. User Guide
-
 1
1 -
2
-
3
-
4
-
5
-
6
-
7
-
8
-
9
-
10
-
11
-
12
-
13
-
14
-
15
-
16
-
17
-
18
-
19
-
20
-
21
-
22
-
23
-
24
-
25
-
26
-
27
-
28
-
29
-
30
-
31
-
32
-
33
-
34
-
35
-
36
-
37
-
38
-
39
-
40
-
 41
41 -
 42
42 -
 43
43 -
 44
44 -
 45
45 -
 46
46 -
 47
47 -
 48
48 -
 49
49 -
 50
50 -
 51
51 -
52
-
53
-
54
-
55
-
56
-
57
-
58
-
59
-
60
-
61
-
62
-
63
-
64
-
65
-
66
-
67
-
68
-
69
-
70
-
71
-
72
-
73
-
74
-
75
-
76
-
77
-
78
-
79
-
80
-
81
-
82
-
83
-
84
-
85
-
86
-
87
-
88
-
89
-
90
-
91
-
92
-
93
-
94
-
95
 |
 |
