LG 55UH6030 Owners Manual - Page 10
Acaution Bnote
 |
View all LG 55UH6030 manuals
Add to My Manuals
Save this manual to your list of manuals |
Page 10 highlights
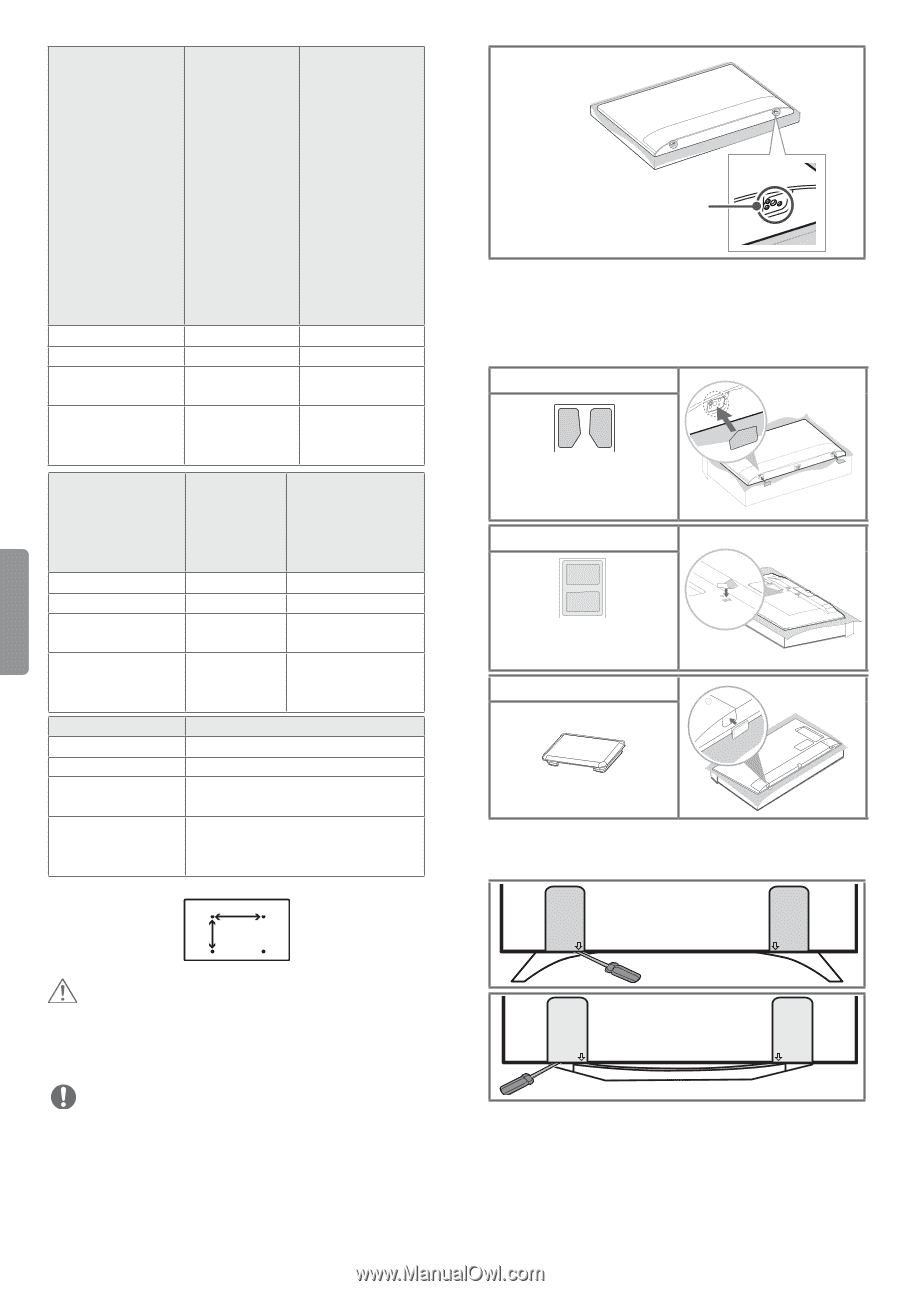
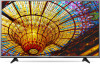
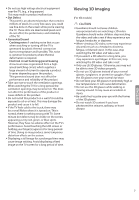
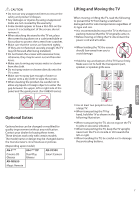
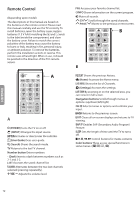
ENGLISH Model VESA (A x B) Standard screw Number of screws Wall mount bracket (optional) Model VESA (A x B) Standard screw Number of screws Wall mount bracket (optional) Model VESA (A x B) Standard screw Number of screws Wall mount bracket (optional) 50UH6300 58UH6300 49UH610A 60/65UH615A 55UH615A 60/65UH6150 49UH6100 60/65UH6550 49UH6090 60/65UH7500 55UH6090 60/65UH7700 55UH6150 60/65UH8500 49UH6500 60/65UH7650 55UH6550 60UH6090 49/55UH7500 60/65UH6030 49/55UH7700 60UH6035 55UH8500 55UH7650 49/55UH6030 300 x 300 300 x 300 M6 M6 4 4 LSW350B MSW240 LSW350B 43UH6100 43UH6500 43UH7500 43UH610A 43UH6030 200 x 200 M6 4 75UH6550 75UH8500 86UH9500 70UH6350 70UH6330 600 x 400 M8 4 LSW240B MSW240 65UH9500 300 x 200 M6 4 LSW640B OTW420B A B CAUTION ••Remove the stand before installing the TV on a wall mount by performing the stand attachment in reverse. NOTE ••When using the wall mount, it is recommended that you apply a piece of tape over the 2 Pole Stand holes to prevent dust and bugs from entering the holes. (Depending upon model) 10 2 Pole Stand Hole ••When using the wall mounting bracket, apply the adhesive protective label or protective cover to cover the unused stand openings. This will prevent the accumulation of dust and dirt. (Use only when provided with your particular model.) Provided Item Adhesive Protective Label Provided Item Adhesive Protective Label Provided Item Protective Cover ••Depending upon the shape of the stand, use a flat tool to remove the stand cover as illustrated below. (e.g., a flat screwdriver)
-
 1
1 -
2
-
3
-
4
-
 5
5 -
 6
6 -
 7
7 -
 8
8 -
 9
9 -
 10
10 -
 11
11 -
 12
12 -
 13
13 -
 14
14 -
 15
15 -
16
-
17
-
18
-
19
-
20
-
21
-
22
-
23
-
24
-
25
-
26
-
27
-
28
-
29
-
30
-
31
-
32
-
33
-
34
-
35
-
36
-
37
-
38
-
39
-
40
-
41
-
42
-
43
-
44
-
45
-
46
-
47
-
48
 |
 |