LG DLEC888W Owners Manual
LG DLEC888W Manual
 |
View all LG DLEC888W manuals
Add to My Manuals
Save this manual to your list of manuals |
LG DLEC888W manual content summary:
- LG DLEC888W | Owners Manual - Page 1
OWNER'S MANUAL DRYER Please read this manual carefully before operating your dryer and retain it for future reference. DLEC888W MFL67653090 - LG DLEC888W | Owners Manual - Page 2
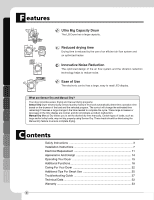
the Manual Dry feature to ensure complete drying. C ontents F Safety Instructions 3 Installation Instructions 7 Electrical Requirement 11 Appearance And Design 14 Operating Your Dryer 15 Additional Functions 18 Caring For Your Dryer 22 Additional Tips For Smart Use 25 Troubleshooting Guide - LG DLEC888W | Owners Manual - Page 3
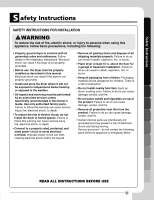
safety messages in this manual and on your appliance. Installation and service must be performed by a qualified installer, service agency, or the gas supplier. • Install the clothes dryer according to the manufacturer's instructions and local codes. • Save these instructions. • Certain internal parts - LG DLEC888W | Owners Manual - Page 4
or explode. • Do not reach into the dryer if the drum or any other part is moving. • Do not repair or replace any part of the dryer or attempt any servicing unless specifically recommended in this Use and Care Guide or in published user-repair instructions that you understand and have the skills to - LG DLEC888W | Owners Manual - Page 5
grounded. • Install and store the dryer where it will not be exposed to temperatures below freezing or exposed to the weather. • All repairs and servicing must be performed by an authorized servicer unless specifically recommended in this Owner's Guide. Use only authorized factory parts. Failure to - LG DLEC888W | Owners Manual - Page 6
be plugged into a properly grounded outlet. • For personal safety, this dryer must be properly grounded. Failure to do so can result in electrical shock or injury. • Refer to the installation instructions in this manual for specific electrical requirements for your model. Failure to follow these - LG DLEC888W | Owners Manual - Page 7
it is important that you review this entire manual before proceeding with any installation or use. More detailed instructions concerning electrical connections, gas connections, and exhaust requirements are provided in other parts of this manual. Positioning the Dryer. Choose a location with a solid - LG DLEC888W | Owners Manual - Page 8
you thoroughly review that section, and the remainder of this manual, before taking any steps to install or use this dryer. 1. Use only a new U.L. listed No. 10 (copper wire only) conductor power supply cord kit rated 240 Volts (minimum) 30 Amperes and labeled as suitable for use in a clothes dryer - LG DLEC888W | Owners Manual - Page 9
Installation Instructions I nstallation Instructions Stacking Kit In order to stack this dryer an LG stacking kit is required. Dryer Washer F WARNING • Incorrect installation can cause serious accidents. • The weight of the dryer and the height of installation makes the stacking procedure too - LG DLEC888W | Owners Manual - Page 10
sure it is not subjected to splashing water or freezing temperatures. Do not store flammable materials near the dryer. Installation Instructions Adjustable feet Raise Lower 2. If the dryer is not properly level, adjust the front leveling legs up and down as necessary. Turn the legs clockwise - LG DLEC888W | Owners Manual - Page 11
115-, OR 120-VOLT CIRCUIT. Heating elements are available for field installation in dryers which are to be connected to an electrical service of a different voltage than that listed on the rating plate. Failure to follow these instructions can result in fire, explosion, or death. • If branch circuit - LG DLEC888W | Owners Manual - Page 12
your local codes or ordinances do not allow the use of a 3 wire connection, or you are installing your dryer in a mobile home, you must use a 4wire connection. 3-wire receptacle (NEMA type10-30R) Use the instructions in this section if your home has a 3-wire receptacle (NEMA type 10-30R) and you - LG DLEC888W | Owners Manual - Page 13
codes or ordinances do not allow the connection of a frame-grounding conductor to the neutral wire, use the instructions under this section. Electrical Requirement For Electric Dryers 1. Connect neutral wire (white) of power cord to center terminal block screw. 2. Connect ground wire of appliance - LG DLEC888W | Owners Manual - Page 14
A ppearance And Design Water Container F Control Panel Door Condenser Cover Air Ventilation Grill Control Panel Cycle Selector Knob LED Display • Time Display • Indicator Lamps Appearance And Design Power 14 Start/Pause Additional Function Buttons • - LG DLEC888W | Owners Manual - Page 15
are heat-sensitive like synthetic fabrics - Medium Wool Wool For wool fabrics - Ultra Low MANUAL DRY CYCLES Gentle Air Silk, wool, delicate lingerie Refreshes clothes without tumble drying (It can use the dryer rack.) - Ultra Low Cool Air All fabrics that need to be fluffed without heat - LG DLEC888W | Owners Manual - Page 16
installation instructions and use a level to ensure proper installation. 3. Check the water reservoir, condenser, door, gasket and drum for signs of damage. 4. Run the dryer water container and condenser are also empty and clean. 4. Place laundry into the drum after sorting. The clothes should be - LG DLEC888W | Owners Manual - Page 17
The lint filter should be cleaned after each load. 10. Turn off the Dryer. Press the Power button. CAUTION • Be careful the filter is not torn with a brush to remove. • If you want to open the door while dryer is operating, please press the Start/Pause button first, wait until drum completely stops - LG DLEC888W | Owners Manual - Page 18
1. Press and release the Custom PGM button. The stored settings will be displayed. 2. Press and release the Cycle Selector Knob to start the cycle. The dryer will start automatically. Note You can only save one Custom PGM program at a time. If you press and hold the Custom PGM button for 3 seconds - LG DLEC888W | Owners Manual - Page 19
MANUAL DRY cycles are selected. These buttons are disabled once the cycle is started. F Temp. Adjusts the temperature setting from Ultra Low causes the control to beep once the clothes have reached a "Damp Dry Signal" level settings from being changed while the dryer is operating. Press and hold the - LG DLEC888W | Owners Manual - Page 20
with your appliance right from your own smart phone. •To use the Tag On function: 1. Download the LG Smart Laundry & DW App to your smart phone. 2. Turn on the NFC (Near Field Communication) version, the NFC activation process may differ. • Refer to the manual of your smart phone for details. 20 - LG DLEC888W | Owners Manual - Page 21
when using the Tag On function with the LG SmartDiagnosis™ and Cycle Download features of the LG Smart Laundry & DW App. • When you use the Tag On function, position your smart phone so that the NFC antenna on the back of your smart phone matches the position of the Tag On icon on - LG DLEC888W | Owners Manual - Page 22
signs of clogging, follow the cleaning instructions below. 4. Snap the filter closed and replace it in the dryer. - Push the filter all the Dry thoroughly and replace. Empty water container If your dryer is not connected to a household drain, then the water reservoir will capture the water from - LG DLEC888W | Owners Manual - Page 23
Your Dryer F Condenser The condenser is a very important part of your dryer. This is where the moisture is removed form the air so there is no need for an outside exhaust. If the condenser is not properly maintained, it will greatly increase energy consumption and drying time. The condenser should - LG DLEC888W | Owners Manual - Page 24
the external drain hose included with the dryer. Route this hose to a permanent drain and secure the hose so it can not come loose. Note The warm air is exhausted through the ventilation grill. Moisture Sensor This sensor is used by the control to sense the moisture remaining in the clothes. If - LG DLEC888W | Owners Manual - Page 25
the dryer could be picked up by your clothes the next time you use the dryer and irriate your skin. Low heating No heat / air Fabric Care Labels Sort and dry laundry according to care labels, size, and fabric type. Do not overload the dryer. This will save energy and time and give the best drying - LG DLEC888W | Owners Manual - Page 26
covered by warranty are provided free of charge. If coverage is expired, spare parts must be purchased from an authorized service center. Your dryer comes with accessories such as 1. Condensing drain hose Disposal of the dryer To prevent possible injury to children, if you dispose of this - LG DLEC888W | Owners Manual - Page 27
T roubleshooting Guide Troubleshooting Tips F Save time and money! Review the charts on the following pages first and you may not need to call for service. 1. Problem: My dryer won't start Question Is the dryer plugged in? What to Do Confirm that the dryer's plug is securely and completely - LG DLEC888W | Owners Manual - Page 28
roubleshooting Guide 4. Problem: There is lint on my clothes F Question Is your lint filter full? What to Do Please refer to the manual your clothes have excess static electricity? See comments below under item 5, There is static in my clothes after drying. Did you overload your dryer? Divide - LG DLEC888W | Owners Manual - Page 29
Do Are you following the care instructions To avoid shrinkage, carefully follow the care and use instructions for your garment, for your garment? because some fabrics will naturally shrink when washed. Other fabrics can be washed but will shrink when dried in a dryer. Troubleshooting Guide 29 - LG DLEC888W | Owners Manual - Page 30
• LED displays if the door is open. Make sure the door is closed and press the Start/Pause button to operate the dryer. • If display errors continue to occur, unplug the power cord and then call the Service Center. Drum light does not work • Contact customer service Troubleshooting Guide 30 - LG DLEC888W | Owners Manual - Page 31
is turned on by pressing the Power button. If your dryer is unable to turn on, then troubleshooting must be done without using Smart Diagnosis™ Troubleshooting Guide Using Smart Diagnosis™ Smart Diagnosis™ Using Your Smart Phone 1. Download the LG Smart Laundry & DW application on your smart phone - LG DLEC888W | Owners Manual - Page 32
1/2" (850 mm) 25 1/4" (640 mm) 23 5/8" (600 mm) Type : Electric Dryer Rating : Please refer to the rating label regarding detailed information. Size : 23 5/8 x (387 cm2) Ensure air flow of 112 cu.ft./min through dryer Closet door must have 2(louvered) openings, each having a minimum area - LG DLEC888W | Owners Manual - Page 33
and you may also have other rights that vary from state to state. THIS LIMITED WARRANTY DOES NOT COVER: • Service trips to deliver, pick up, or install or repair the product; instruction to the customer on operation of the product; repair or replacement of fuses or correction of wiring or plumbing - LG DLEC888W | Owners Manual - Page 34
inaccessible location or is not installed in accordance with published installation instructions, including LG's owner's and installation manuals. • Damage resulting from misuse, abuse, improper installation, repair, or maintenance. Improper repair includes use of parts not approved or specified by - LG DLEC888W | Owners Manual - Page 35
lugar inaccesible o no está instalado de acuerdo con las instrucciones de instalación publicadas, lo que incluye los manuales de instalación y del propietario de LG. • Daños resultantes de mal uso, abuso, instalación, reparación o mantenimiento incorrectos. Una reparación incorrecta incluye el uso - LG DLEC888W | Owners Manual - Page 36
normal, durante el período de garantía que se establece a continuación, LG tendrá la opción de reparar o reemplazar el producto. Esta garantía una atmósfera corrosiva o contraria a las instrucciones esbozadas en el manual del propietario del producto. • Daños al producto causados por accidentes - LG DLEC888W | Owners Manual - Page 37
2 aberturas (de tipo persiana), cada una de ellas con un área mínima de 60 pulgadas cuadradas (387 cm2), situadas a 3 pulgadas (8 cm) de la parte inferior y superior de la puerta. 60 in.2* (387 cm2) 60 in.2* (387 cm2) 1" (2.5 cm) 23.6" 1" (60.0 cm) (2.5 cm) 0" (0 cm) 39" (99.1 cm) 1" 23 - LG DLEC888W | Owners Manual - Page 38
lo que podría producir que Smart Diagnosis™ funcione mal. Smart Diagnosis™ a través del centro de atención 1. Llame al centro de atención de LG al: (LG EE. UU.) 1-800-243-0000 (LG Canadá) 1-888-542-2623. 2. Cuando el agente del centro de atención se lo indique, sostenga el micrófono de su teléfono - LG DLEC888W | Owners Manual - Page 39
G uía para la solución de problemas Modo de error F • La pantalla LED mostrará el símbolo si la puerta está abierta. Debe cerrar la puerta y pulsar el botón Start/Pause (Inicio) para volver a iniciar la operación. • Si continúa experimentando errores en pantalla, desenchufe el cable de - LG DLEC888W | Owners Manual - Page 40
G uía para la solución de problemas F 29 Guía para la solución de problemas - LG DLEC888W | Owners Manual - Page 41
G uía para la solución de problemas F 28 Guía para la solución de problemas - LG DLEC888W | Owners Manual - Page 42
G uía para la solución de problemas Consejos para la solución de problemas F Ahorre tiempo y dinero! Primero revise las tablas en las siguientes páginas quizás no necesite llamar a servicio. Guía para la solución de problemas 27 - LG DLEC888W | Owners Manual - Page 43
ón del problema. 4. El número de modelo y número de serie de la secadora. 5. La fecha de compra. 2. Soporte de la manguera 3. Cesto de la secadora (2EA) Kit de superposición Rejilla de secado (se vende por separado) Consejos adicionales para un uso inteligente 26 - LG DLEC888W | Owners Manual - Page 44
, baberos y fundas de silla b) Cortinas y manteles c) Alfombras de baño Fibra de vidrio No seque artículos de fibra de vidrio en la secadora. Las partículas de vidrio que quedan en la secadora podrían quedar adheridas a su ropa la siguiente vez que utilice la secadora e irritar la piel. Etiquetas - LG DLEC888W | Owners Manual - Page 45
la tubería de drenaje para no tener que utilizar el depósito. 1. Deslice la conexión del desagüe por la abertura que se encuentra en la parte posterior derecha de la secadora, observando la secadora desde atrás. 2. Desconecte la manguera que va hasta el depósito. Sensor de humedad La unidad de - LG DLEC888W | Owners Manual - Page 46
3 o 4 veces al año o siempre que parpadee la luz Clean Condenser (Limpiar condensador ). 1. Presione la pestaña y abra la tapa del para desbloquearla. A continuación, extraiga la placa de la abertura. Parte delantera Lateral Cubierta protectora 3. Deslice el condensador con cuidado para extraerlo - LG DLEC888W | Owners Manual - Page 47
, aunque bajo ningún concepto deberá seguir usando la secadora durante más de una hora. 1. Tire del asa de la parte frontal del cajón para extraer el depósito. 2. Tire del asa de la parte frontal del cajón para extraer el depósito. 5. Cierre la puerta. Limpie el filtro de pelusa con agua templada - LG DLEC888W | Owners Manual - Page 48
la aplicación LG Smart Laundry & DW. • Cuando utilice la función Tag On, coloque el smartphone de forma que la antena NFC de la parte trasera del smartphone correctamente. • Pulse en la aplicación LG Smart Laundry & DW para acceder a un manual más detallado sobre cómo usar la función Tag - LG DLEC888W | Owners Manual - Page 49
aparato directamente desde su propio smartphone. • Para usar la función Tag On: 1. Descargue la aplicación LG Smart Laundry & DW en su smartphone. 2. Active la función NFC (Comunicación de campo cercano) y la versión del SO. • Para obtener más información, consulte el manual de su smartphone. 20 - LG DLEC888W | Owners Manual - Page 50
botón Temp. repetidas veces para deslizarse por los ajustes disponibles. OPCIÓNS (Options) Nota Estos botones están solamente disponibles con las opciones SECADO MANUAL, antes de pulsar el botón Inicio/Pausa. LUZ DEL TAMBOR (Drum Light) Presione el botón Drum Light (Luz del tambor) para encender la - LG DLEC888W | Owners Manual - Page 51
hasta que retiren de la máquina. Nota Si se abre la puerta durante la parte de secado de un ciclo antes de que se haya iniciado la función WRINKLE CARE y se iniciará la función WRINKLE CARE una vez que termine la parte de secado normal del ciclo. 18 PROGRAMA PERSONALIZADO (Custom PGM) Si tiene - LG DLEC888W | Owners Manual - Page 52
Funcionamiento de la secadora F uncionamiento de la secadora 5. Cierre la puerta. Antes de cerrar la puerta, es necesario asegurarse de que las prendas estén bien colocadas y que no haya objetos extraños, especialmente inflamables, atrapados alrededor de la puerta. 6. Seleccione el ciclo de secado - LG DLEC888W | Owners Manual - Page 53
Funcionamiento de la secadora F uncionamiento de la secadora Antes de utilizar la secadora por primera vez F 1. Al desembalar la secadora, asegúrese de que ésta no presenta daños visibles 2. Siga las instrucciones de montaje y utilice un nivel para garantizar que la instalación se realiza de - LG DLEC888W | Owners Manual - Page 54
acrílicos temperatura caliente durante - - - Regulable PRECAUCIÓN Si la carga es inferior a 2.2lbs (1kg), use la opción ciclo de calor en ciclo de secado manual Las prendas de lana deben secarse en el Wool program (Programa de lana) y los tejidos sensibles al calor, como la seda, ropa interior - LG DLEC888W | Owners Manual - Page 55
A specto y diseño Contenedor de agua Puerta F Panel de control Cubierta del condensador Rejilla de ventilación Panel de control Selector de ciclo Pantalla LED • Indicador de tiempo • Luces indicadoras Aspecto y diseño Encendido 14 Inicio/Pausa Botones de funciones adicionales • More Time • - LG DLEC888W | Owners Manual - Page 56
R equerimientos eléctricos Conexión de 3-alambres con un cable de Alimentación. F Conexión Opcional de 3alambres. Si los códigos y ordenanzas locales permiten la conexión de un conductor estructura-tierra al alambre neutral, utilice estas instrucciones. Si los códigos y ordenanzas locales no - LG DLEC888W | Owners Manual - Page 57
Requerimientos eléctricos para secadora elécrtica R equerimientos eléctricos F Revise las siguientes opciones para determinar la conexión eléctrica adecuada para su casa: Tomacorriente de 4-alambres (Tipo NEMA 14-30R). Utilice las instrucciones en esta sección si su casa tiene un tomacorriente de - LG DLEC888W | Owners Manual - Page 58
ón en una vivienda móvil o prefabricada debe realizarse de conformidad con los Estándares de seguridad y construcción de viviendas prefabricadas, Título 24 CFR, Parte 32-80 o estándar CAN/CSA Z240 MH y con los códigos y regulaciones locales. • Se requiere una conexión de 4 hilos en todas las - LG DLEC888W | Owners Manual - Page 59
I nstrucciones de instalación F Nivele la secadora 1. Se debe nivelar la secadora para evitar ruidos y vibraciones no deseables. Coloque la secadora en un suelo firme y nivelado. Asegúrese de que en el lugar donde se coloque no se produzcan salpicaduras de agua ni descensos bruscos de temperatura. - LG DLEC888W | Owners Manual - Page 60
de la lavadora LG. 2. Quite los dos tornillos de la parte inferior de la tapa trasera de cada lado como se ilustra a continuación. • Apriete los 2 tornillos retirados previamente de la secadora para el kit de apilado. • Utilice los 4 tornillos de la caja accesorios de [0,6 pulgada (16mm)] para - LG DLEC888W | Owners Manual - Page 61
de detergente y agua, con un paño húmedo para remover de la parte interior del tambor de la secadora /compartimiento de secado cualquier polvo o sucio que la secadora y después de haber completado todos los pasos en este manual para una instalación correcta de esta secadora, encienda la secadora en - LG DLEC888W | Owners Manual - Page 62
. Instrucciones detalladas adicionales concernientes a las conexiones eléctricas, conexiones del gas, y los requerimientos sobre el escape son suministrados en otras partes de este manual. Colocación de la Secadora Elija un lugar de suelo sólido en el que se pueda ubicar su secadora. Colóquela al - LG DLEC888W | Owners Manual - Page 63
eléctricas o heridas. • Consulte las instrucciones de instalación de este manual para obtener los requisitos eléctricos específicos de su modelo. Si El cable de corriente se puede cortar debido a cualquier movimiento de su parte central, resultando en una descarga eléctrica. • Repare o reemplace de - LG DLEC888W | Owners Manual - Page 64
que se den otras recomendaciones específicas en el Manual del Usuario. Utilice sólo piezas de fábrica autorizadas. Si no se cumple con esta advertencia se podrán producir heridas graves, incendios, descargas eléctricas o muerte. • Instale y almacene la secadora en un lugar no expuesto a temperaturas - LG DLEC888W | Owners Manual - Page 65
secadora debe estar correctamente instalada como se describe en este manual. • No coloque artículos que hayan sido expuestos parte interior de la secadora y el conducto de ventilación se deberán limpiar periódicamente, y la misma deberá ser realizada por personal calificado del servicio. • No instale - LG DLEC888W | Owners Manual - Page 66
Su Seguridad y la de los dem son de suma importancia. En este manual y en su electrodoméstico figuran muchos mensajes importantes de seguridad. Lea y la toma de corriente, contrate a un electricista calificado para que instale una toma de corriente en forma adecuada. Este electrodoméstico debe - LG DLEC888W | Owners Manual - Page 67
aracterísticas F Tambor de capacidad ultragrande LG Secadora tiene una capacidad. Tiempo de secado . Qué significa secado por sensor o secado por tiempo? Su secadora proporciona programas de secado manual y mediante sensor. Secado con sensor La secadora mide de forma electrónica el nivel de humedad - LG DLEC888W | Owners Manual - Page 68
MANUAL DE PROPIETARIO SECADORA Lea este manual con cuidado antes de utilizar la secadora y guárdelo para futuras consultas. DLEC888W DLEC888R
-
 1
1 -
 2
2 -
 3
3 -
 4
4 -
 5
5 -
 6
6 -
 7
7 -
8
-
9
-
10
-
11
-
12
-
13
-
14
-
15
-
16
-
17
-
18
-
19
-
20
-
21
-
22
-
23
-
24
-
25
-
26
-
27
-
28
-
29
-
30
-
31
-
32
-
33
-
34
-
35
-
36
-
37
-
38
-
39
-
40
-
41
-
42
-
43
-
44
-
45
-
46
-
47
-
48
-
49
-
50
-
51
-
52
-
53
-
54
-
55
-
56
-
57
-
58
-
59
-
60
-
61
-
62
-
63
-
64
-
65
-
66
-
67
-
68
 |
 |
DRYER
OWNER’S MANUAL
Please read this manual carefully before operating
your dryer and retain it for future reference.
DLEC888W
MFL67653090