LG LBC20514SW Owner's Manual - Page 14
REFRIGERATOR DOORS: HOW TO REMOVE AND REVERSE Optional For Swing models
 |
View all LG LBC20514SW manuals
Add to My Manuals
Save this manual to your list of manuals |
Page 14 highlights
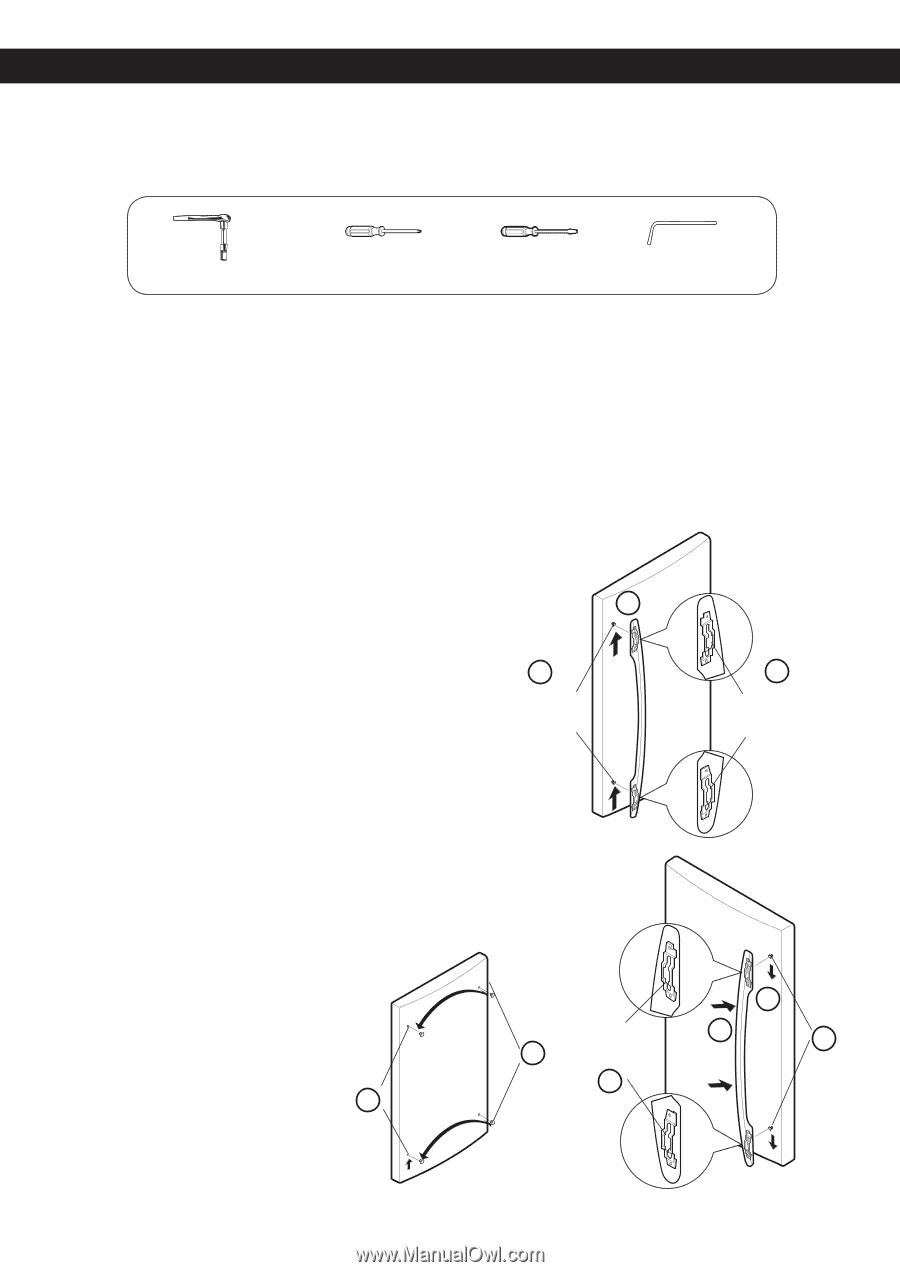
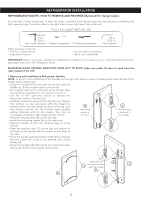
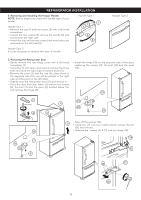
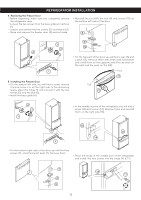
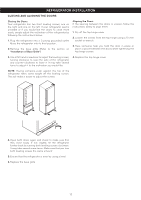
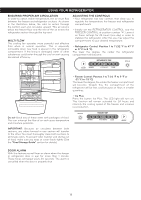
REFRIGERATOR INSTALLATION REFRIGERATOR DOORS: HOW TO REMOVE AND REVERSE (Optional) For Swing models You may find it more convenient to have the doors converted from the left-opening type (factory installed) to the right-opening type. Directions refer to the right side as your right when facing the unit. TOOLS YOU MIGHT NEED OR USE 10 mm 1/4 in 3/8 in Hex Socket Wrench Phillips Screwdriver Flat Head Screwdriver 1/4 in 3/32 in Allen Wrench Other necessary tools are: • 1/4 inch socket wrench. • Adjustable Wrench. • 10 mm open-end wrench. • Flat 2 inch putty knife. IMPORTANT: Before you begin, unplug the refrigerator or disconnect the power source. Remove all food and any adjustable racks from the refrigerator doors. REVERSING DOOR OPENING DIRECTION FROM LEFT TO RIGHT (when you prefer the door to open from the right instead of the left) 1. Removing and Installing the Refrigerator Handles NOTE: To assist in the installation of the handles on the right side, place a piece of masking tape near the top of the handle before removing it. • Grasp the handle firmly with both hands and slide the handle up (1) (this might require some force). • The keyhole slots (2) on the back of the handle allow the handle to separate from the screws in the door. • Use the 10 mm open-end wrench to remove the 1 mounting screws in the door (3). • Carefully loosen the plug buttons (4) with your fingers. The buttons can be unscrewed with the fingers by rotating them counter-clockwise and continuing until 3 2 they loosen and fall out The buttons were installed Mounting Keyhole slots without pressure, and for this reason, they can be screws in in the back of unscrewed using your index finger, thumb or both. the door the handle • Install the plug buttons (5) on the left side. • Install the mounting screws (6) on the right side. • Hold the handle so that the masking tape is at the bottom. • Align the keyhole slots (7) on the top and bottom of the back of the handle with the screws on the front of the door. • Press the handle against the front of the door, ensuring that the screws are inside of the keyhole slots of the handle (8). • Grasp the handle with both hands and slide the handle downward (9) (this may require some force). 9 Alignment of 8 4 the keyhole slots with the screws 6 7 5 13
-
 1
1 -
2
-
3
-
4
-
5
-
6
-
7
-
8
-
 9
9 -
 10
10 -
 11
11 -
 12
12 -
 13
13 -
 14
14 -
 15
15 -
 16
16 -
 17
17 -
 18
18 -
 19
19 -
20
-
21
-
22
-
23
-
24
-
25
-
26
-
27
-
28
-
29
-
30
-
31
-
32
-
33
-
34
-
35
 |
 |