LG LBC22520ST Owner's Manual - Page 15
Removing and Installing the Freezer Handle, Removing the Refrigerator Door - refrigerator model
 |
View all LG LBC22520ST manuals
Add to My Manuals
Save this manual to your list of manuals |
Page 15 highlights
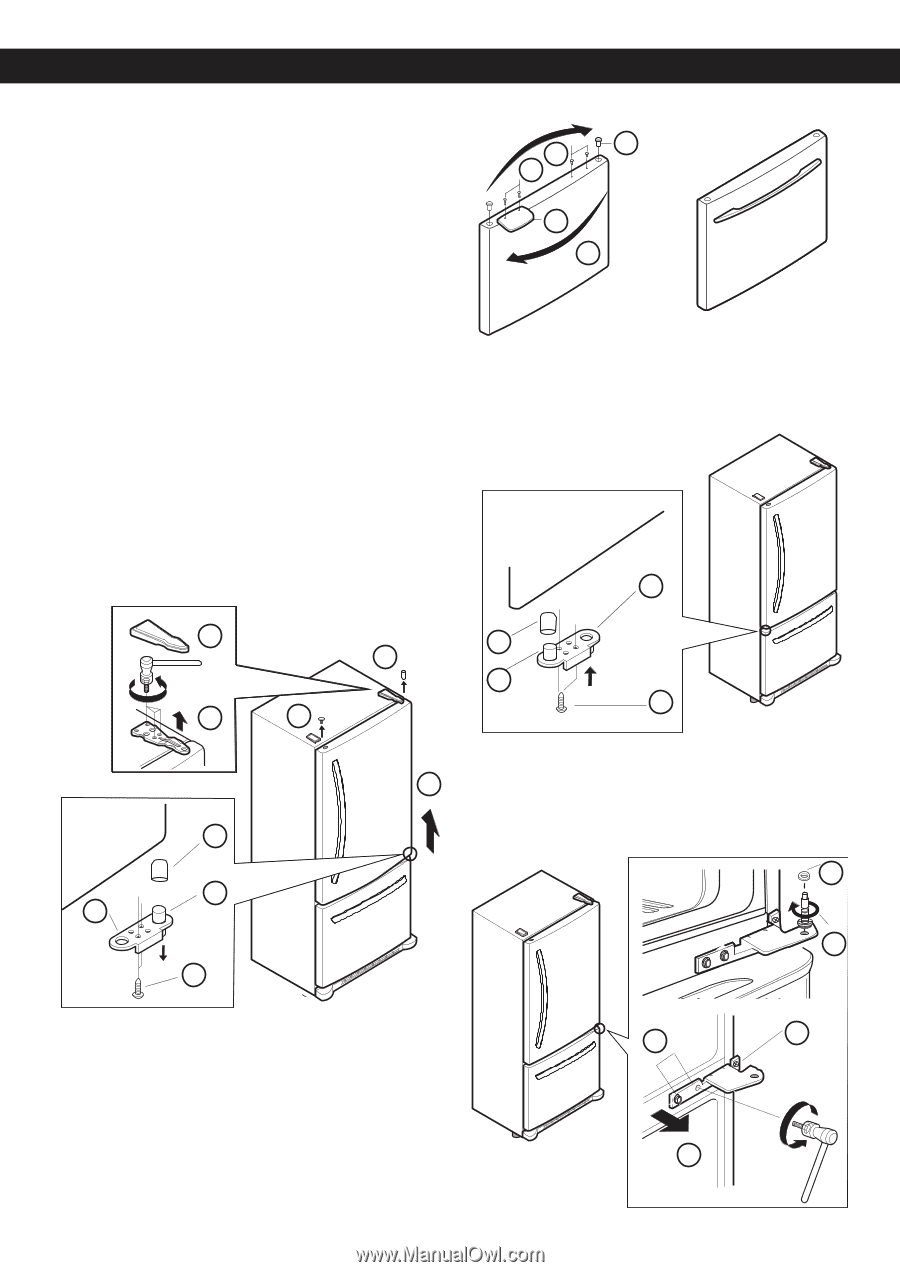
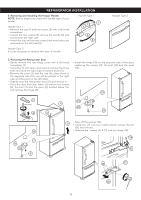
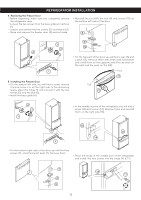
REFRIGERATOR INSTALLATION 2. Removing and Installing the Freezer Handle NOTE: Before beginning, check the handle type of your model. Handle Type 1 • Remove the cap (1) and two screws (2) with a flat head screwdriver. • Loosen the two screws (3), remove the handle (4) and install all on the right side. • Attach the cap and the two screws (that were previously removed) on the left side (5). Handle Type 1 2 1 3 4 5 Handle Type 2 It is not necessary to remove this type of handle. Handle Type 2 3. Removing the Refrigerator Door • Gently remove the top hinge cover with a flat head screwdriver (1). • Using the 10 mm open-end wrench, remove the three bolts and raise the top hinge and place aside (2). • Remove the pivot (3) and the cap (4), place them in the opposite side (the cap will be placed in the right side and the pivot on the left side). • Slightly raise the refrigerator door (5) and remove it. • Once the door has been taken off, remove the screws (6), the bolt (7) and the pivot (8) located below this and remove the hinge (9). • Install the hinge (10) on the opposite side of the door, replacing the screws (11), the bolt (12) and the pivot (13). 10 1 13 4 12 11 2 3 8 7 9 6 5 • Take off the washer (14). • Using the 1/4 inch hex socket wrench loosen the pin (15) and remove. • Remove the screws (16 & 17) and the hinge (18). 14 15 16 17 18 14
-
 1
1 -
2
-
3
-
4
-
5
-
6
-
7
-
8
-
9
-
 10
10 -
 11
11 -
 12
12 -
 13
13 -
 14
14 -
 15
15 -
 16
16 -
 17
17 -
 18
18 -
 19
19 -
 20
20 -
21
-
22
-
23
-
24
-
25
-
26
-
27
-
28
-
29
-
30
-
31
-
32
-
33
-
34
-
35
 |
 |