LG LFX28978ST Owner's Manual - Page 19
Leveling The Refrigerator Doors
 |
View all LG LFX28978ST manuals
Add to My Manuals
Save this manual to your list of manuals |
Page 19 highlights
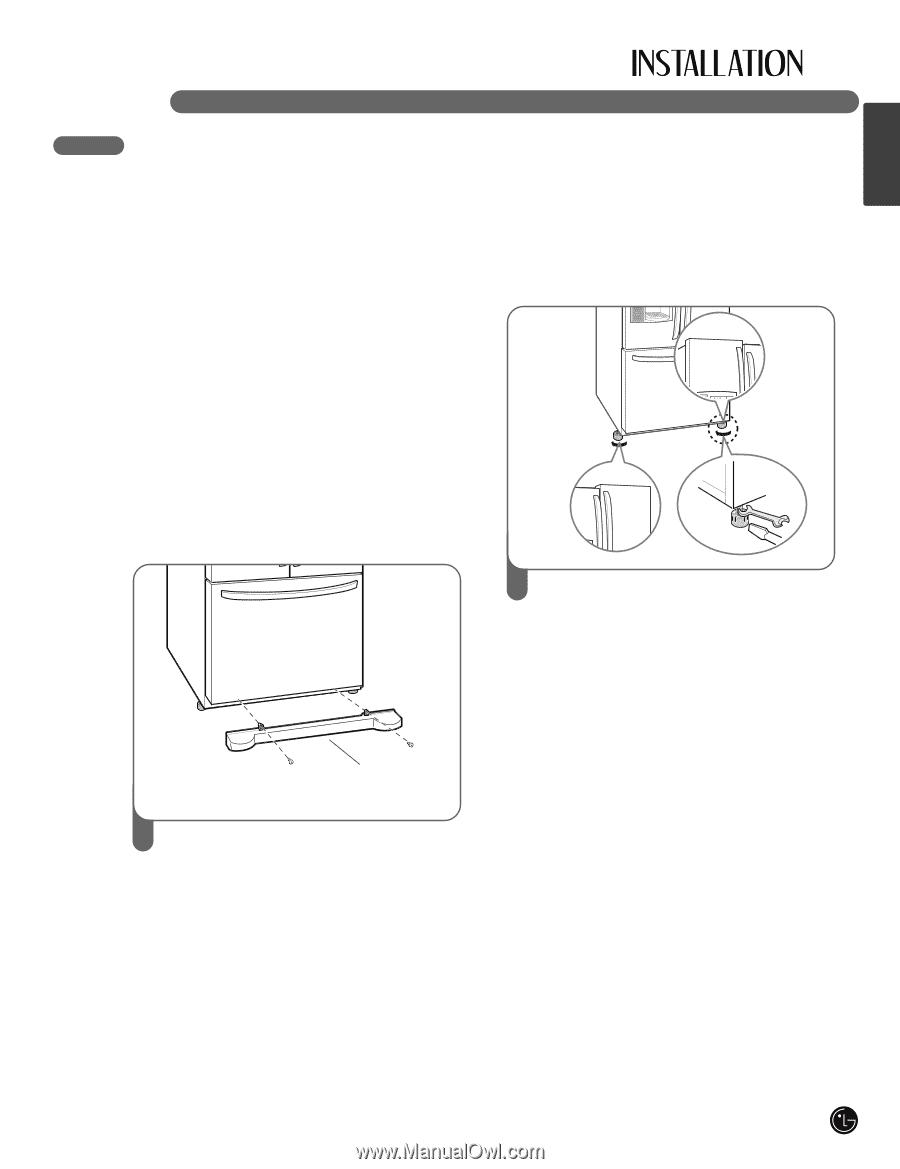
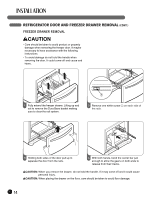
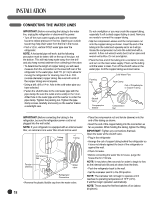
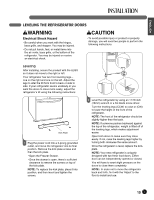
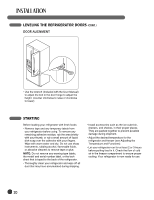
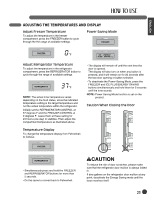
ENGLISH LEVELING THE REFRIGERATOR DOORS wWARNING Electrical Shock Hazard • Be careful when you work with the hinges, base grille, and stopper. You may be injured. • Do not put hands, feet, or metal items into the air vents, base grille, or the bottom of the refrigerator. You may be injured or receive an electrical shock. wCAUTION • To avoid possible injury or product or property damage, you will need two people to perform the following instructions. Leveling After installing, secure the product with the LEGS so it does not move to the right or left. Your refrigerator has two front leveling legs- one on the right and one on the left. Adjust the legs to alter the tilt from front to back or side to side. If your refrigerator seems unsteady or you want the doors to close more easily, adjust the refrigerator's tilt using the following instructions: Kick Plate 1 Plug the power cord into a 3-prong grounded outlet, and move the refrigerator into its final position. Remove the kick plate screws and then the kick plate. • Open the Freezer Drawer. • Once the drawer is open, there is sufficient clearance to remove the screws on top of the kick plate. NOTE: To replace the kick plate, place it into position, and then insert and tighten the screws. 2 Level the refrigerator by using an 11/16 inch (18mm) wrench or a flat blade screw driver. Turn the leveling legs (CCW) to raise or (CW) to lower the height of the front of the refrigerator. NOTE: The front of the refrigerator should be slightly higher than the back. NOTE: If someone pushes backward against the top of the refrigerator, weight is lifted off of the leveling legs, which makes adjustment easier. Open both doors to make sure they close easily. If not, raise the leveling legs higher by turning both clockwise the same amount. Once the refrigerator is level, replace the kickplate. NOTE: Your new refrigerator is uniquely designed with two fresh food doors. Either door can be independently opened or closed. You will have to exert slight pressure on the doors to close them completely. NOTE: In order not to move the refrigerator back and forth, fix it with the 'Adjust' to the floor to install and use. 19
-
 1
1 -
2
-
3
-
4
-
5
-
6
-
7
-
8
-
9
-
10
-
11
-
12
-
13
-
 14
14 -
 15
15 -
 16
16 -
 17
17 -
 18
18 -
 19
19 -
 20
20 -
 21
21 -
 22
22 -
 23
23 -
 24
24 -
25
-
26
-
27
-
28
-
29
-
30
-
31
-
32
-
33
-
34
-
35
-
36
-
37
-
38
-
39
-
40
-
41
-
42
-
43
-
44
-
45
-
46
-
47
-
48
-
49
-
50
 |
 |