LG LRE30755SW Owner's Manual (English) - Page 24
Setting The Proof Feature, Setting Oven Lockout, Feature, Changing Hour Mode On, Clock 12hr, 24 Hr,
 |
View all LG LRE30755SW manuals
Add to My Manuals
Save this manual to your list of manuals |
Page 24 highlights
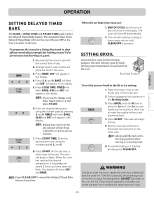
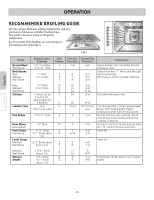
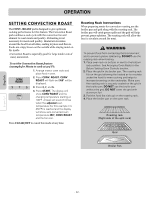
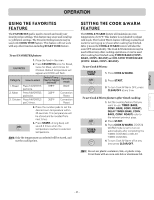
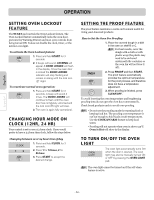
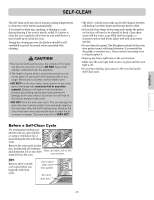
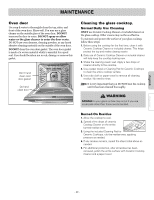
English OPERATION SETTING OVEN LOCKOUT FEATURE The START pad controls the Oven Lockout feature. The Oven Lockout feature automatically locks the oven door, prevents the Warming Drawer and most oven controls from being turned ON. It does not disable the clock, timer, or the interior oven light. To activate the Oven Lockout feature: 1. Press and hold START for 3 seconds. 2. 2 beeps will sound, LOCKING will appear & DOOR LOCKED will flash in the display. Once the oven door is locked the DOOR LOCKED indicator will stop flashing and remain on along with the lock icon ( ) light. To reactivate normal oven operation: 1. Press and hold START for 3 seconds. A beep will sound 2 times. The DOOR LOCKED will continue to flash until the oven door has completely unlocked and the lock icon( ) light will clear. 2. The oven is again fully operational. CHANGING HOUR MODE ON CLOCK (12HR, 24 HR) Your control is set to use a 12-hour clock. If you would prefer to have a 24-hour time clock, follow the steps below. Changing between 12 or 24 hour time of day 1. Press and hold CLOCK for 3 seconds. 2. Press 1 for 12-hour, 2 for 24-hour. 3. Press START to accept the desired change. SETTING THE PROOF FEATURE The proof feature maintains a warm environment useful for rising yeast-leavened products. How to Set the Oven For Proofing 1. Place the covered dough in a dish in the oven on shelf B or C. Note: For best results, cover the dough with a cloth or with plastic wrap (the plastic may need to be anchored underneath the container so the oven fan will not blow it off). 2. Press PROOF and then START. The proof feature automatically provides the optimum temperature for the proof process, and therefore does not have a temperature adjustment. 3. When proofing is finished, press CLEAR/OFF. To avoid lowering the oven temperature and lengthening proofing time,do not open the oven door unnecessarily. Check bread products early to avoid over-proofing. Note: • Do not use the proofing mode for warming food or keeping food hot. The proofing oven temperature is not hot enough to hold foods at safe temperatures. Use the COOK &WARM feature to keep food warm. • Proofing will not operate when oven is above 125°F. Oven is Hot will show in the display. TO TURN ON/OFF THE OVEN LIGHT The oven light automatically turns ON when the door is opened. The oven light may also be manually turned ON or OFF by pressing the OVEN LIGHT pad. Note: The oven light cannot be turned on if the self-clean feature is active. Español - 24 -
-
 1
1 -
2
-
3
-
4
-
5
-
6
-
7
-
8
-
9
-
10
-
11
-
12
-
13
-
14
-
15
-
16
-
17
-
18
-
 19
19 -
 20
20 -
 21
21 -
 22
22 -
 23
23 -
 24
24 -
 25
25 -
 26
26 -
 27
27 -
 28
28 -
 29
29 -
30
-
31
-
32
-
33
-
34
-
35
-
36
 |
 |
