LG LRSES2706V Owners Manual - Page 26
InstaView Function, Only in some models, Door-in-Door
 |
View all LG LRSES2706V manuals
Add to My Manuals
Save this manual to your list of manuals |
Page 26 highlights
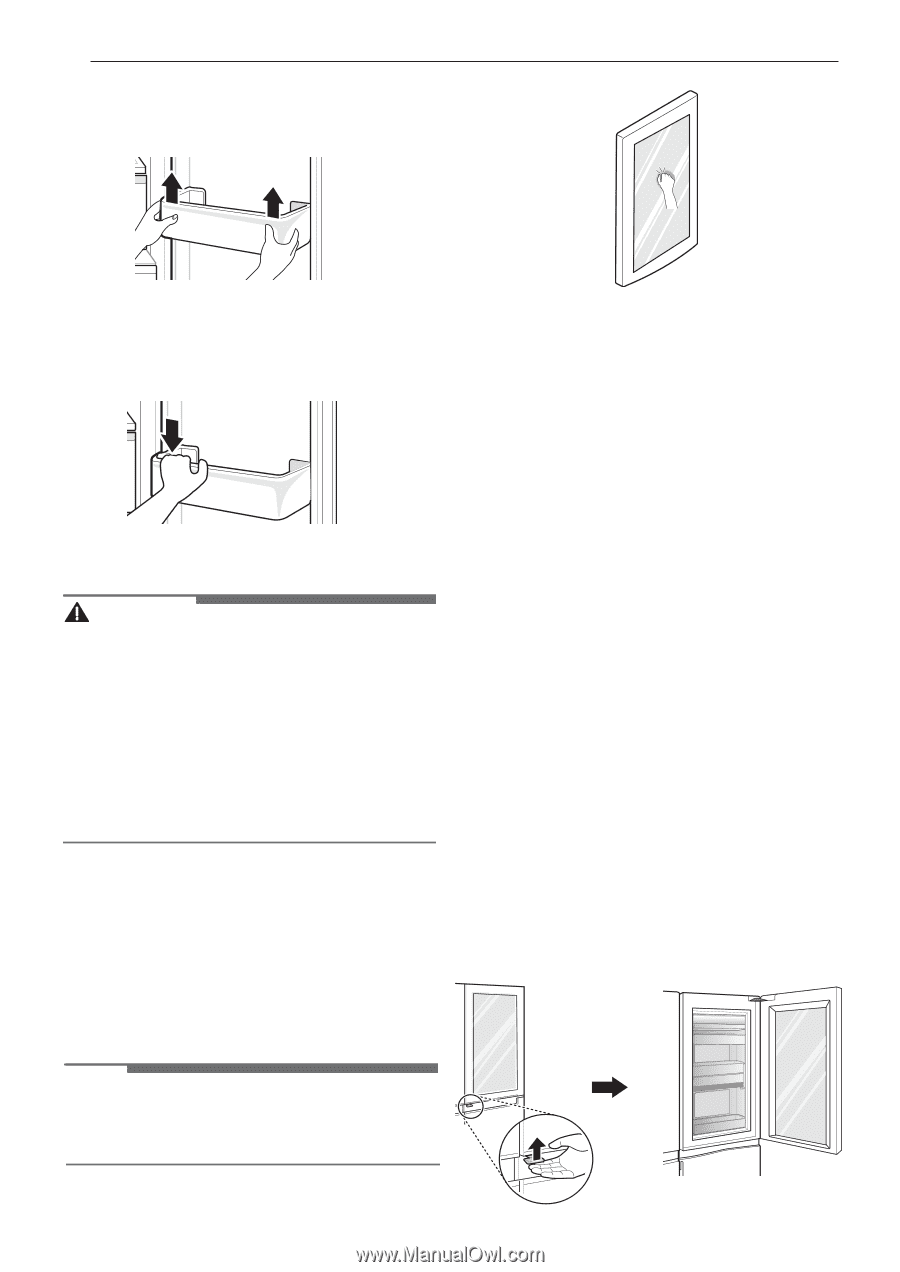
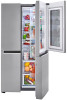
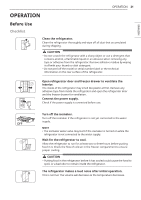
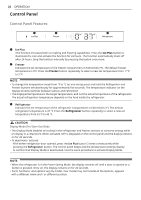
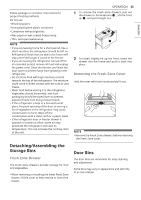
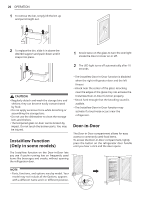
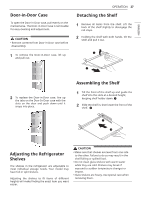
26 OPERATION 1 To remove the bin, simply lift the bin up and pull straight out. 2 To replace the bin, slide it in above the desired support and push down until it snaps into place. 1 Knock twice on the glass to turn the LED light inside the Door-in-Door on or off. 2 The LED light turns off automatically after 10 seconds. CAUTION • Regularly detach and wash the storage bins and shelves; they can become easily contaminated by food. • Do not apply excessive force while detaching or assembling the storage bins. • Do not use the dishwasher to clean the storage bins and shelves. • The tempered glass on door can be broken by impact. Do not touch the broken parts. You may be injured. InstaView Function (Only in some models) The InstaView function on the Door-in-Door lets you see if you're running low on frequently used items like beverages and snacks, without opening the refrigerator door. • The InstaView Door-in-Door function is disabled when the right refrigerator door and the left freezer. • Knock near the center of the glass. Knocking near the edges of the glass may not activate the InstaView Door-in-Door function properly. • Knock hard enough that the knocking sound is audible. • The InstaView Door-in-Door function may activate if a loud noise occurs near the refrigerator. Door-in-Door The Door-in-Door compartment allows for easy access to commonly used food items. To access the Door-in-Door compartment, lightly press the button on the refrigerator door handle until you hear a click and the door opens. NOTE • Parts, functions, and options vary by model. Your model may not include all the Options, appears with a different name and / or different position.
-
 1
1 -
2
-
3
-
4
-
5
-
6
-
7
-
8
-
9
-
10
-
11
-
12
-
13
-
14
-
15
-
16
-
17
-
18
-
19
-
20
-
 21
21 -
 22
22 -
 23
23 -
 24
24 -
 25
25 -
 26
26 -
 27
27 -
 28
28 -
 29
29 -
 30
30 -
 31
31 -
32
-
33
-
34
-
35
-
36
-
37
-
38
-
39
-
40
-
41
-
42
-
43
-
44
-
45
-
46
-
47
-
48
-
49
-
50
-
51
-
52
-
53
-
54
-
55
-
56
-
57
-
58
-
59
-
60
-
61
-
62
-
63
-
64
-
65
-
66
-
67
-
68
-
69
-
70
-
71
-
72
-
73
-
74
-
75
-
76
-
77
-
78
-
79
-
80
-
81
-
82
-
83
-
84
-
85
-
86
-
87
-
88
-
89
-
90
-
91
-
92
-
93
-
94
-
95
-
96
 |
 |