LG LST3410A Owners Manual - Page 9
LG LST3410A - DVR - 120 Hour Manual
 |
UPC - 719192166516
View all LG LST3410A manuals
Add to My Manuals
Save this manual to your list of manuals |
Page 9 highlights
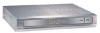
Connection Panel ANT IN Connect to over-the-air outdoor/indoor antenna. G-LINK® Gemstar cable box control connector. Connect G-LINK cable (supplied with your HD DVR) to control a Cable Box using the TV Guide On Screen™ feature. Note: If there is a "demo pin" in the jack, remove it to disable demo mode. AUDIO/VIDEO INPUT 1, 2 Connect audio/video output of an external source (Audio system, TV/Monitor, VCR, Camcorder). VIDEO OUT 1, 2 Connect to TV/Monitor with composite video inputs. COMPONENT OUTPUT Connect to TV/Monitor with YPbPr inputs. DIGITAL AUDIO OUT (OPTICAL) Connect to digital (optical) audio equipment. AUTHORIZED SERVICE ONLY Is used only for authorized service purposes. DVI OUT Connect to TV/Monitor with DVI port. INTRODUCTION AC Power Cord Plug into the power source. IEEE-1394 Connect to IEEE-1394 equipment. RGB OUT Connect to TV/Monitor with RGB input. Variable "volume" AUDIO OUT (Left/Right) Connect to a TV, amplifier, receiver or stereo system. You can adjust the volume of this audio out on HD DVR. Fixed "volume" AUDIO OUT (Left/Right) Connect to a TV, amplifier, receiver or stereo system. You cannot adjust the volume of this audio out on HD DVR. S-VIDEO OUT Connect to TV/Monitor with S-Video input. CABLE IN Connect to cable TV (CATV) signal source. Do not touch the inner pins of the jacks on the rear panel. Electrostatic discharge may cause permanent damage to the unit. 9
-
 1
1 -
2
-
3
-
 4
4 -
 5
5 -
 6
6 -
 7
7 -
 8
8 -
 9
9 -
 10
10 -
 11
11 -
 12
12 -
 13
13 -
 14
14 -
15
-
16
-
17
-
18
-
19
-
20
-
21
-
22
-
23
-
24
-
25
-
26
-
27
-
28
-
29
-
30
-
31
-
32
-
33
-
34
-
35
-
36
-
37
-
38
-
39
-
40
-
41
-
42
-
43
-
44
-
45
-
46
-
47
-
48
-
49
-
50
-
51
-
52
-
53
-
54
-
55
-
56
-
57
-
58
-
59
-
60
-
61
-
62
-
63
-
64
-
65
-
66
-
67
-
68
-
69
-
70
-
71
-
72
 |
 |
