LG LT1030CR Owners Manual - Page 13
Caution
 |
View all LG LT1030CR manuals
Add to My Manuals
Save this manual to your list of manuals |
Page 13 highlights
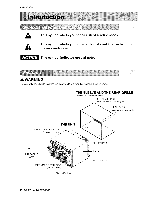
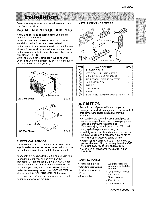
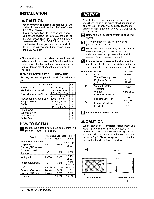
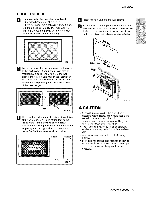
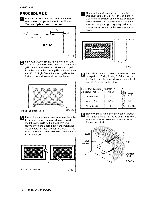
PROCEDURE A H H yOU are using the new sleeve (optioina]l[y s.upp_ied with your unit),skip to step 3.. O,#ie_ise, install the phstic grilJ,e_rom the kit Cut the plastic grille to 25o1/Z wide and t 5i1/4" high, P_a_ the phstic grillle to the inside of the walll s_eeve at the rear flange° Ins_llation _ hstalf the new unit into the wa_J_eeve_ lb, .as_mb_e trim, snap the tab of each pie_ into the _ot of the other pike as sh_n be_, SNe trim over the front ot the air co,nditio, ner anti[ trim isflush w_h _eeve as shown _[ow_ FiG. 4, _ asten the 4 washer _rews to secure the g[i_le to the wall _eeve,, If you need p_stic nuts to, mount plastic grille to the insi_ of the wa_l s_eeve, hero are phsfic nuts in the instalhtbn kit. The nuts ae installed 'f_o,mthe inside of the slleeve and are pressing into the _uare holes of the _ear flanges. T_iim (2 ea) Wail _ Re; m_,e the backing from the Vertical insuhtion strip, 15,_/_6x 1s_8x i3,,8 and attach that to the inside right of the s[_,/e as shown below.. Remove the backing from the Around hsuhtion strip, 67_,,'8x lS_ x 2_','s=and attach that t:o the inside front ot Me _ee'_ as _own _low: _or Ould_r FIG. I & CAUTION • Air cond_ionersco_r_ in this manualpo_ tan excesses weight hazard_T_ or more peopie are _,eded to move and install the unit, To preJentiniury or str_n, use proper lifti% and carrying techniqueswhen moving un_, • W/_n handlingthe _r conditioner,be carefu_to avod cuts from sharp me_ fins on front and rear' coi_so • Make sure air ®nditioner does not fall duri_g #emoval, ° If unit does not operae after inaalllationche& to sure the circuit i_errupter has not been trip_d, Referto 't_ Troubleshooti_ guide for resel F]Go 6 Owner_ Manual 13
-
 1
1 -
2
-
3
-
4
-
5
-
6
-
7
-
 8
8 -
 9
9 -
 10
10 -
 11
11 -
 12
12 -
 13
13 -
 14
14 -
 15
15 -
 16
16 -
 17
17 -
 18
18 -
19
-
20
-
21
-
22
-
23
-
24
-
25
-
26
 |
 |
