LG LT1210C Owners Manual - Page 11
Installation, Requlremenits
 |
UPC - 048231353335
View all LG LT1210C manuals
Add to My Manuals
Save this manual to your list of manuals |
Page 11 highlights
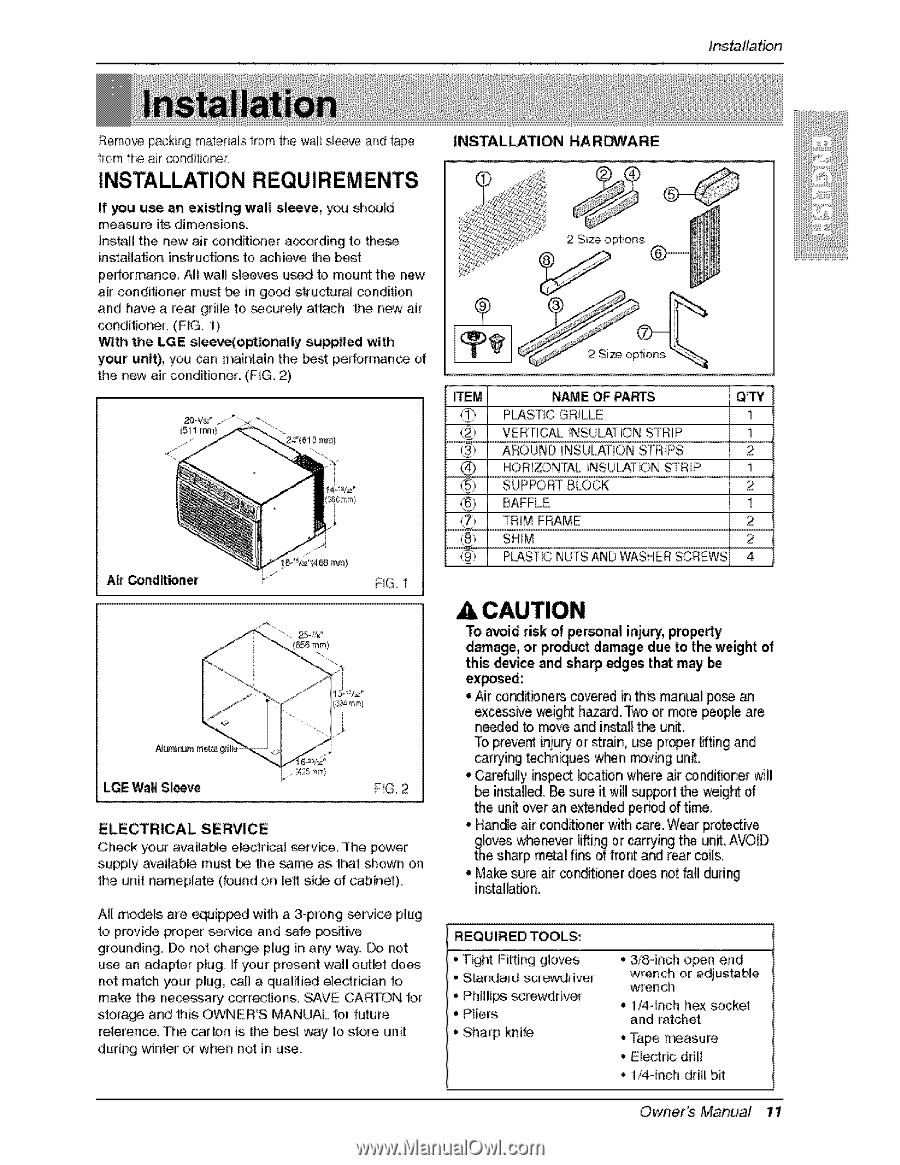
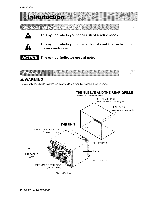
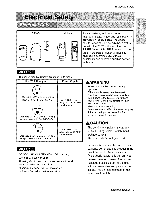
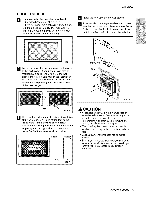
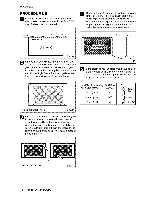
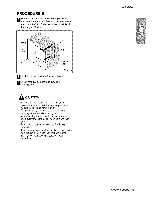
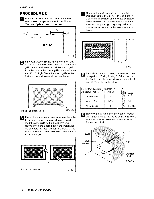
Ins_llation Remo'_ packir_ mate,rials from De wall s_eeve and tape from t_ air conditio_r INSTALLATION REQUlREMENiTS If you use an existing wall sl_ve, you _ould measure its dimensions, install the new air conditioner according to the_ installation instruc4:k3nsto achieve De best performan_, All wal! sleeves u_d to mount the new air condi_oner mast _ in go_ s_uctura_ _ndition and have a rear grille to _curely conditioner. (FIG. 1!) With the LGE s,l,eev_optionally attach the new air supplied with y_r unit), you can maintain the best pedorrr_nce o1 the new air conditioner, (FiG 2:) (511 mm) INSTALLATION HARDWARE 2 Size options, N_I= OF PARTS PLASTIC GRILLE VERTICAL _NSU_TION STRIP AROUND INSULATION STR_PS Qq'Y 1 1 2 AIr Condif_en,er FIG 1 BACFLE ! TRIM FRAME 2 SHIM 2 PLASTIC NUTS AND WASHER SCREWS 4 /_6 ram) FIG, 2 ELECTRICAL SERVICE Check your avaiilaMe e_e_ri_t eerv_e_ The _ower supply available must _ the same as tha_ shown on the unit nameplate (found on le_: side of cabinet). All mode_s are equipped with a 3-p_ong _rvice plug to provi® proper servi_ and _fe positi_ grounding. Do not change plug in any w_/. Do not use inn adapter pfugo I1 your present wall outer do,_ not: match you_ plug, call a qualified electrician to, make lhe necessary corrections. ,SAVE CARTON fer stora_ and this OWNER'S MANUAL for future reference, The carton is the best way to store unit during winter o,r when not: in u:_. To a_id risk of personal inj_r_',property damage, or product dam_e due to the weight of this device and slha_ _ges th_ may ° Air ce_iflo_,m covered in this manual pose an excessive ,_igN hazard. Two,or more peop_ are n_ed tot _ve and installtl"_ uni_. To preve_ injury'or strain, use proper lilting and carryi_i techniques w_n _ving unit, • Carefully inspe_ location w_re air conditbner will be inst_l_l. _ sure it will su_rt _e we_ht of the unit over an extended period of time, Hand_ air conditbner with care. Wear protective iI t_loveswhoever lifting or carrying tlr_ unit. AVOID e s_rp metal fl_ of front and rear ceils., ° Make sure air conditioner does net All dun_ in_alb_en. IREQUIR ED TOOLS: • Tight Fittinggloves • Slendard sc_'dri'ver • Phillips screwdriver • Pliers ° Sharp knit, • ,3/8cinch o_n end wrench or adjustab4e wrench • t/4o,inch hex _cket and ratchet Tape _asure _i •,E_tric dd_l • 1/4-inch drill bit Owner_ Manual 11
-
 1
1 -
2
-
3
-
4
-
5
-
 6
6 -
 7
7 -
 8
8 -
 9
9 -
 10
10 -
 11
11 -
 12
12 -
 13
13 -
 14
14 -
 15
15 -
 16
16 -
17
-
18
-
19
-
20
-
21
-
22
-
23
-
24
-
25
-
26
-
27
-
28
-
29
-
30
-
31
-
32
-
33
-
34
-
35
-
36
-
37
-
38
-
39
-
40
-
41
-
42
-
43
-
44
-
45
-
46
-
47
-
48
 |
 |