LG LTC19340SW Owner's Manual - Page 14
Take Door Closer/stop and flip See Fig. 19. Line up
 |
View all LG LTC19340SW manuals
Add to My Manuals
Save this manual to your list of manuals |
Page 14 highlights
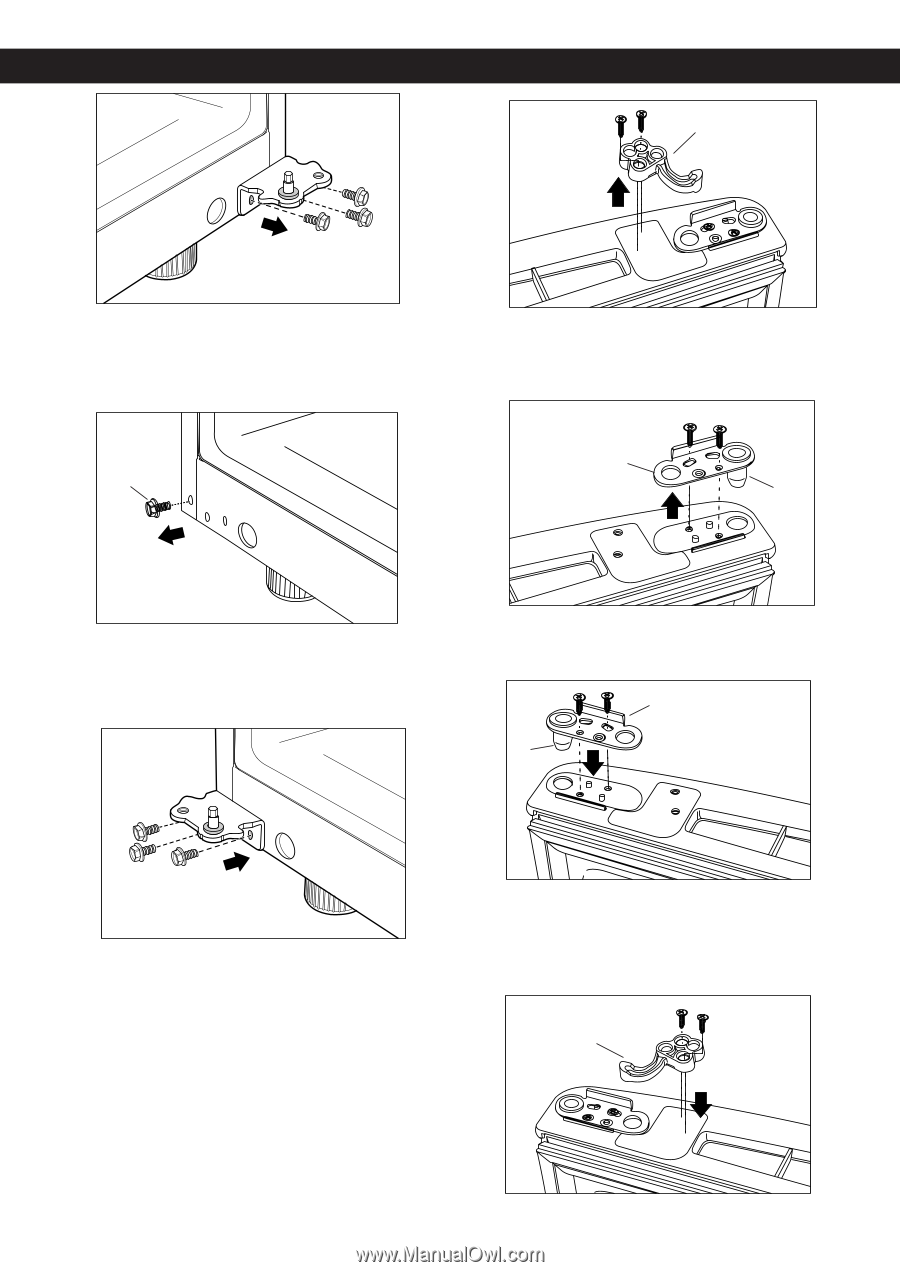
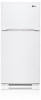
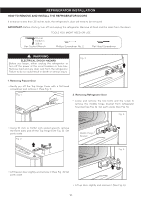
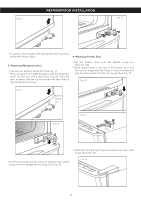
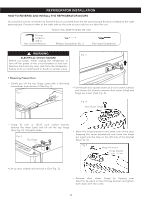
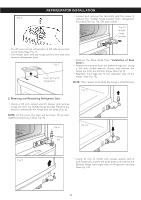
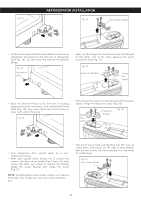
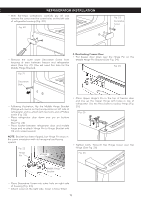
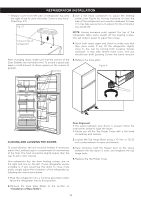
Fig. 13 REFRIGERATOR INSTALLATION Fig. 16 Door Closer (Stop) • At this point, remove the Decorative Bolt on bottom on refrigerator housing from the left side of refrigerator (See Fig. 14). You will need this hole for the Bottom Hinge. Fig. 14 Decorative Bolt • Take out the Hinge Pin Insert and move the Bracket to the other side of the door, keeping the same orientation (See Fig. 17). Fig. 17 Hinge Pin Bracket Hinge Pin Insert • Move the Bottom Hinge to the left side of housing keeping the same orientation, and reattach with three bolts (Fig. 15). Now move decorative bolt to hole on lower right side of housing. Fig. 15 • Place Hinge Pin Insert into the left side of the bracket, tighten Hinge Pin Bracket to door (Fig. 18). Hinge Pin Insert Hinge Pin Bracket Fig. 18 • Turn refrigerator door upside down on a nonscratching surface. • With door upside down, loosen the 2 screws and remove the door closer (stop) (See Figure 16), then loosen the other two screws to remove the bottom Hinge Pin Insert Bracket with Hinge Pin Insert (Fig. 17). NOTE: The Refrigerator door closer (stop) is not used on all models. The model you have may not include this part. • Take Door Closer/stop and flip (See Fig. 19). Line up screw holes and mount on left side of door bottom with the two screws. Turn door upright. It is now ready for reattaching. Fig. 19 Door Closer (Stop) 14
-
 1
1 -
2
-
3
-
4
-
5
-
6
-
7
-
8
-
 9
9 -
 10
10 -
 11
11 -
 12
12 -
 13
13 -
 14
14 -
 15
15 -
 16
16 -
 17
17 -
 18
18 -
 19
19 -
20
-
21
-
22
-
23
-
24
-
25
-
26
-
27
-
28
-
29
-
30
-
31
 |
 |