LG PQRCUCS0C Owners Manual - Page 7
Installation Method
 |
View all LG PQRCUCS0C manuals
Add to My Manuals
Save this manual to your list of manuals |
Page 7 highlights
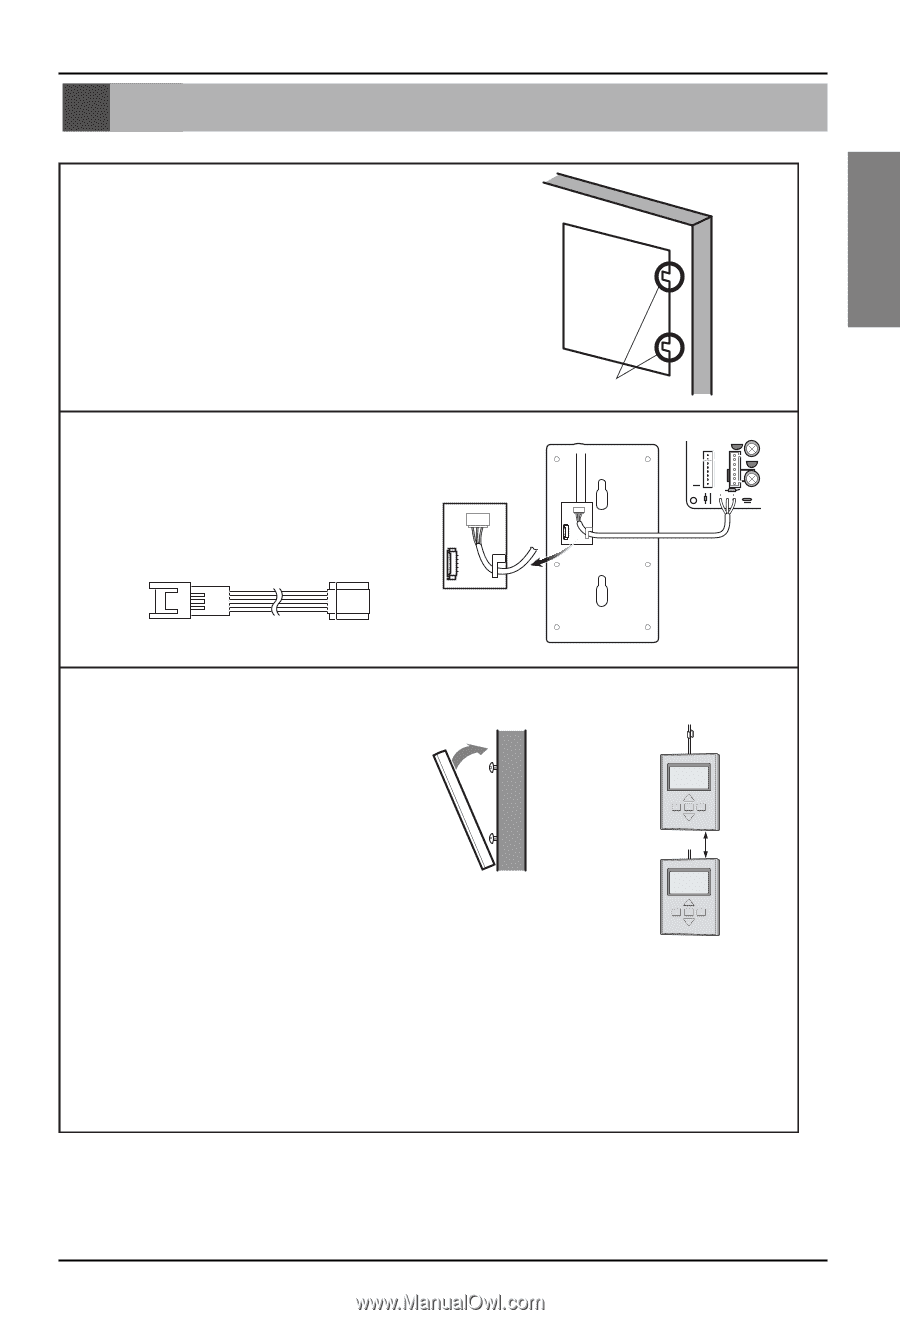
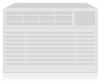
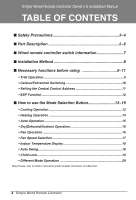
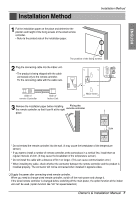
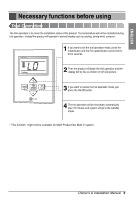
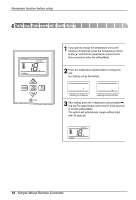
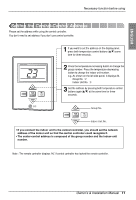
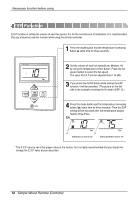
Installation Method 1 Put the installation paper on the place and determine the position and height of the fixing screws of the wired remote controller. • Refer to the printed side of the installation paper. Installation Method ENGLISH 2 Plug the connecting cable into the indoor unit. • The product is being shipped with the cable connected only to the remote controller. Fix the connecting cable with the cable rack. The position of the fixing screws Main indoor unit Red Yellow Brown C01K CN-M C CN-ZONE CN-REMO J15 J14 LO1K CN-DISP IC01A LO1D C07D LO2K Side of remote Controller Side of Indoor Unit Main frame 3 Remove the installation paper before installing Fixing the the remote controller so that it can fit at the right remote controller place. 2cm * Do not embed the remote controller into the wall. (It may cause the breakdown of the temperature sensor.) * If you want to install a number of remote controller at the same place in a vertical line, install them at regular intervals of 2cm. (It may cause the breakdown of the temperature sensor.) * Do not install the cable with a distance of 50 m or longer. (This can cause communication error.) * When installing the cable, check whether the connector between the remote controller and the product is installed properly. The connector will not be connected when installed in opposite sides. ❏ Supply the power after connecting wired remote controller. When you need to change wired remote controller, switch off the main power and change it. If the wired remote controller is changed before switching off the main power, the option function of the indoor unit can't be used. (option function like "slo" fan speed selection) Owner's & Installation Manual 7
-
 1
1 -
 2
2 -
 3
3 -
 4
4 -
 5
5 -
 6
6 -
 7
7 -
 8
8 -
 9
9 -
 10
10 -
 11
11 -
 12
12 -
13
-
14
-
15
-
16
-
17
-
18
-
19
-
20
 |
 |