LG WT1701CV Owners Manual - Page 11
Connecting The Drain Hose
 |
View all LG WT1701CV manuals
Add to My Manuals
Save this manual to your list of manuals |
Page 11 highlights
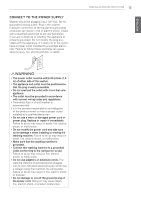
ENGLISH INSTALLATION INSTRUCTIONS 11 CONNECTING THE DRAIN HOSE yy The drain hose should always be properly secured. Failure to properly secure the drain hose can result in flooding and property damage. yy The drain must be installed in accordance with any applicable local codes and regulations. yy Make sure that the drain hose is not stretched, pinched, crushed, or kinked. OPTION 2: LAUNDRY TUB Bend the end of the drain hose to the desired shape and support it on the edge of the laundry tub. Use the tie strap to secure the drain hose in place. Drain Hose OPTION 1: STANDPIPE Bend the outlet end of the drain hose to form a U shape. Insert the end of the drain hose into the drain. If the drain is large enough for the flange on the hose to fit inside, then do not insert the flange more than 1-2 inches into the drain. Use the tie strap included with the installation materials in the foam block in the tub to secure the drain hose to the drain. If the water valves and drain are built into the wall, 39" 39" (99 cm) (99 cm) Tie Strap Tie Strap fasten the drain hose to one of the water hoses with the tie strap (ribbed side on inside). If your drain is a standpipe, fasten the drain hose to the standpipe with the tie strap provided. NOTE: yy Normal height of the end of the hose should be approximately 35"~47" (0.9~1.2 m) from the floor. yy Do not install the end of the drain hose higher than 96 in. (243.8 cm) above the bottom of the washer or more than 60 in. (152.4 cm) away from the washer. yy Never seal the drain hose to the drain such as with tape. If no air gap is present, water can be siphoned out of the tub resulting in poor wash/ rinse performance or clothing damage. Drain Hose
-
 1
1 -
2
-
3
-
4
-
5
-
 6
6 -
 7
7 -
 8
8 -
 9
9 -
 10
10 -
 11
11 -
 12
12 -
 13
13 -
 14
14 -
 15
15 -
 16
16 -
17
-
18
-
19
-
20
-
21
-
22
-
23
-
24
-
25
-
26
-
27
-
28
-
29
-
30
-
31
-
32
-
33
-
34
-
35
-
36
-
37
-
38
-
39
-
40
-
41
-
42
-
43
-
44
-
45
-
46
-
47
-
48
-
49
-
50
-
51
-
52
-
53
-
54
-
55
-
56
-
57
-
58
-
59
-
60
-
61
-
62
-
63
-
64
-
65
-
66
-
67
-
68
-
69
-
70
-
71
-
72
-
73
-
74
-
75
-
76
-
77
-
78
-
79
-
80
 |
 |
