Lantronix NM2-GXE-201 Series NM2-GXE-201 Series Installation Guide Rev E - Page 11
Installing the NM2-GXE-2230-xx-201 in the Dell OptiPlex, Installation Overview
 |
View all Lantronix NM2-GXE-201 Series manuals
Add to My Manuals
Save this manual to your list of manuals |
Page 11 highlights
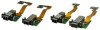
Lantronix NM2-GXE-2230-xx-201 Install Guide Installing the NM2-GXE-2230-xx-201 in the Dell OptiPlex The NM2-GXE-2230-xx-201 Series is designed to install in the Dell OptiPlex™ 3060/5060/7060, 7070 and 7080 Micro PCs. Caution: Only qualified persons should install the NIC. Failure to observe this caution could result in poor performance or damage to the equipment. Before installing the NIC, review the Pre-Installation Checklist and Safety Precautions below. Caution: Wear a grounding device and observe electrostatic discharge precautions when installing the NIC in a system. Failure to observe this caution could result in damage to the NIC. Before installing the NIC, review the Pre-Installation Checklist and Safety Precautions below. Before installing the NIC, ensure that system power is OFF, the power cord is unplugged from the power outlet, and that proper electrical grounding procedure has been followed. Warning: High voltage inside the system may present a safety hazard. Make sure that the system power is off before removing the cover. Unplug and disconnect the PC and then wait for 15-20 seconds before plugging the NIC into the PC. When removing the NIC, unplug the Ethernet cable before removing the PC cover. Note: Refer to the Notes, Cautions, and Warnings in the appropriate Dell OptiPlex Service Manual. See Manuals & documents for details. Class I Laser Compliance: This product has been tested and found to comply with the limits for FDA Class I laser for IEC60825, EN60825, and 21CFR1040 specifications. Warning: Visible and invisible laser radiation when open. DO NOT stare into laser beam or view directly with optical instruments. Failure to observe this warning could result in damage to your eyes or blindness. Installation Overview Before installing your NIC, review the preceding sections, and then do the following: 1. Verify that your system is using the latest BIOS. 2. If you download the driver software, record the path where you saved the downloads. 3. If your system is active, shut it down. Do not install the NIC until system power is completely removed. When system shutdown is complete, power OFF and unplug your system. 4. Holding the NIC by the edges, remove it from its shipping package and place it on an antistatic surface. 5. Check the NIC for signs of damage, particularly on the PCB edge connector. Caution: Never attempt to install a damaged NIC card. If the NIC is damaged, report it to Lantronix. 6. Remove the OptiPlex Side Cover. See Removing the Side Cover below. 7. Gently remove the OptiPlex HDD. 8. Remove the OptiPlex 15-Pin DSUB Knockout. 9. Insert the M.2 NIC into the OptiPlex Micro PC's M.2 "A or E keyed" interface. 10. Insert the fiber optic adapter into the OptiPlex Micro PC's Option port. 11. Replace the OptiPlex HDD. 12. Replace the OptiPlex Side Cover. 33811 Rev. E https://www.lantronix.com/ 11
-
 1
1 -
2
-
3
-
4
-
5
-
 6
6 -
 7
7 -
 8
8 -
 9
9 -
 10
10 -
 11
11 -
 12
12 -
 13
13 -
 14
14 -
 15
15 -
 16
16 -
17
-
18
-
19
-
20
-
21
-
22
-
23
-
24
-
25
-
26
-
27
 |
 |
