Lantronix Spider Lantronix Spider - Quick Start Guide - Page 5
Spider Web Configuration, Installation And Network Settings Continued - default password
 |
View all Lantronix Spider manuals
Add to My Manuals
Save this manual to your list of manuals |
Page 5 highlights
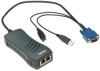
Quick Start Guide SecureLinx Spider INSTALLATION AND NETWORK SETTINGS CONTINUED 5. Follow the prompts to enter the unit's IP address, subnet mask, default gateway, and LAN interface information. SPIDER WEB CONFIGURATION 1. Access the Spider over the network using a favorite web browser by entering https:// for a secure SSL connection or http:// for an insecure connection and its IP address in the address bar. 2. Enter your user name (default is sysadmin) and password (default is PASS) at the prompt. The Spider home page displays. 6. Type Y, following by Enter, to accept the changes. The system takes about 10 seconds to complete and display the updated IP address on the login prompt. 7. Plug an Ethernet cable connected to your network into the Ethernet port. The Link LED illuminates. 6 WWW.LANTRONIX.COM 7
-
 1
1 -
 2
2 -
 3
3 -
 4
4 -
 5
5 -
 6
6 -
 7
7 -
 8
8
 |
 |
