Lantronix UDS-10 UDS-10 / UDS100 / UDS200 - Quick Start Guide - Page 5
Assign Ip Address Con't., Assign Ip Address And Network Class - uds100
 |
View all Lantronix UDS-10 manuals
Add to My Manuals
Save this manual to your list of manuals |
Page 5 highlights
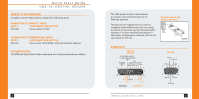
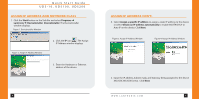
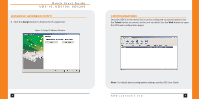
Quick Start Guide UDS-10, UDS100, UDS200 ASSIGN IP ADDRESS AND NETWORK CLASS 1. Click the Start button on the Task Bar and select Programs ➜ Lantronix ➜ DeviceInstaller DeviceInstaller. The DeviceInstaller window displays. Figure 1. DeviceInstaller Window Figure 2. Assign IP Address Window 2. Click the IP icon . The Assign IP Address window displays. 3. Enter the Hardware or Ethernet address of the device. 6 ASSIGN IP ADDRESS CON'T. 4. Select Assign a specific IP address to assign a static IP address to the device or select Obtain an IP address automatically to enable BOOTP, DHCP or Auto IP on the device. Click Next. Figure 3. Assign IP Address Window Figure 4. Assign IP Address Window 5. Input the IP address, Subnet mask, and Gateway being assigned to the device XXX.XXX.XXX.XXX format. Click Next. WWW.LANTRONIX.COM 7
-
 1
1 -
 2
2 -
 3
3 -
 4
4 -
 5
5 -
 6
6 -
 7
7 -
 8
8
 |
 |
