Lenovo 1869CSU User Manual
Lenovo 1869CSU Manual
 |
View all Lenovo 1869CSU manuals
Add to My Manuals
Save this manual to your list of manuals |
Lenovo 1869CSU manual content summary:
- Lenovo 1869CSU | User Manual - Page 1
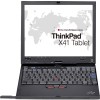
ThinkPad Computer Hardware Maintenance Manual January 2006 This manual supports: ThinkPad X41 Tablet (MT 1866, 1867, 1869) ThinkPad X4 Dock (MT 2506) - Lenovo 1869CSU | User Manual - Page 2
it supports, be sure to read the general information under "Notices" on page 133. First Edition (January 2006) © Copyright Lenovo /or services are provided with RESTRICTED RIGHTS. Use, duplication or disclosure by the Government is subject to the GSA ADP Schedule contract with Lenovo Group Limited - Lenovo 1869CSU | User Manual - Page 3
first 29 Related service information 31 Service Web site 31 Restoring the pre-installed system 31 Passwords 32 Power management 34 Checkout guide 37 Testing the computer 37 Detecting system information with PC-Doctor. . . 40 Power system checkout 40 ThinkPad X41 Tablet 45 Product overview - Lenovo 1869CSU | User Manual - Page 4
Undetermined problems 67 FRU replacement notices 68 Screw notices 68 Retaining serial numbers 69 Removing and replacing a FRU 72 1010 Battery pack 111 Locations 113 Front view for X41 Tablet 113 Rear view for X41 Tablet 114 Bottom view for X41 Tablet 115 Front View for X4 Dock 116 - Lenovo 1869CSU | User Manual - Page 5
ThinkPad X41 Tablet (MT 1866/1867/1869) product. Use this manual along with the advanced diagnostic tests to troubleshoot problems. The manual is divided into sections as follows: v The common sections provide general information, guidelines, and safety information required in servicing computers - Lenovo 1869CSU | User Manual - Page 6
2 MT1866/1867/1869 - Lenovo 1869CSU | User Manual - Page 7
FRUs listed in this manual. Use the following strategy to prevent unnecessary expense for replacing and servicing FRUs: v If you are instructed to replace a FRU but the replacement does not correct the problem, reinstall the original FRU before you continue. v Some computers have both a processor - Lenovo 1869CSU | User Manual - Page 8
false error codes. If no error code is displayed, see whether the error symptom is listed in the Symptom-to-FRU Index for the computer you are servicing. Strategy for replacing FRUs for CTO, CMV, and GAV Product definition Dynamic Configure To Order (CTO) This provides the ability for a customer to - Lenovo 1869CSU | User Manual - Page 9
service are three information resources to identify which FRUs are used to support CTO, CMV, and GAV products. These sources are PEW, eSupport disk drives, system boards, microprocessors, Liquid Crystal Displays (LCDs), and memory. v Remember, All CTO and CMV products are loaded in PEW under - Lenovo 1869CSU | User Manual - Page 10
disk drive, system board, microprocessor, LCD, and memory) v eSupport can be used to view the accessed at the following Web site: http://www.lenovo.com/ support v To view the key commodities, click on SERVICE PARTS. Under "Parts Information by Date" select SYSTEM SERVICE PARTS. The list of service - Lenovo 1869CSU | User Manual - Page 11
Important service information Important information about replacing RoHS compliant FRUs RoHS, The also be RoHS compliant. Lenovo plans to transition to RoHS compliance well before the implementation date and expects its suppliers to be ready to support Lenovo's requirements and schedule. Products - Lenovo 1869CSU | User Manual - Page 12
Important service information Products marketed before June 2006 Products marketed after June Read and write Read and write Not compatible Safety notices: multilingual translations In this manual, safety notices appear in English with a page number reference to the appropriate multilingual, - Lenovo 1869CSU | User Manual - Page 13
replacement, make sure all screws, springs, and other small parts are in place and are not left loose inside the computer. Verify this by shaking the computer and listening for rattling sounds. Metallic parts or metal flakes can cause electrical shorts. Avant de remettre l'ordinateur sous tension - Lenovo 1869CSU | User Manual - Page 14
ou celle de l'horloge temps réel, veillez à n'utiliser que les modèles cités dans la liste de pièces détachées adéquate. Une batterie ou une pile inappropriée risque de prendre feu ou d'exploser. Die Bereitschaftsbatterie, die sich unter dem Diskettenlaufwerk befindet, kann geringe Mengen Nickel und - Lenovo 1869CSU | User Manual - Page 15
(continuation of safety notice 2) Safety notices Alcune batterie di riserva contengono una piccola quantità di nichel e cadmio. Non smontarle, ricaricarle, gettarle nel fuoco o nell'acqua né cortocircuitarle. Smaltirle secondo la normativa in vigore (DPR - Lenovo 1869CSU | User Manual - Page 16
, veillez à n'utiliser que les modèles cités dans la liste de pièces détachées adéquate. En effet, une batterie inappropriée risque de prendre feu ou d'exploser. Akkus enthalten geringe Mengen von Nickel. Sie dürfen nicht zerlegt, wiederaufgeladen, kurzgeschlossen, oder Feuer oder Wasser ausgesetzt - Lenovo 1869CSU | User Manual - Page 17
Safety notices (continuation of safety notice 3) La batteria contiene piccole quantità di nichel. Non smontarla, gettarla nel fuoco o nell'acqua né cortocircuitarla. Smaltirla secondo la normativa in vigore (DPR 915/82, successive disposizioni e disposizioni locali). Quando si sostituisce la - Lenovo 1869CSU | User Manual - Page 18
der zur richtigen Polung angebrachte Verbindungsstecker entfernt werden. Bei der Entsorgung die örtlichen Bestimmungen für Sondermüll beachten. Beim Ersetzen der Batterie nur Batterien des Typs verwenden, der in der Ersatzteilliste aufgeführt ist. Der Einsatz falscher Batterien kann zu Entzündung - Lenovo 1869CSU | User Manual - Page 19
(continuation of safety notice 4) Safety notices La batteria di supporto e una batteria al litio e puo incendiarsi, esplodere o procurare gravi ustioni. Evitare di ricaricarla, smontarne il connettore polarizzato, smontarla, riscaldarla ad una temperatura superiore ai 100 gradi centigradi, - Lenovo 1869CSU | User Manual - Page 20
Entsorgung die örtlichen Bestimmungen für Sondermüll beachten. Der LCD-Bildschirm besteht aus Glas und kann zerbrechen, wenn er unsachgemäß behandelt wird oder der Computer auf den Boden fällt. Wenn der Bildschirm beschädigt ist und die darin befindliche Flüssigkeit in Kontakt mit Haut und Augen ger - Lenovo 1869CSU | User Manual - Page 21
Safety notice 6 DANGER Safety notices To avoid shock, do not remove the plastic cover that protects the lower part of the inverter card. Afin d'éviter tout risque de choc électrique, ne retirez pas le cache en plastique protégeant la partie inférieure de la carte d'alimentation. Aus Sicherheitsgrü - Lenovo 1869CSU | User Manual - Page 22
Kurzschluß oder Erdung genug Strom abgeben, um brennbare Materialien zu entzünden oder Verletzungen bei Personen hervorzurufen. Sebbene le batterie di alimentazione siano a basso voltaggio, una batteria in corto circuito o a massa può fornire corrente sufficiente da bruciare materiali combustibili - Lenovo 1869CSU | User Manual - Page 23
Safety notice 8 DANGER Safety notices Before removing any FRU, power off the computer, unplug all power cords from electrical outlets, remove the battery pack, and then disconnect any interconnecting cables. Avant de retirer une unité remplaçable en clientèle, mettez le système hors tension, dé - Lenovo 1869CSU | User Manual - Page 24
Safety information Safety information The following section presents safety information with which you need to be familiar before you service a ThinkPad computer. General safety Follow these rules to ensure general safety: v Observe good housekeeping in the area of the machines during and after - Lenovo 1869CSU | User Manual - Page 25
Safety information v After service, reinstall all safety shields, guards, labels, and ground electrical shock. v Find the room emergency power-off (EPO) switch, disconnecting switch, or electrical outlet. If an electrical accident occurs, you can then operate the switch or unplug the power cord - Lenovo 1869CSU | User Manual - Page 26
special safety precautions when you work with very high voltages; Instructions for these precautions are in the safety sections of maintenance ; such touching can cause personal injury and machine damage. v Do not service the following parts with the power on when they are removed from their - Lenovo 1869CSU | User Manual - Page 27
ThinkPad features or options not covered by this inspection guide . If any unsafe conditions are present, you must determine how serious the apparent hazard could be and whether you can continue without first correcting the problem every service task Power off the computer. Disconnect the power - Lenovo 1869CSU | User Manual - Page 28
to electrostatic discharge Any computer part containing transistors or integrated to provide protection that meets the specific service requirement. Note The use of a grounding wire ground. - When working on a double-insulated or battery-operated system, use an ESD common ground or reference point - Lenovo 1869CSU | User Manual - Page 29
- Use the round ground prong of the ac plug on ac-operated computers. Grounding requirements Electrical grounding of the computer is required for operator safety and correct system function. Proper grounding of the electrical outlet can be verified by a certified electrician. Introduction 25 - Lenovo 1869CSU | User Manual - Page 30
statement Laser compliance statement Some models of ThinkPad computer are equipped from the factory with an certified in the U.S. to conform to the requirements of the Department of Health and Human Services 21 Code of Federal Regulations (DHHS 21 CFR) Subchapter J for Class 1 laser products - Lenovo 1869CSU | User Manual - Page 31
the CD-ROM drive, the DVD-ROM drive, or any other optical storage device could result in exposure to hazardous laser radiation. There are no serviceable parts inside those drives. Do not open. Introduction 27 - Lenovo 1869CSU | User Manual - Page 32
Laser compliance statement A CD-ROM drive, a DVD-ROM drive, or any other storage device installed may contain an embedded Class 3A or Class 3B laser diode. Note the following: DANGER Emits visible and invisible laser radiation when open. Do not stare into the beam, do not view directly with optical - Lenovo 1869CSU | User Manual - Page 33
ThinkPad model that has the PC-Doctor® for DOS diagnostics program. Some descriptions might not apply to your particular computer. Read this first Before you go to the checkout guide, be sure to read this section. Important notes v Only certified trained personnel should service the computer problem - Lenovo 1869CSU | User Manual - Page 34
use. Before checking problems with the computer, determine whether the damage computer unusable) v Sticky keys caused by spilling a liquid onto the keyboard The following symptoms might indicate damage caused by nonwarranted activities: v Missing parts might be a symptom of unauthorized service - Lenovo 1869CSU | User Manual - Page 35
service diskette become available, they will be posted on http://www.lenovo.com/think/spm Restoring the pre-installed system When the hard disk drive is replaced because of a failure, no Product Recovery program is on the new hard disk. In this case, you must use the recovery CD for the computer - Lenovo 1869CSU | User Manual - Page 36
Related service information 6. A message is displayed: "Full Recovery:". Press Enter to select. 7. On each of the next three windows, press the Y key. 8. Follow the prompts to complete the recovery. Passwords As many as three passwords may be needed for any ThinkPad computer: the power-on password ( - Lenovo 1869CSU | User Manual - Page 37
POST ends, the password prompt does not appear. The POP has been removed. 5. Reinstall the backup battery and the battery pack. (B) If an SVP has been set and is known by the servicer: 1. Turn on the computer; then, while the "To interrupt normal startup, press the blue Access IBM button" message is - Lenovo 1869CSU | User Manual - Page 38
and cannot be made available to the servicer, neither Lenovo nor Lenovo authorized servicers provide any services to reset the user HDPs or to have been removed. Power management To reduce power consumption, the computer has three power management modes: screen blank, standby, and hibernation - Lenovo 1869CSU | User Manual - Page 39
becomes low has been selected in the "Power Management Properties" window, the computer goes into hibernation mode.) If you are using the ACPI operating system, only the low-battery alarm is available. To cause the computer to return from standby mode and resume operation, do one of the following - Lenovo 1869CSU | User Manual - Page 40
Related service information Note: The computer does not accept any input immediately after it enters and setup data are stored on the hard disk. v The system is powered off. Note: If the computer enters the hibernation mode while it is docked to the docking station, do not undock it from the docking - Lenovo 1869CSU | User Manual - Page 41
Checkout guide Checkout guide Use the following procedures as a guide in identifying and correcting problems with the ThinkPad computer. Note: The diagnostic tests are intended to test only ThinkPad products. The use of non-ThinkPad products, prototype cards, or modified options can lead to false - Lenovo 1869CSU | User Manual - Page 42
guide created, the ThinkPad computer will reboot. The computer cannot be powered on, go to "Power system checkout" on page 40, and check the power sources. If an error code appears, go to "Symptom-to-FRU index" on page 55. On the first screen, select the model and press Enter. Follow the instructions - Lenovo 1869CSU | User Manual - Page 43
be held down for at least 2 seconds; otherwise, it cannot be sensed. v Video Adapter test supports only the LCD display on the ThinkPad computer. If you have an external monitor attached to your computer, detach it before running PC-Doctor for DOS. v To test Digital Signature Chip, the chip must - Lenovo 1869CSU | User Manual - Page 44
power is supplied when you power on the computer. 5. Power off the computer. 6. Disconnect the ac adapter and install the charged battery pack. 7. Check that the battery pack supplies power when you power on the computer. If you suspect a power problem, see the appropriate one of the following power - Lenovo 1869CSU | User Manual - Page 45
Checkout guide Checking the ac adapter You are here because the computer fails only when the ac adapter is used: v If the power problem occurs board. Then reinstall the battery pack. If it is still not charged, go to the next section. Checking the battery pack Battery charging does not start until - Lenovo 1869CSU | User Manual - Page 46
system board. Checking the backup battery Do the following: 1. Power off the computer, and unplug the ac adapter from it. 2. Turn the computer upside down. 3. Remove the battery pack (see "1010 Battery pack" on page 73). 4. Remove the backup battery (see "Checking the battery pack" on page 41). 42 - Lenovo 1869CSU | User Manual - Page 47
Checkout guide 5. Measure the voltage of the backup battery. See the following figure. Red (+) Black (-) Wire Voltage (V dc) Red +2.5 to +3.2 Black Ground v If the voltage is correct, replace the system board. v If the voltage is not correct, replace the backup battery. v If the backup battery - Lenovo 1869CSU | User Manual - Page 48
Checkout guide 44 MT1866/1867/1869 - Lenovo 1869CSU | User Manual - Page 49
ThinkPad X41 Tablet Product overview 47 Specifications 47 Status indicators for X41 Tablet 49 FRU tests 51 Fn key combinations 53 Symptom-to-FRU index 55 Numeric error codes 55 Error messages 63 Beep symptoms 65 No-beep symptoms 65 LCD-related symptoms 66 Intermittent problems battery - Lenovo 1869CSU | User Manual - Page 50
Overall 118 LCD FRUs 125 12.1-in. XGA TFT 125 Keyboard 127 Recovery CDs 128 For Windows XP Tablet 128 Miscellaneous parts 129 AC adapters 129 Common parts list 130 Tools 130 Power cords (system 130 Telephone cable 132 Notices 133 Trademarks 135 46 MT1866/1867/1869 - Lenovo 1869CSU | User Manual - Page 51
1536 MB for 512 model) v HUB link v PCI bus v LPC bus v Graphics chip: Intel 915GM v Total video memory: UMA, 128MBmax v 242 bytes v 20.0 GB, 1.8-inch, IDE interface v 30.0 GB, 1.8-inch, IDE interface v viewing angle XGA (1024 × 768 resolution) TFT color LCD (continued) ThinkPad X41 Tablet 47 - Lenovo 1869CSU | User Manual - Page 52
Ultrabay device UltraBay Slim (supported by X4 Dock) Communication daughter card (CDC) v ThinkPad Integrated 56K Modem (MDC-2) v ThinkPad Integrated Blutooth IV with 56K Modem (BMDC-3) AC adapter v 56-watt type Diskette drive (external) v USB diskette drive Battery pack (main) v 1 parallel - Lenovo 1869CSU | User Manual - Page 53
Product overview Status indicators for X41 Tablet The system status indicators show the status of the computer, as follows: 1234 5678 Indicator 1 Wireless status Meaning Green: Wireless is operational and is on when the Bluetooth is on and not in suspend mode. (continued) ThinkPad X41 Tablet 49 - Lenovo 1869CSU | User Manual - Page 54
to the hard disk drive, or the drive in the Ultrabay device. When this indicator is on, do not put the computer into standby mode or turn off the computer. 6 Power on 7 Battery status 8 Standby status Note: Do not move the system while the Green drive in use light is on. Sudden physical - Lenovo 1869CSU | User Manual - Page 55
to the TrackPointing Stick. This symptom is not a hardware problem. If the pointer stops after a short time, no service action is necessary. If enabling the TrackPoint does not correct the problem, continue with the following: v Interactive Tests --> Mouse (continued) ThinkPad X41 Tablet 51 - Lenovo 1869CSU | User Manual - Page 56
remove one of them and run Diagnostics --> Memory Test - Quick. 2. If the problem does not recur, return the DIMM to Memory Test - Full. 1. Turn on the computer and check the air turbulence at the louver near the power switch. 2. Run Diagnostics --> ThinkPad Devices --> Fan. Diagnostics --> ThinkPad - Lenovo 1869CSU | User Manual - Page 57
v External monitor (CRT display) v Computer display and external monitor (LCD + CRT display) v Computer display (LCD) Note: For any This function does not work when different desktop images are displayed on the computer display and the external monitor (the Extend desktop function). 2. This function - Lenovo 1869CSU | User Manual - Page 58
computer. v Configure EasyEject Actions: User can open the ThinkPad EasyEject Utility main window. v Fn+F9 Settings: User can configure the settings for the Fn+F9 function. Note: This function is supported 2000, the PM device driver must have been installed on the computer. LCD brightness up The - Lenovo 1869CSU | User Manual - Page 59
problem, put the original part back in the computer. Do not replace a nondefective FRU. This index can also help you determine, during regular servicing, problems" on page 67. Note For a device not supported by diagnostic codes in the ThinkPad notebook computers, see the manual ThinkPad X41 Tablet 55 - Lenovo 1869CSU | User Manual - Page 60
board. Replace planar. Box serial number needs to be reinstalled. System board. Replace planar. UUID needs to be reinstalled. 1. Charge the battery pack. 2. Battery pack. 1. Run BIOS Setup Utility, and then save current setting by pressing F10. 2. System board. System board. (continued) 56 MT1866 - Lenovo 1869CSU | User Manual - Page 61
is not working or not configured properly. 1. Reseat the hard disk drive. 2. Load Setup Defaults in BIOS Setup Utility. 3. Hard disk drive. 4. System board. (continued) ThinkPad X41 Tablet 57 - Lenovo 1869CSU | User Manual - Page 62
. 0232 Extended RAM Failed at offset: nnnn -Extended memory not working or not configured properly at offset nnnn.. 1. DIMM. 2. System board. 0250 System battery is dead -The CMOS clock battery indicator shows the battery is dead Replace the backup battery and run BIOS Setup Utility to reset the - Lenovo 1869CSU | User Manual - Page 63
clock error-Real-Time Clock fails BIOS hardware test 1. Replace the backup battery and run BIOS Setup Utility to reset the time and date. 2. Utility. 2. DIMM. 3. System board. 0281 Memory Size found by POST differed from CMOS-Memory Size found by POST differed from CMOS 1. ThinkPad X41 Tablet 59 - Lenovo 1869CSU | User Manual - Page 64
Cannot write to extended DMA (Direct Memory Access) registers. 02F6 Software NMI attached-Attached docking station is not supported by the product 1802 Unauthorized network battery. 3. System board. 1. DIMM. 2. System board. 1. DIMM. 2. System board. 1. DIMM. 2. System board. Shut down the computer - Lenovo 1869CSU | User Manual - Page 65
the hard disk drive. 1. Undock docking station or port replicator if it is attached to the ThinkPad computer, and place the computer on a horizontal surface. Do not apply any physical shock to the computer. 2. Run Diagnostics -> Other Devices -> HDD Active Protection Test. ThinkPad X41 Tablet 61 - Lenovo 1869CSU | User Manual - Page 66
disk drive you have installed has not been qualified for use in this computer or does not have the latest firmware. Using a drive that is not ESC. If in the primary drive bay the customer is using a supported IBM/Lenovo HDD with an old firmware, the customer needs to update its firmware to the - Lenovo 1869CSU | User Manual - Page 67
error. Authentication of system services failed. Press - Lenovo 1869CSU | User Manual - Page 68
board. Video BIOS shadowed 1. DIMM. 2. System board. Do you want abort resume from 1. DIMM. hibernation? (Y/N)System 2. System board. memory removed, press F3 to power off systemand restore memory chip, press F4 to normal boot Docking station is removed or its ID is different,press F3 to - Lenovo 1869CSU | User Manual - Page 69
password prompt A hard-disk password is set. appears. Type the password and press Enter. The DOS full screen looks smaller than it should. Start the ThinkPad Configuration program and set the Screen expansion function. ThinkPad X41 Tablet 65 - Lenovo 1869CSU | User Manual - Page 70
symptoms Important The TFT LCD for the notebook computer contains many thin-film transistors (TFTs). The presence of a small number of dots that are missing, discolored, or always lighted is characteristic of TFT LCD technology, but excessive pixel problems can cause viewing concerns. The LCD should - Lenovo 1869CSU | User Manual - Page 71
Non-ThinkPad devices b. Devices attached to the port replicator c. Printer, mouse, and other external devices d. Battery pack e. Hard disk drive f. External diskette drive g. DIMM h. CD-ROM and diskette drive in the Ultrabay i. PC Cards 4. Turn on the computer. 5. Determine whether the problem has - Lenovo 1869CSU | User Manual - Page 72
FRU. Screw notices Loose screws can cause a reliability problem. In the ThinkPad computer, this problem is addressed with special nylon-coated screws that have degrees more (Cross-section) v Torque driver If you have a torque driver, refer to the "Torque" column for each step. 68 MT1866/1867/1869 - Lenovo 1869CSU | User Manual - Page 73
serial number by doing the following: 1. Install the ThinkPad Hardware Maintenance Diskette Version 1.71 or later and restart the computer. 2. From the main menu, select 1. Set System Identification. 3. Select 1. Add S/N data from EEPROM. Follow the instructions on the screen. ThinkPad X41 Tablet 69 - Lenovo 1869CSU | User Manual - Page 74
1.71 or later. 1. Insert the ThinkPad Hardware Maintenance Diskette Version 1.71 or later, and restart the computer. 2. From the main menu, select 6. Set ECA Information. 3. To read ECA information, select 2. Read ECA/rework number from EEPROM and follow the instruction. 4. To read box build date - Lenovo 1869CSU | User Manual - Page 75
box build date from EEPROM, and follow the instruction on the screen. If the system board is being replaced, try to read the ECA information from the old system board and transfer the information to the new system. If the system board is inoperable, this will not be possible. ThinkPad X41 Tablet 71 - Lenovo 1869CSU | User Manual - Page 76
to service any computer unless you have been trained and certified. An untrained person runs the risk of damaging parts. 2. Before replacing any FRU, review " removing any FRU, turn off the computer, unplug all power cords from electrical outlets, remove the battery pack, and then disconnect any - Lenovo 1869CSU | User Manual - Page 77
1010 Battery pack DANGER Removing and replacing a FRU Use only the battery specified in the parts list for your computer. Any other battery could ignite or explode. ThinkPad X41 Tablet 73 - Lenovo 1869CSU | User Manual - Page 78
Removing and replacing a FRU 1020 Hinge cap For access, remove following FRU: v "1010 Battery pack" on page 73 (continued) 74 MT1866/1867/1869 - Lenovo 1869CSU | User Manual - Page 79
Removing and replacing a FRU (continued) ThinkPad X41 Tablet 75 - Lenovo 1869CSU | User Manual - Page 80
Removing and replacing a FRU 6 When installing: Make hinge cap parallel to LCD, and then pullup hinge to install well. 76 MT1866/1867/1869 - Lenovo 1869CSU | User Manual - Page 81
on the drive if possible. v Never remove the drive while the system is operating or is in suspend mode. For access, remove following FRU: v "1010 Battery pack" on page 73 Step 1 Screw (quantity) M3 × 4 mm, wafer-head, nylon-coated (1) (continued) Color Black Torque 0.294 Nm (3 kgfcm - Lenovo 1869CSU | User Manual - Page 82
Removing and replacing a FRU When installing: Make sure that the hard disk is connected firmly. 78 MT1866/1867/1869 - Lenovo 1869CSU | User Manual - Page 83
Removing and replacing a FRU 1040 DIMM cover For access, remove following FRU: v "1010 Battery pack" on page 73 Note: Loosen the screws 1 , but do not remove them. Step 1 Screw (quantity) M2 × 3 mm, wafer-head, nylon-coated (3) Color Black Torque 0.157 Nm (1.6 kgfcm) ThinkPad X41 Tablet 79 - Lenovo 1869CSU | User Manual - Page 84
Removing and replacing a FRU 1050 Mini PCI adapter For access, remove following FRUs, in order: v "1010 Battery pack" on page 73 v "1040 DIMM cover" on page 79 80 MT1866/1867/1869 - Lenovo 1869CSU | User Manual - Page 85
Removing and replacing a FRU 1060 DIMM For access, remove following FRUs, in order: v "1010 Battery pack" on page 73 v "1040 DIMM cover" on page 79 ThinkPad X41 Tablet 81 - Lenovo 1869CSU | User Manual - Page 86
Removing and replacing a FRU 1070 MDC-2 For access, remove following FRUs, in order: v "1010 Battery pack" on page 73 v "1040 DIMM cover" on page 79 MDC-2 (IBM Integrated 56K Modem) Step 1 Screw (quantity) M2 × 3.5 mm, wafer-head, nylon-coated (2) Color - Lenovo 1869CSU | User Manual - Page 87
Removing and replacing a FRU 1080 BMDC-3 For access, remove following FRUs, in order: v "1010 Battery pack" on page 73 v "1040 DIMM cover" on page 79 BMDC (IBM Integrated Bluetooth IV shown below. v Route the Bluetooth antenna cable between the system board and the BMDC-3. ThinkPad X41 Tablet 83 - Lenovo 1869CSU | User Manual - Page 88
Removing and replacing a FRU 1090 Keyboard For access, remove following FRU: v "1010 Battery pack" on page 73 Remove 6 screws with keyboard icon to remove keyboard. 1 1 1 1 1 1 Step Icon 1 Screw (quantity) Color M2 × 6 mm, wafer-head, Black nylon-coated (6) Torque 0. - Lenovo 1869CSU | User Manual - Page 89
Removing and replacing a FRU Gently push the keyboard forward, as shown in step 2 . Then lift up the keyboard slightly, as shown in step 3 . Detach the keyboard connector to remove the keyboard. ThinkPad X41 Tablet 85 - Lenovo 1869CSU | User Manual - Page 90
and try to slide the keyboard toward you, shown in the step 3 . 4. Secure the keyboard by tightening the screws from the bottom side of the computer. 86 MT1866/1867/1869 - Lenovo 1869CSU | User Manual - Page 91
following FRUs, in order: v "1010 Battery pack" on page 73 v "1090 Keyboard" on page 84 Step 1 2 Screw (quantity) M2 × 6 mm, wafer-head, nylon-coated (9) M2 × 3.5 mm, wafer-head, nylon-coated (4) (continued) Color Black Silver Torque 0.196 Nm (2 kgfcm) 0.196 Nm (2 kgfcm) ThinkPad X41 Tablet 87 - Lenovo 1869CSU | User Manual - Page 92
Removing and replacing a FRU Detach microphone cable, as shown in step 3 . Gently lift upper case up, as shown in step 4 and 5 , to remove upper case. (continued) 88 MT1866/1867/1869 - Lenovo 1869CSU | User Manual - Page 93
in 3a . 3a Note: For the models have BMDC-3, route the wireless LAN antenna cable and the Bluetoogh antenna cable as shown in 3b . 3b ThinkPad X41 Tablet 89 - Lenovo 1869CSU | User Manual - Page 94
Removing and replacing a FRU 1110 Backup battery DANGER Use only the battery specified in the parts list for your computer. Any other battery could ignite or explode. For access, remove following FRUs, in order: v "1010 Battery pack" on page 73 v "1090 Keyboard" on page 84 When installing: Make sure - Lenovo 1869CSU | User Manual - Page 95
and replacing a FRU 1120 LCD assembly For access, remove following FRUs, in order: v "1010 Battery pack" on page 73 v "1030 Hard disk drive" on page 77 v "1070 MDC-2" (quantity) M2 × 8 mm, wafer-head, nylon-coated (2) (continued) Color Silver Torque 0.196 Nm (2 kgfcm) ThinkPad X41 Tablet 91 - Lenovo 1869CSU | User Manual - Page 96
Removing and replacing a FRU Step 6 7 Screw (quantity) M2.5 × 5 mm, wafer-head, nylon-coated (2) M2.5 × 5 mm, wafer-head, nylon-coated (2) (continued) Color Black Black Torque 0.294 Nm (3 kgfcm) 0.294 Nm (3 kgfcm) 92 MT1866/1867/1869 - Lenovo 1869CSU | User Manual - Page 97
Removing and replacing a FRU ThinkPad X41 Tablet 93 - Lenovo 1869CSU | User Manual - Page 98
Removing and replacing a FRU 1130 Hard disk housing assembly For access, remove following FRUs, in order: v "1010 Battery pack" on page 73 v "1030 Hard disk drive" on page 77 v "1090 Keyboard" on page 84 v "1100 Upper case" on page 87 Step 1 2 Screw (quantity) - Lenovo 1869CSU | User Manual - Page 99
" on page 73 v "1030 Hard disk drive" on page 77 v "1040 DIMM cover" on page 79 v "1070 MDC-2" on page 82 v "1110 Backup battery" on page 90 v "1090 Keyboard" on page 84 v "1100 Upper case" on page 87 Step 1 2 Screw (quantity) M2 × 8 mm, wafer-head, nylon-coated (2) M2 × 3.5 mm, - Lenovo 1869CSU | User Manual - Page 100
" on page 73 v "1030 Hard disk drive" on page 77 v "1040 DIMM cover" on page 79 v "1070 MDC-2" on page 82 v "1110 Backup battery" on page 90 v "1090 Keyboard" on page 84 v "1100 Upper case" on page 87 v "1130 Hard disk housing assembly" on page 94 v "1140 Top shielding" - Lenovo 1869CSU | User Manual - Page 101
Removing and replacing a FRU Step 2 Screw (quantity) M2 × 3.5 mm, wafer-head, nylon-coated (2) (continued) Color Silver Torque 0.1372 Nm (1.4 kgfcm) ThinkPad X41 Tablet 97 - Lenovo 1869CSU | User Manual - Page 102
Removing and replacing a FRU When installing: Attach the system board so that the two small projections a and b on the base cover fit into the holes provided, and then secure the system board with the screw. a b 98 MT1866/1867/1869 - Lenovo 1869CSU | User Manual - Page 103
" on page 73 v "1030 Hard disk drive" on page 77 v "1040 DIMM cover" on page 79 v "1070 MDC-2" on page 82 v "1110 Backup battery" on page 90 v "1090 Keyboard" on page 84 v "1100 Upper case" on page 87 v "1130 Hard disk housing assembly" on page 94 v "1140 Top shielding" - Lenovo 1869CSU | User Manual - Page 104
Removing and replacing a FRU For models with LV processor Step 2 3 Screw (quantity) M2 × 7.3 mm, wafer-head, nylon-coated (4) M2 × 3.5 mm, wafer-head, nylon-coated (2) Color Silver Silver Torque 0.196 Nm (2 kgfcm) 0.196 Nm (2 kgfcm) 100 MT1866/1867/1869 - Lenovo 1869CSU | User Manual - Page 105
replacing a FRU 2010 LCD bezel For access, remove following FRUs, in order: v "1010 Battery pack" on page 73 v "1020 Hinge cap" on page 74 For models without fingerprint ) 0.294 Nm (3 kgfcm) Note: The adhesive on the bezel would make bezel removal difficult. (continued) ThinkPad X41 Tablet 101 - Lenovo 1869CSU | User Manual - Page 106
Removing and replacing a FRU For models without fingerprint card 3 For models with fingerprint card 3 4 (continued) 102 MT1866/1867/1869 - Lenovo 1869CSU | User Manual - Page 107
careful not to make the bezel touch the Bluetooth antenna from being deformed downward or inward as B . Make sure Bluetooth antenna is not deformed as A . A B ThinkPad X41 Tablet 103 - Lenovo 1869CSU | User Manual - Page 108
" on page 73 v "1030 Hard disk drive" on page 77 v "1040 DIMM cover" on page 79 v "1070 MDC-2" on page 82 v "1110 Backup battery" on page 90 v "1090 Keyboard" on page 84 v "1100 Upper case" on page 87 v "1120 LCD assembly" on page 91 v "1020 Hinge cap" on page - Lenovo 1869CSU | User Manual - Page 109
Removing and replacing a FRU When installing: Fold the cable, shown as 1 , then insert the cable into hinge, shown as 2. ThinkPad X41 Tablet 105 - Lenovo 1869CSU | User Manual - Page 110
Removing and replacing a FRU 2030 Inverter card For access, remove following FRUs, in order: v "1010 Battery pack" on page 73 v "1020 Hinge cap" on page 74 v "2010 LCD bezel" on page 101 Step 1 Screw (quantity) M2 × 3.5 mm, wafer-head, nylon-coated (3) ( - Lenovo 1869CSU | User Manual - Page 111
Removing and replacing a FRU 2 3 4 When installing: Make sure that all the connectors attached firmly. ThinkPad X41 Tablet 107 - Lenovo 1869CSU | User Manual - Page 112
Removing and replacing a FRU 2040 LCD For access, remove following FRUs, in order: v "1010 Battery pack" on page 73 v "1020 Hinge cap" on page 74 v "2010 LCD bezel" on page 101 v "2030 Inverter card" on page 106 Step 1 Screw (quantity) - Lenovo 1869CSU | User Manual - Page 113
Removing and replacing a FRU ThinkPad X41 Tablet 109 - Lenovo 1869CSU | User Manual - Page 114
" on page 73 v "1030 Hard disk drive" on page 77 v "1040 DIMM cover" on page 79 v "1070 MDC-2" on page 82 v "1110 Backup battery" on page 90 v "1090 Keyboard" on page 84 v "1100 Upper case" on page 87 v "1120 LCD assembly" on page 91 v "1020 Hinge cap" on page - Lenovo 1869CSU | User Manual - Page 115
drive" on page 77 v "1040 DIMM cover" on page 79 v "1070 MDC-2" on page 82 v "1110 Backup battery" on page 90 v "1090 Keyboard" on page 84 v "1100 Upper case" on page 87 v "1120 LCD mm, wafer-head, nylon-coated (2) (continued) Color Silver Torque 0.098 Nm (1 kgfcm) ThinkPad X41 Tablet 111 - Lenovo 1869CSU | User Manual - Page 116
Removing and replacing a FRU A Note: One piece of tape, indicated as A , sticks between digitizer board and LCD module. Be careful to remove digitizer board slowly in step 2 . When installing: If digitizer board is defective and needs to be replaced, remove protection sheet from tape before - Lenovo 1869CSU | User Manual - Page 117
Locations Locations Front view for X41 Tablet 1 Computer display 2 Power switch 3 Fingerprint reader (for some models) 4 Security keyhole 5 Modem connector 6 Ethernet connector 7 button 15 System status indicators 15 1 14 2 3 13 4 5 6 7 12 11 8 9 10 ThinkPad X41 Tablet 113 - Lenovo 1869CSU | User Manual - Page 118
Locations Rear view for X41 Tablet 1 Tablet digitizer pen 2 Powered USB 2.0 connector 3 External monitor connector 4 AC Power connector 1 2 3 4 114 MT1866/1867/1869 - Lenovo 1869CSU | User Manual - Page 119
Bottom view for X41 Tablet 1 Hard disk drive 2 Mini-PCI and memory door 3 Docking connector 4 Battery pack latches 5 Battery pack Locations ThinkPad X41 Tablet 115 - Lenovo 1869CSU | User Manual - Page 120
Locations Front View for X4 Dock 1 Power switch 2 Eject request button 3 Eject button 4 Docking connector 5 Ultrabay latch 6 Ultrabay slim device Note: The Ultrabay slim device accepts several storage devices, such as a DVD drive, a CD-RW / DVD combo drive, or a second hard disk - Lenovo 1869CSU | User Manual - Page 121
2 Power jack 3 Security keyhole 4 Keyboard/mouse connector 5 USB connectors 6 Modem connector 7 Ethernet connector 8 Parallel connector 9 Serial connector 10 External monitor connector Locations 10 9 8 1 67 5 2 34 ThinkPad X41 Tablet 117 - Lenovo 1869CSU | User Manual - Page 122
Parts list Parts list Overall 1 23 22 a 2 21 20 3 19 4 5 18 6 7 17 8 16 15 9 14 13 10 12 11 118 MT1866/1867/1869 - Lenovo 1869CSU | User Manual - Page 123
pen latch assembly 26R9162 * Hard disk drive cover with pen latch assembly R 41V9664 * 5 Fan assembly LV Dothan Alviso 26R9618 N Fan assembly ULV Dothan Alviso 26R9619 N ThinkPad X41 Tablet 119 - Lenovo 1869CSU | User Manual - Page 124
all except Axx, Cxx v 1867-all except Axx v 1868-all except Cxx v 1869-all except Cxx 93P4212 ThinkPad Integrated Bluetooth IV with 56K Modem (BMDC-3) v 1866-4xx, 6xx, Hxx v 1867-4xx 39T0024 ThinkPad Integrated Bluetooth IV with 56K Modem (BMDC-3) v 1866-Axx, Cxx v 1867-Axx v 1868-Cxx v 1869-Cxx - Lenovo 1869CSU | User Manual - Page 125
label, 1868 Taiwan v 1868-xxV P/N 73P3841 73P3843 73P3845 26R9166 26R9165 26R9322 26R9323 26R9324 26R9168 26R9167 26R9325 26R9326 26R9327 26R9328 26R9329 26R9330 26R9331 CRU ID * * * N N N N N N N N N N N N N N (continued) ThinkPad X41 Tablet 121 - Lenovo 1869CSU | User Manual - Page 126
Parts list No. FRU 9 Lower case with label, 1869 WW v 1869-All except xxG Lower case with label, 1869 EMEA v 1869-xxG 10 Speaker kit 11 X4 Dock assembly X4 Dock assembly R - Adjuster - X4 Dock security screw 12 System board for LV 1.5 GHz Dothan Alviso 256 MB with security chip v 1866-2Cx, 2Gx v - Lenovo 1869CSU | User Manual - Page 127
A3x, ACx, ADx, AEx v 1867-9Mx v 1868-BCx, CUx v 1869-BCx, CMx, CNx Battery 8-Cell Main battery Li-Ion Sanyo -W/W v 1866-1Gx, 2Gx, 3Gx, 3Rx, 4Gx, 5Gx, 6Gx, 6Hx, 6Sx, 1869-CSx 92P1085 Extended battery 92P1007 Extended battery - W/W R 92P1151 CRU ID * * * * (continued) ThinkPad X41 Tablet 123 - Lenovo 1869CSU | User Manual - Page 128
Parts list No. FRU - Extended battery support bracket 15 PC card slot mech 16 Intel PRO Wireless 2200BG Mini-PCI Adapter (US, Canada) OP Intel PRO Wireless 2200BG Mini-PCI Adapter (Others) OP ThinkPad 11a/b/g Wireless LAN Mini-PCI Adapter II (US, Canada) OP ThinkPad 11a/b/g Wireless LAN Mini-PCI - Lenovo 1869CSU | User Manual - Page 129
LCD FRUs 12.1-in. XGA TFT 13 12 11 10 9 8 7 Parts list 1 2 3 4 5 6 ThinkPad X41 Tablet 125 - Lenovo 1869CSU | User Manual - Page 130
Parts list No. FRU 1 LCD front bezel assembly 12.1-in. TFT with seal v 1866-1Cx, 1Gx, 2Cx, 2Gx, 3Gx, 3Rx, 4Cx, 4Dx, 4Gx, 4Ex, DCx, EGx, DGx v 1867-5Gx v 1868-9xx, 8xx, Axx v 1867-9xx LCD front bezel assembly fingerprint 12.1-in. TFT with seal v 1866-5Gx ,6Gx, 6Hx, 6Sx, 6Jx, 6Tx, GGx, Hxx v 1867-1Gx - Lenovo 1869CSU | User Manual - Page 131
39T0824 39T0886 39T0820 39T0882 39T0822 39T0884 39T0830 39T0892 39T0829 39T0891 39T0817 39T0879 39T0834 39T0896 39T0813 39T0875 39T0819 39T0881 39T0835 39T0897 39T0825 39T0887 39T0836 - CRU ID ** ThinkPad X41 Tablet 127 - Lenovo 1869CSU | User Manual - Page 132
Parts list Recovery CDs For Windows XP Tablet Windows XP Tablet is preinstalled as the operating system in following models: v 1866-1Cx, 1Gx, 2Cx, 2Gx, 3Gx, 3Rx, 4Cx, 4Dx, 4Gx, 5Gx, 6Gx, 6Hx, 6Sx, 4Ex, 6Jx, - Lenovo 1869CSU | User Manual - Page 133
(2) Base cover miscellaneous parts kit: v Knob battery lock v Lens IR v Battery latch knob v Battery latch v Battery lock v SPG battery v Spring CDROM DD Rubber kit System miscellaneous parts xxH, xxK, xxM, xxQ, xxV DELTA 02K6813 * LITEON LITEON R 02K6815 * 92P1043 * ThinkPad X41 Tablet 129 - Lenovo 1869CSU | User Manual - Page 134
Maintenance Diskette Version - 1.71 or later Note: Download the file from the following Web site: http://www.lenovo.com/think/spm Power cords (system) A ThinkPad power cord for a specific country or region is usually available only in that country or region: For 2-pin power cords: Country - Lenovo 1869CSU | User Manual - Page 135
list P/N CRU ID 76H3514 ** 39M4960 02K0539 39M4996 76H3520 39M4968 76H3518 39M4964 76H3532 39M4988 76H3530 39M4984 76H3535 39M5000 76H3522 39M4972 76H3528 39M4980 76H3524 39M4976 76H3516 39M4955 ThinkPad X41 Tablet 131 - Lenovo 1869CSU | User Manual - Page 136
Parts list Telephone cable Country or region Australia Austria Belgium Denmark Finland, Norway France Germany Italy Holland Switzerland Spain Sweden U.K., Ireland, New Zealand U.S., Canada, Japan, Taiwan, APS, Brazil P/N 27L0467 27L0449 27L0451 27L0447 27L0446 27L0443 27L0441 27L0448 27L0444 - Lenovo 1869CSU | User Manual - Page 137
of any other product, program, or service. Lenovo may have patents or pending patent use in implantation or other life support applications where malfunction may result in Lenovo or third parties. All information contained in this document was obtained in specific environments ThinkPad X41 Tablet - Lenovo 1869CSU | User Manual - Page 138
in any manner serve as an endorsement of those Web sites. The materials at those Web sites are not part of the materials for this Lenovo product, and use of those Web sites is at your own risk. Any performance data contained herein was determined in a controlled environment. Therefore, the result - Lenovo 1869CSU | User Manual - Page 139
The following terms are trademarks of Lenovo in the United States, other countries or both: Lenovo ThinkPad ThinkPad Port Replicator TrackPoint Ultrabay The and other countries. Other company, product, or service names may be the trademarks or service marks of others. ThinkPad X41 Tablet 135 - Lenovo 1869CSU | User Manual - Page 140
Part Number: 39T9290 (1P) P/N: 39T9290
-
 1
1 -
 2
2 -
 3
3 -
 4
4 -
 5
5 -
 6
6 -
 7
7 -
8
-
9
-
10
-
11
-
12
-
13
-
14
-
15
-
16
-
17
-
18
-
19
-
20
-
21
-
22
-
23
-
24
-
25
-
26
-
27
-
28
-
29
-
30
-
31
-
32
-
33
-
34
-
35
-
36
-
37
-
38
-
39
-
40
-
41
-
42
-
43
-
44
-
45
-
46
-
47
-
48
-
49
-
50
-
51
-
52
-
53
-
54
-
55
-
56
-
57
-
58
-
59
-
60
-
61
-
62
-
63
-
64
-
65
-
66
-
67
-
68
-
69
-
70
-
71
-
72
-
73
-
74
-
75
-
76
-
77
-
78
-
79
-
80
-
81
-
82
-
83
-
84
-
85
-
86
-
87
-
88
-
89
-
90
-
91
-
92
-
93
-
94
-
95
-
96
-
97
-
98
-
99
-
100
-
101
-
102
-
103
-
104
-
105
-
106
-
107
-
108
-
109
-
110
-
111
-
112
-
113
-
114
-
115
-
116
-
117
-
118
-
119
-
120
-
121
-
122
-
123
-
124
-
125
-
126
-
127
-
128
-
129
-
130
-
131
-
132
-
133
-
134
-
135
-
136
-
137
-
138
-
139
-
140
 |
 |

ThinkPad
Computer
Hardware
Maintenance
Manual
January 2006
This manual supports:
ThinkPad
X41 Tablet (MT 1866, 1867, 1869)
ThinkPad
X4 Dock (MT 2506)