Lenovo 81713GU User Manual - Page 34
Removing, replacing, diskette, drive, Installing, security, features
 |
View all Lenovo 81713GU manuals
Add to My Manuals
Save this manual to your list of manuals |
Page 34 highlights
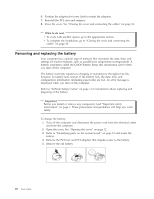
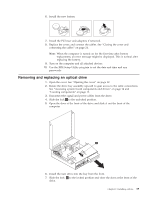
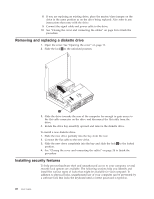
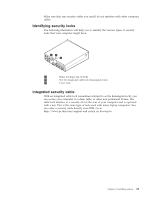
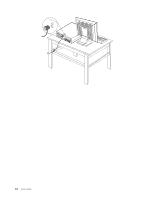
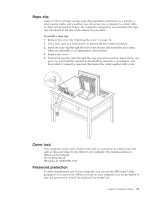
8. If you are replacing an existing drive, place the master/slave jumper on the drive in the same position as on the drive being replaced. Also refer to any instructions that come with the drive. 9. Connect the signal cable and power cable to the drive. 10. See "Closing the cover and connecting the cables" on page 24 to finish the procedure. Removing and replacing a diskette drive 1. Open the cover. See "Opening the cover" on page 12. 2. Slide the lock 1 to the unlocked position. 3. Slide the drive towards the rear of the computer far enough to gain access to the flat cable connector on the drive and disconnect the flat cable from the drive. 4. Rotate the drive bay assembly upward and remove the diskette drive. To install a new diskette drive: 1. Slide the new drive partially into the bay from the rear. 2. Connect the flat cable to the new drive. 3. Slide the new drive completely into the bay and slide the lock 1 to the locked position. 4. See "Closing the cover and connecting the cables" on page 24 to finish the procedure. Installing security features To help prevent hardware theft and unauthorized access to your computer, several security lock options are available. The following sections help you identify and install the various types of locks that might be available for your computer. In addition to physical locks, unauthorized use of your computer can be prevented by a software lock that locks the keyboard until a correct password is typed in. 20 User Guide
-
 1
1 -
2
-
3
-
4
-
5
-
6
-
7
-
8
-
9
-
10
-
11
-
12
-
13
-
14
-
15
-
16
-
17
-
18
-
19
-
20
-
21
-
22
-
23
-
24
-
25
-
26
-
27
-
28
-
 29
29 -
 30
30 -
 31
31 -
 32
32 -
 33
33 -
 34
34 -
 35
35 -
 36
36 -
 37
37 -
 38
38 -
 39
39 -
40
-
41
-
42
-
43
-
44
-
45
-
46
-
47
-
48
-
49
-
50
-
51
-
52
-
53
-
54
-
55
-
56
-
57
-
58
-
59
-
60
 |
 |
