Lenovo C325 Lenovo C225\C320\C325 Hardware Maintenance Manual - Page 49
Step 13. Holding the sides of the microprocessor with your fingers
 |
View all Lenovo C325 manuals
Add to My Manuals
Save this manual to your list of manuals |
Page 49 highlights
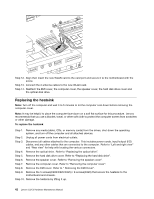
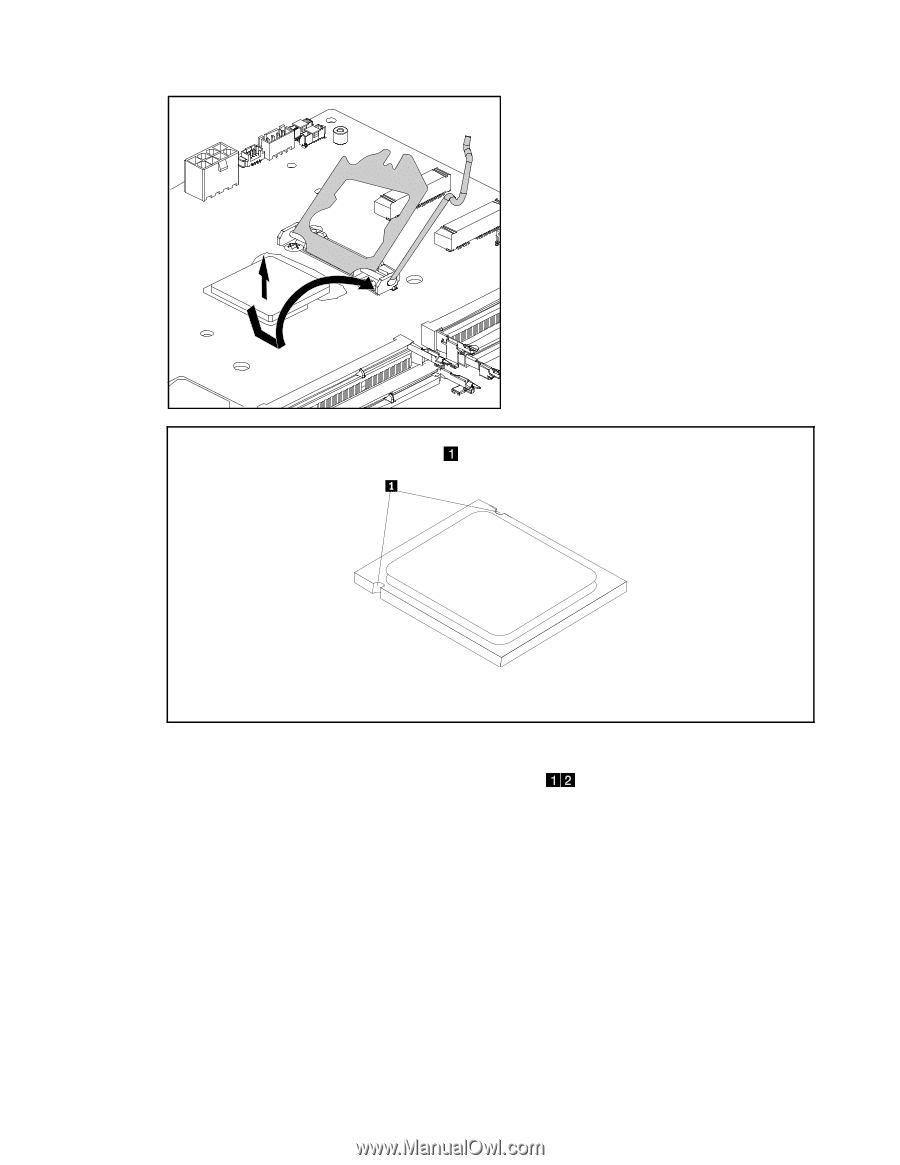
Note: Note the orientation of the notches 1 on the microprocessor. This is important when installing the new microprocessor on the motherboard. Note: Do not drop anything onto the microprocessor socket while it is exposed. The socket pins must be kept as clean as possible. Step 12. Make sure that the microprocessor retainer is fully open. Step 13. Holding the sides of the microprocessor with your fingers, remove the protective cover 2 that protects the gold contacts on the new microprocessor 1 . Chapter 7. Replacing hardware 45
-
 1
1 -
2
-
3
-
4
-
5
-
6
-
7
-
8
-
9
-
10
-
11
-
12
-
13
-
14
-
15
-
16
-
17
-
18
-
19
-
20
-
21
-
22
-
23
-
24
-
25
-
26
-
27
-
28
-
29
-
30
-
31
-
32
-
33
-
34
-
35
-
36
-
37
-
38
-
39
-
40
-
41
-
42
-
43
-
 44
44 -
 45
45 -
 46
46 -
 47
47 -
 48
48 -
 49
49 -
 50
50 -
 51
51 -
 52
52 -
 53
53 -
 54
54 -
55
-
56
-
57
-
58
-
59
-
60
-
61
 |
 |
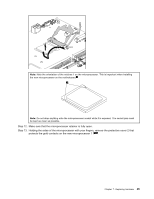
Note:
Note the orientation of the notches 1 on the microprocessor. This is important when installing
the new microprocessor on the motherboard.
Note:
Do not drop anything onto the microprocessor socket while it is exposed. The socket pins must
be kept as clean as possible.
Step 12. Make sure that the microprocessor retainer is fully open.
Step 13. Holding the sides of the microprocessor with your fingers, remove the protective cover 2 that
protects the gold contacts on the new microprocessor 1 .
Chapter 7
.
Replacing hardware
45