Lenovo H500 Lenovo H5 Series User Guide - Page 40
Replacing hardware, Removing the computer cover
 |
View all Lenovo H500 manuals
Add to My Manuals
Save this manual to your list of manuals |
Page 40 highlights
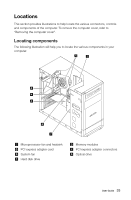
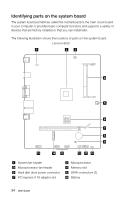
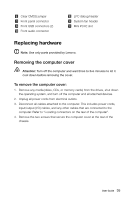
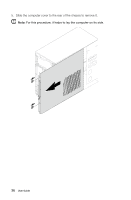
Clear CMOS jumper Front panel connector Front USB connectors (2) Front audio connector LPC debug header System fan header Mini PCI-E slot Replacing hardware Note: Use only parts provided by Lenovo. Removing the computer cover Attention: Turn off the computer and wait three to five minutes to let it cool down before removing the cover. To remove the computer cover: 1. Remove any media (disks, CDs, or memory cards) from the drives, shut down the operating system, and turn off the computer and all attached devices. 2. Unplug all power cords from electrical outlets. 3. Disconnect all cables attached to the computer. This includes power cords, input/output (I/O) cables, and any other cables that are connected to the computer. Refer to "Locating connectors on the rear of the computer". 4. Remove the two screws that secure the computer cover at the rear of the chassis. User Guide 35
-
 1
1 -
2
-
3
-
4
-
5
-
6
-
7
-
8
-
9
-
10
-
11
-
12
-
13
-
14
-
15
-
16
-
17
-
18
-
19
-
20
-
21
-
22
-
23
-
24
-
25
-
26
-
27
-
28
-
29
-
30
-
31
-
32
-
33
-
34
-
 35
35 -
 36
36 -
 37
37 -
 38
38 -
 39
39 -
 40
40 -
 41
41 -
 42
42 -
 43
43 -
 44
44 -
 45
45 -
46
-
47
-
48
-
49
-
50
-
51
-
52
-
53
-
54
-
55
 |
 |