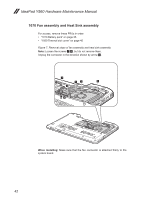
Lenovo IdeaPad Y560 Lenovo IdeaPad Y560 Hardware Maintenance Manual V2.0 - Page 42
When installing, Screw quantity, Color, Torque
 |
View all Lenovo IdeaPad Y560 manuals
Add to My Manuals
Save this manual to your list of manuals |
Page 42 highlights
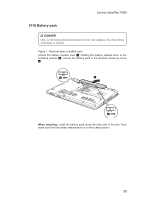
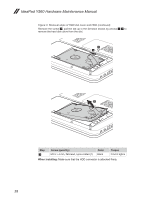
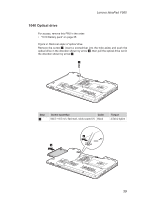
IdeaPad Y560 Hardware Maintenance Manual Figure 3. Removal steps of HDD slot cover and HDD (continued) Remove the screw 3, pull the tab up in the direction shown by arrows 4 5 to remove the hard disk drive from the slot. 3 4 5 Step 3 Screw (quantity) M2.5 × 4 mm, flat-head, nylok-coated (1) Color Black Torque 2.0±0.2 kgfcm When installing: Make sure that the HDD connector is attached firmly. 38
-
 1
1 -
2
-
3
-
4
-
5
-
6
-
7
-
8
-
9
-
10
-
11
-
12
-
13
-
14
-
15
-
16
-
17
-
18
-
19
-
20
-
21
-
22
-
23
-
24
-
25
-
26
-
27
-
28
-
29
-
30
-
31
-
32
-
33
-
34
-
35
-
36
-
 37
37 -
 38
38 -
 39
39 -
 40
40 -
 41
41 -
 42
42 -
 43
43 -
 44
44 -
 45
45 -
 46
46 -
 47
47 -
48
-
49
-
50
-
51
-
52
-
53
-
54
-
55
-
56
-
57
-
58
-
59
-
60
-
61
-
62
-
63
-
64
-
65
-
66
-
67
-
68
-
69
-
70
-
71
-
72
-
73
-
74
-
75
-
76
-
77
-
78
-
79
-
80
-
81
-
82
-
83
-
84
-
85
-
86
-
87
-
88
-
89
-
90
-
91
-
92
-
93
-
94
-
95
-
96
-
97
-
98
-
99
-
100
-
101
-
102
-
103
 |
 |

38
IdeaPad Y560 Hardware Maintenance Manual
Figure 3. Removal steps of HDD slot cover and HDD (continued)
Remove the screw
3
, pull the tab up in the direction shown by arrows
4
5
to
remove the hard disk drive from the slot.
4
3
5
Step
Screw (quantity)
Color
Torque
3
M2.5 × 4 mm, flat-head, nylok-coated (1)
Black
2.0±0.2 kgfcm
When installing:
Make sure that the HDD connector is attached firmly.