Lenovo ThinkCentre Edge 71 (English) User Guide - Page 68
Completing the parts replacement
 |
View all Lenovo ThinkCentre Edge 71 manuals
Add to My Manuals
Save this manual to your list of manuals |
Page 68 highlights
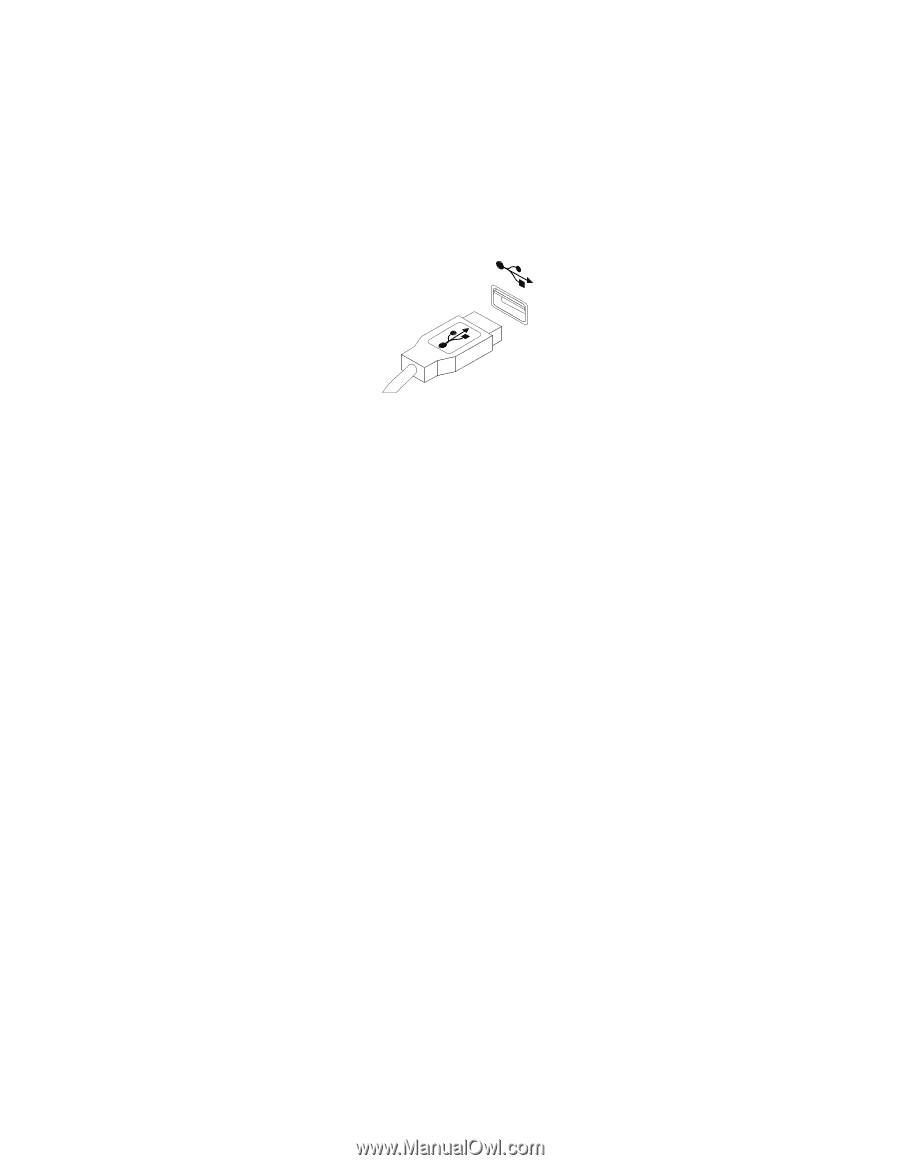
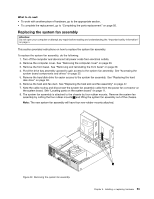
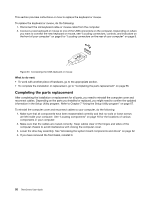
This section provides instructions on how to replace the keyboard or mouse. To replace the keyboard or mouse, do the following: 1. Disconnect the old keyboard cable or mouse cable from the computer. 2. Connect a new keyboard or mouse to one of the USB connectors on the computer. Depending on where you want to connect the new keyboard or mouse, see "Locating connectors, controls, and indicators on the front of your computer" on page 8 or "Locating connectors on the rear of your computer" on page 9. Figure 43. Connecting the USB keyboard or mouse What to do next: • To work with another piece of hardware, go to the appropriate section. • To complete the installation or replacement, go to "Completing the parts replacement" on page 56. Completing the parts replacement After completing the installation or replacement for all parts, you need to reinstall the computer cover and reconnect cables. Depending on the parts you installed or replaced, you might need to confirm the updated information in the Setup Utility program. Refer to Chapter 7 "Using the Setup Utility program" on page 67. To reinstall the computer cover and reconnect cables to your computer, do the following: 1. Make sure that all components have been reassembled correctly and that no tools or loose screws are left inside your computer. See "Locating components" on page 10 for the locations of various components in your computer. 2. Make sure that the cables are routed correctly. Keep cables clear of the hinges and sides of the computer chassis to avoid interference with closing the computer cover. 3. Lower the drive bay assembly. See "Accessing the system board components and drives" on page 32. 4. If you have removed the front bezel, reinstall it. 56 ThinkCentre User Guide
-
 1
1 -
2
-
3
-
4
-
5
-
6
-
7
-
8
-
9
-
10
-
11
-
12
-
13
-
14
-
15
-
16
-
17
-
18
-
19
-
20
-
21
-
22
-
23
-
24
-
25
-
26
-
27
-
28
-
29
-
30
-
31
-
32
-
33
-
34
-
35
-
36
-
37
-
38
-
39
-
40
-
41
-
42
-
43
-
44
-
45
-
46
-
47
-
48
-
49
-
50
-
51
-
52
-
53
-
54
-
55
-
56
-
57
-
58
-
59
-
60
-
61
-
62
-
 63
63 -
 64
64 -
 65
65 -
 66
66 -
 67
67 -
 68
68 -
 69
69 -
 70
70 -
 71
71 -
 72
72 -
 73
73 -
74
-
75
-
76
-
77
-
78
-
79
-
80
-
81
-
82
-
83
-
84
-
85
-
86
-
87
-
88
-
89
-
90
-
91
-
92
-
93
-
94
-
95
-
96
-
97
-
98
-
99
-
100
-
101
-
102
-
103
-
104
-
105
-
106
-
107
-
108
-
109
-
110
-
111
-
112
-
113
-
114
-
115
-
116
-
117
-
118
-
119
-
120
-
121
-
122
-
123
-
124
-
125
-
126
-
127
-
128
-
129
-
130
-
131
-
132
-
133
-
134
 |
 |