Lenovo ThinkPad Edge S230u (English) Password Manager 4 Deployment Guide - Page 8
Manual upgrade, Uninstall Password Manager 3 or Client Security Solution.
 |
View all Lenovo ThinkPad Edge S230u manuals
Add to My Manuals
Save this manual to your list of manuals |
Page 8 highlights
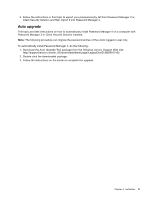
If you are going to install Password Manager 3 or Client Security Solution on a computer with Password Manager 4 installed, an error will be displayed and the installation will be stopped. Manual upgrade This topic provides instructions on how to manually install Password Manager 4 on a computer with Password Manager 3 or Client Security Solution installed. To manually install Password Manager 4, do the following: 1. Export your password entry list. a. Log in to your computer with the user account in which your password entry list has been saved. b. Launch Password Manager 3 or Client Security Solution installed on your computer. c. Click Import/Export on the menu bar, and select Export Entry List. d. Provide the file name, and save it as an EXE file or a PWM file. e. Enter a password to protect the export file. Notes: • The EXE file is a portable export file. You can browse your saved password entry list by running the EXE file without installing Password Manager. You can use either the EXE file or the PWM file to import your password entry list into Password Manager 4. • If there are other user accounts on this computer, log in to each user account and repeat the above steps to export the password entry lists. 2. Uninstall Password Manager 3 or Client Security Solution. a. Click Uninstall a program from Control Panel. b. Double-click Client Security - Password Manager, and click Uninstall. c. Follow the instructions on the screen to complete the uninstall process, and restart your computer. 3. Install Password Manager 4. a. Go to: http://support.lenovo.com/en_US/downloads/detail.page?LegacyDocID=MIGR-61432 b. Go to the Password Manager section and click the version link. c. Open the Password Manager readme file and follow the instructions in the file to install the program. d. Restart your computer. 4. Import your password entry list. a. Launch Password Manager 4. b. Click Import/Export on the menu bar. The Import/Export wizard starts. c. Click Import passwords from a back-up file and click Next. d. Type the export file name or click Browse to locate and select the export file. Click Next. e. Select Merge with existing passwords or Overwrite existing passwords depending on your needs. f. Click Next. Then, type the password that protects your export file in the Enter the password field. g. Click Finish. A message is displayed to indicate that your logon information has been imported successfully. Click OK to close the Import/Export wizard. Notes: If you forget to export the password entry list before upgrading to Password Manager 4, do the following: 1. Uninstall Password Manager 4. 2. Install Password Manager 3 or Client Security Solution. 4 Password Manager 4 Deployment Guide
-
 1
1 -
2
-
 3
3 -
 4
4 -
 5
5 -
 6
6 -
 7
7 -
 8
8 -
 9
9 -
 10
10 -
 11
11 -
 12
12 -
 13
13 -
14
-
15
-
16
-
17
-
18
-
19
-
20
 |
 |