LevelOne HVE-6501R Manual - Page 8
Installation
 |
View all LevelOne HVE-6501R manuals
Add to My Manuals
Save this manual to your list of manuals |
Page 8 highlights
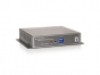
Installation: HVE-6501T Transmitter 1. DC5V: Connect it to the external AC adapter which plugs into an electrical outlet. Or via 802.3af PoE PSE to GIGA LAN port. 2. GIGA LAN: Connect directly to a Receiver or to a GIGA(1000Mbps) Ethernet Switch using CAT5e/6 cable. 3. HDMI IN: Connect to an HDMI source device with an HDMI M-M cable. Use an HDMI --> DVI adapter if the source is DVI. 4. RS232: Connect to the RS232 port of the device you want to configure. LEDs , button and Group ID setting 1. POWER LED Blinking: power on and the unit is booting up. 2. POWER LED On: power on and the unit is active. 3. LINK LED Off: LAN is not connected. 4. LINK LED On: LAN is connected. 5. DATA LED Blinking: if Transmitter is connecting with LAN, or the HDMI source is removed. 6. DATA LED On: All the connections are working. 7. RESET Button: change Link / Unlink; Engineering Mode and Reset to default using this button. Please to see the RESET Button Descriptions. 8. GROUP ID: Set up the Transmitter's group ID by adjusting the 4-pin DIP switch, ON means "1", OFF means "0", there are 16 groups available to set up. Multicast IP Address 255.0.0.XXX & 255.0.1.XXX, the XXX are resolved by the 4-pin DIP Switch on the Transmitter.
-
 1
1 -
2
-
 3
3 -
 4
4 -
 5
5 -
 6
6 -
 7
7 -
 8
8 -
 9
9 -
 10
10 -
 11
11 -
 12
12 -
 13
13 -
14
-
15
-
16
-
17
-
18
-
19
 |
 |
