LevelOne HVE-9000 Manual - Page 12
HVE-9008, HDSpider, Port Cat.5 HDMI Sender with Local HDMI Output
 |
View all LevelOne HVE-9000 manuals
Add to My Manuals
Save this manual to your list of manuals |
Page 12 highlights
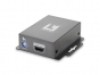
HVE-9008 HDSpider™ 8-Port Cat.5 HDMI Sender with Local HDMI Output 12 3 4 5 1. +5V DC: Connect to a 5V DC power supply unit 2. HDMI IN: Connect to a HDMI source 3. HDMI OUT: Connect to a HDMI display for local monitoring or cascade to another HDMI sender (HVE-9001, HVE-9004, or HVE-9008) 4. MODE: 0 = [Video] - supports up to HDMI 1.3 output. [Audio] - supports up to 7.1ch output 1 = [Video] - supports up to HDMI 1.3 output. [Audio] - locks to stereo audio output 2 = [Video] - locks to HDMI 1.2 output. [Audio] - supports up to 7.1ch output 3 = [Video] - locks to HDMI 1.2 output. [Audio] - locks to stereo audio output 4 = [Video] - DVI display mode. [Audio] - no audio output 5 = [Safe Mode] - uses default EDID with video supported up to 720p/1080i 6 = [Default Mode] - uses default EDID with video supported up to 1080p 7 = [EDID Learning Mode] - learns EDID from the display [For more detail info, please refer to page 6.] 5. HDMI Signal OUTPUT 1-8: Link to each HDMI display via a Cat.5e/6 cable with a receiver HVE-9000 or HVE-9900 on each CAT5 output port Audio/Video Setting 1.If you cannot get the audio/video output from the connected display for the first time setup. Please follow the instructions below to check if the HVE-9008 is OK. Step 1 - Please set the rotary arrow at Mode 5 for Safe Mode, and wait for the green LED SIGNAL on the front panel to blink for a couple seconds. Step 2 - Please dial the rotary arrow counterclockwise [4] from Mode 5 to Mode 3. If you can get audio/video from the display, you can stay tune at this setting for 720p or 1080i and stereo audio. If you need to get 720p/1080i with 7.1ch audio output, please dial the rotary arrow counterclockwise [4] from Mode 3 to Mode 2. Step 3 - Please dial the rotary arrow counterclockwise [4] from Mode 3 to Mode 7. Wait a few seconds until the green LED SIGNAL on the front panel dims and then lights again. Step 4 - Please dial the rotary arrow clockwise [3] from Mode 7 to Mode 1. You should have normal audio/video output. If not, please contact technical support. 11
-
 1
1 -
2
-
3
-
4
-
5
-
6
-
 7
7 -
 8
8 -
 9
9 -
 10
10 -
 11
11 -
 12
12 -
 13
13 -
 14
14 -
 15
15 -
 16
16 -
 17
17 -
18
-
19
-
20
-
21
-
22
-
23
-
24
-
25
-
26
-
27
-
28
 |
 |
