LevelOne KVM-0831 Manual
LevelOne KVM-0831 Manual
 |
View all LevelOne KVM-0831 manuals
Add to My Manuals
Save this manual to your list of manuals |
LevelOne KVM-0831 manual content summary:
- LevelOne KVM-0831 | Manual - Page 1
LevelOne KVM-0831/KVM-1631 8/16-Port Combo KVM Switch w/ Expansion Slot User Manual Ver. 1.2-0706 - LevelOne KVM-0831 | Manual - Page 2
ii - LevelOne KVM-0831 | Manual - Page 3
harmful interference (2) This device must accept any interference received. It's including interference that may cause undesired operation. CE This equipment is in compliance with the requirements of the following regulations: EN 55 022: CLASS B iii - LevelOne KVM-0831 | Manual - Page 4
FEATURES ...2 PACKAGE CONTENT ...2 OPTIONAL CABLES & MODULE ...3 SYSTEM REQUIREMENT ...3 FRONT PANEL ...4 REAR PANEL ...5 EXPANSION SLOT...6 2. Menu...16 Login Window ...17 Port Name ...18 MAIN MENU ...19 LANGUAGE...20 PORT NAME EDIT ...20 PORT SEARCH...21 USER SECURITY...21 ACCESS LIST ...22 - LevelOne KVM-0831 | Manual - Page 5
TIME SETTINGS ...23 OSD MOUSE...23 FIRMWARE UPGRADE 24 6. TECHNICAL SPECIFICATION 25 7. TROUBLESHOOTING 26 v - LevelOne KVM-0831 | Manual - Page 6
and cost when building their system. Besides the USB console port, KVM-0831/1631 support an optional module which provide Cat.5 remote console for users to access KVM switch remotely with the KVM-9007 Cat.5 Receiver. After making connection between KVM switch and Cat.5 receiver by Cat.5/5e/6 cable - LevelOne KVM-0831 | Manual - Page 7
for switching port confirmation Built-in one daisy chain port for cascading up to 8 KVM-0831/KVM-1631 Provides one expansion slot and can be used for KVM Cat.5 Console or future extension functionality * Package Content KVM-0831 / KVM-1631 Power Adapter DC12V, 1.0A Rack Mount Kit Rubber Feet User - LevelOne KVM-0831 | Manual - Page 8
1-to-3 5.0m cable for PS/2 and USB port ACC-2109 90cm Daisy Chain cable KVM-9007 KVM Cat.5 Receiver Connection Diagram ACC-1000 KVM-9007 System Requirement Model No. Local Console side Computer side KVM-0831 / KVM-1631 One VGA Monitor One USB Keyboard One USB Mouse HDDB 15 pin male to HDDB - LevelOne KVM-0831 | Manual - Page 9
daisy chain level and then to press "BANK" push button once back to the bank 1. Bank 1 Bank 2 Bank 3 MAX. BANK Push Buttons (1~8): To switch from one to another port, please press the push button for the destination port on the front panel. SHIFT Button: For 16 ports KVM switch, please press - LevelOne KVM-0831 | Manual - Page 10
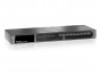
Rear Panel KVM-0831 KVM-1631 PC Port Special Cable: (ACC-2101, ACC-2102, ACC-2103) HDDB15 pin male to one HDDB 15 pin male, one Mini Din 6 pin and one USB special cables Daisy Chain Cable: (ACC-2109) HDDB15 pin Male to Male 5 - LevelOne KVM-0831 | Manual - Page 11
) To be able remote control through Cat.5 Console, use requires the standard Cat.5 cable and KVM-9007 KVM Cat.5 Receiver. Cable quality can cause image display differently, ask your local distributor for help if you experience troubles. Cat.5/5E/6 Straight Through UTP/STP Cable 8P8C Connection - LevelOne KVM-0831 | Manual - Page 12
Mounting KVM-0831 / KVM-1631 can be mounted in a standard 19-inch equipment rack or on a desktop. To mount to a rack, attach the brackets to the device using the screws provided in the rack-mount Kit. Step 2 Local Console Connect the monitor to the HDDB-15 female port of the local console ports on - LevelOne KVM-0831 | Manual - Page 13
Plug one end of Cat.5 cable into the remote console port of KVM switch and the other end of Cat.5 cable into the RJ-45 port of KVM-9007 Cat.5 receiver. (3) Connect keyboard, mouse and monitor to the Keyboard/Mouse port and Monitor port of KVM-9007. (4) Connect Local PC to KVM-9007 by using the HDDB - LevelOne KVM-0831 | Manual - Page 14
end into a receptacle. The Port 1 LED will be lit up, and you will hear a beep. Please switch on your monitor. Note: Please remember to plug the power adapter. Although the PCs connected to KVM Switch are able to support enough power to the stand alone switch, KVM switch still needs a power adapter - LevelOne KVM-0831 | Manual - Page 15
3. Operation The power on state of KVM-0831/1631: When you power on the KVM switch, it will prompt a login window for key-in USER NAME and PASSWORD. For more details, please refer to OSD section The push buttons 1~8: To switch from one to another port, please press the push button for the - LevelOne KVM-0831 | Manual - Page 16
you want. Add the KVM switch one at a time The maximum daisy chain bank is eight levels. The bank 1 OSD menu and front panel button will be used to do while KVM system after daisy chain, other KVM switch OSD will be disabled. If you daisy chain KVM-830 and KVM 1631 please use the 16 port at the bank - LevelOne KVM-0831 | Manual - Page 17
bank LED will be changed from bank 1 to the maximum daisy chain level and then to press "BANK" push button once back to the bank 1. Bank 1 Bank 2 Bank 3 MAX. BANK Display Example If multiple KVM switches are cascading, user can control all the devices through BANK1 (Master) only. The following - LevelOne KVM-0831 | Manual - Page 18
application convenience. If you prefer to use other hotkey, please go to OSD KVM switch on the Daisy chain line is on bank 1 (the Master). A standalone KVM switch also on bank 1. ■ The second & third digits are port to factory default value (except User Security settings). For SUPERVISOR to activate - LevelOne KVM-0831 | Manual - Page 19
don't need user name & password to access to the KVM system. The Security function is default OFF (Disable). 14 - LevelOne KVM-0831 | Manual - Page 20
press "Caps Lock", "Caps Lock", and the "Space Bar". Immediately, the OSD overlay screen will appear. The superimposed menu screen is generated by the KVM switch, and does not affect your computers or software function in any way. Caps Lock Caps Lock Space Bar please enter next key in 2 seconds - LevelOne KVM-0831 | Manual - Page 21
Login Window --- When powering on this KVM switch, it will prompt a login window and ask for user name and password. This KVM system can setup one SUPERVISOR and eight USERs. SUPERVISOR can access to all OSD functions. USER can access to PORT NAME and PORT SEARCH only. 2. Status screen --- after the - LevelOne KVM-0831 | Manual - Page 22
again. At normal operation, if no input from the console keyboard or mouse over 10 minutes the KVM switch will turn off the screen display and show up Login window asking for user name and password. One more minute of keyboard/mouse inactivity, the monitor will be turned off (notice the monitor LED - LevelOne KVM-0831 | Manual - Page 23
show up the Status window Previous Menu Switch to the selected port Select the port (press Enter to switch) Previous Bank Next Bank Exit Show ports 01 ~ 08 Show ports 09 ~ 16 Show ports 17 ~ 24 Show ports 25 ~ 32 ■ USER --- There are two types of user levels: SUPERVISOR and USER. The default is 18 - LevelOne KVM-0831 | Manual - Page 24
setup and change the OSD settings at Main Menu. USER can only do the port switch and port search. ■ SCAN TIME --- This is the time interval for auto-scan function. When auto-scan function is activated, the KVM switch will auto-scan the host port one by one in the interval as setting. Notice that the - LevelOne KVM-0831 | Manual - Page 25
number, following lines are port name list. Use keyboard (Up Arrow key " ", Down Arrow key " ") or mouse to select the port. After select the port, you can either press the Enter Key, or move the cursor to port name and double click left button of mouse to switch the port immediately. Press PgUp key - LevelOne KVM-0831 | Manual - Page 26
Search the computer by port name. Enter "*" will show the all the port names. USER SECURITY There are two types of user levels: SUPERVISOR and USER. There is one SUPERVISOR and up to eight USERs can be configured. Press the Enter key or right button of mouse for editing. The left-top "S" means - LevelOne KVM-0831 | Manual - Page 27
number, following the server/computer name list. The last 8 columns are the access right of each user. Use the Enter key or left button of mouse to active/deactivate the access right of each port. "X" means to disable access and "O" means to enable access. HOTKEY Some keyboard may not equip with - LevelOne KVM-0831 | Manual - Page 28
function is activated, the KVM switch will auto-scan the host ports one by one in the interval as setting. Notice that the port without connecting to a item. There are three levels to choose from. The fastest moving speed is "FAST", the second is "MIDDLE" and the slowest is "SLOW". Using " " and " - LevelOne KVM-0831 | Manual - Page 29
DC2.5M/DB9F cable, plug the DC2.5 end to the KVM switch's phone jack (marked Flash) and the DB9F end to PC serial DB9 port. 3. Power on the KVM unit. The KVM unit now will be in Flash mode, waiting for firmware download. 4. Run "Firmware Upgrade Utility.exe" 5. Click Browse to select the FW upgrade - LevelOne KVM-0831 | Manual - Page 30
PC Port LED Bank 7 segment LED On Screen Display Scan Intervals Keyboard Emulation Mouse Emulation VGA Resolution Bandwidth Daisy Chain MAX Level MAX PC Connection Housing KVM Switch Power Adapter Operation Temperature Storage Temperature Humidity Weight (kg) Dimension (mm) KVM-0831 8 KVM-1631 - LevelOne KVM-0831 | Manual - Page 31
use the Keyboard or Mouse again. 5. If the Mouse is not detected during PC boot up, please make sure that the USB mouse works when directly plugged into the computer. Please avoid moving the mouse or pressing the mouse buttons when switching ports. 6. If you forget the password to access the KVM
-
 1
1 -
 2
2 -
 3
3 -
 4
4 -
 5
5 -
 6
6 -
 7
7 -
8
-
9
-
10
-
11
-
12
-
13
-
14
-
15
-
16
-
17
-
18
-
19
-
20
-
21
-
22
-
23
-
24
-
25
-
26
-
27
-
28
-
29
-
30
-
31
 |
 |

LevelOne
KVM-0831/KVM-1631
8/16-Port Combo KVM Switch
w/ Expansion Slot
User Manual
Ver. 1.2-0706