LevelOne KVM-1631 Manual - Page 43
Step 1 Rack Mounting, Step 2 Local Console, Step 3 USB Keyboard
 |
View all LevelOne KVM-1631 manuals
Add to My Manuals
Save this manual to your list of manuals |
Page 43 highlights
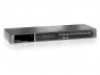
2. Hardware Installation Before installation, please make sure all of peripherals and computers have been turned off. This example of installation is based on KVM-0831 and the procedure of KVM-1631 is the same. Step 1 Rack Mounting KVM-0831 / KVM-1631 can be mounted in a standard 19-inch equipment rack or on a desktop. To mount to a rack, attach the brackets to the device using the screws provided in the rack-mount Kit. Step 2 Local Console Connect the monitor to the HDDB-15 female port of the local console ports on the back of the KVM. Step 3 USB Keyboard Connect an USB keyboard to the KVM Switch. 7
-
 1
1 -
2
-
3
-
4
-
5
-
6
-
7
-
8
-
9
-
10
-
11
-
12
-
13
-
14
-
15
-
16
-
17
-
18
-
19
-
20
-
21
-
22
-
23
-
24
-
25
-
26
-
27
-
28
-
29
-
30
-
31
-
32
-
33
-
34
-
35
-
36
-
37
-
 38
38 -
 39
39 -
 40
40 -
 41
41 -
 42
42 -
 43
43 -
 44
44 -
 45
45 -
 46
46 -
 47
47 -
 48
48 -
49
-
50
-
51
-
52
-
53
-
54
-
55
-
56
-
57
-
58
-
59
-
60
-
61
-
62
 |
 |

7
2. Hardware Installation
Before installation, please make sure all of peripherals and computers have been turned off.
This example of installation is based on KVM-0831 and the procedure of KVM-1631 is the
same.
Step 1 Rack Mounting
KVM-0831 / KVM-1631 can be mounted in a standard 19-inch equipment rack or on a
desktop. To mount to a rack, attach the brackets to the device using the screws provided in
the rack-mount Kit.
Step 2 Local Console
Connect the monitor to the HDDB-15 female port of the local console ports on the back of
the KVM.
Step 3 USB Keyboard
Connect an USB keyboard to the KVM Switch.