Lexmark 33S0300 User's Guide - Page 87
Abcde
 |
UPC - 734646013284
View all Lexmark 33S0300 manuals
Add to My Manuals
Save this manual to your list of manuals |
Page 87 highlights
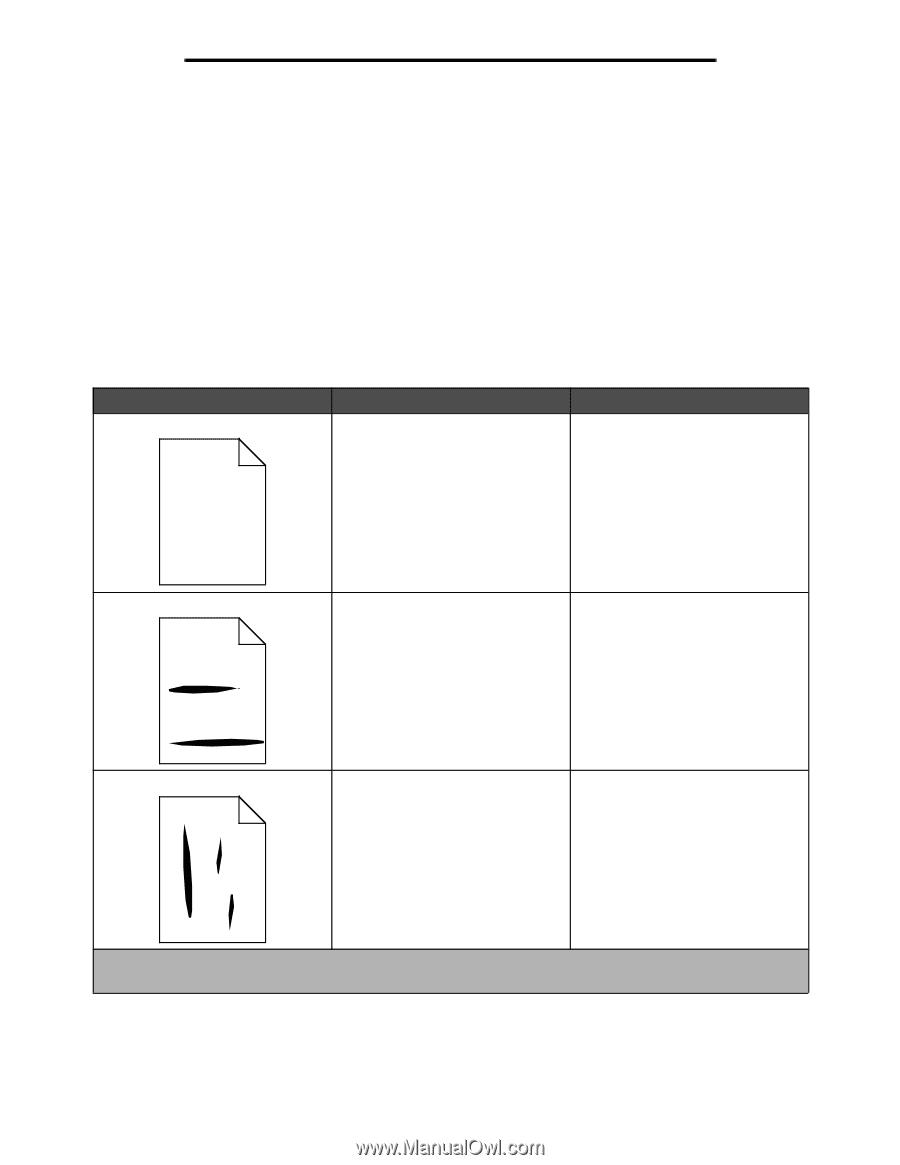
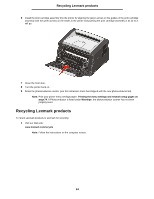
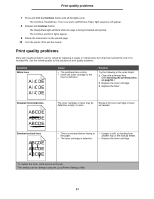
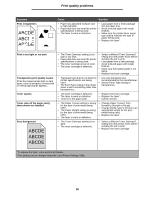
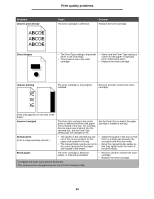
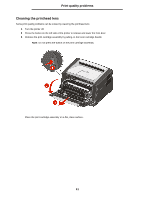
Print quality problems 7 Press and hold the Continue button until all the lights cycle. The Continue, Ready/Data, Toner Low and Load/Remove Paper light sequence will appear. 8 Release the Continue button. The Ready/Data light will blink while the page is being formatted and printed. The Continue and Error lights appear. 9 Follow the instructions on the printed page. 10 Turn the printer off to exit the menus. Print quality problems Many print quality problems can be solved by replacing a supply or maintenance item that has reached the end of its intended life. See the following table to find solutions to print quality problems. Symptom White lines ABCDE ABCDE ABCDE Cause • The printhead lens is dirty. • Either the toner cartridge or the fuser is defective. Solution Try the following in the order listed: 1 Clean the printhead lens. (See Cleaning the printhead lens on page91.) 2 Replace the toner cartridge. 3 Replace the fuser*. Streaked horizontal lines ABCDE ABCDE ABCDE The toner cartridge or fuser may be defective, empty, or worn. Replace the toner cartridge or fuser* as needed. Streaked vertical lines ABCDE ABCDE ABCDE • Toner is smeared before fusing to the paper. • The toner cartridge is defective. • If paper is stiff, try feeding from another tray or the manual feeder. • Replace the toner cartridge. *To replace the fuser, call a service technician. †This setting can be changed using the Local Printer Settings Utility. 87
-
 1
1 -
2
-
3
-
4
-
5
-
6
-
7
-
8
-
9
-
10
-
11
-
12
-
13
-
14
-
15
-
16
-
17
-
18
-
19
-
20
-
21
-
22
-
23
-
24
-
25
-
26
-
27
-
28
-
29
-
30
-
31
-
32
-
33
-
34
-
35
-
36
-
37
-
38
-
39
-
40
-
41
-
42
-
43
-
44
-
45
-
46
-
47
-
48
-
49
-
50
-
51
-
52
-
53
-
54
-
55
-
56
-
57
-
58
-
59
-
60
-
61
-
62
-
63
-
64
-
65
-
66
-
67
-
68
-
69
-
70
-
71
-
72
-
73
-
74
-
75
-
76
-
77
-
78
-
79
-
80
-
81
-
 82
82 -
 83
83 -
 84
84 -
 85
85 -
 86
86 -
 87
87 -
 88
88 -
 89
89 -
 90
90 -
 91
91 -
 92
92 -
93
-
94
-
95
-
96
-
97
-
98
-
99
-
100
-
101
 |
 |