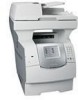
Lexmark 642e User's Guide - Page 38
Placing the date and time at the top of each Placing an overlay message on each
 |
UPC - 734646010658
View all Lexmark 642e manuals
Add to My Manuals
Save this manual to your list of manuals |
Page 38 highlights
Placing the date and time at the top of each page 1 Place the original document in the automatic document feeder facing up, short-edge first. 2 Adjust the paper guides. 3 Touch Copy. 4 Touch Options. 5 Touch Date/Time Stamp. 6 Touch On. 7 Touch Done. 8 Touch Copy It. Placing an overlay message on each page An overlay message can be placed on each page. The message choices are Urgent, Confidential, Copy, or Draft. To place a message on the copies: 1 Place the original document in the automatic document feeder facing up, short-edge first. 2 Adjust the paper guides. 3 Touch Copy. 4 Touch Options. 5 Touch the button containing the overlay you want to use. 6 Touch Done. 7 Touch Copy It. Canceling a copy job While the document is in the ADF When the ADF begins processing a document, the scanning screen is displayed. You can cancel the copy job by touching Cancel Job on the touch screen. Touching Cancel Job cancels the entire job that is being scanned. The scanning screen will be replaced with a "Canceling scan job" screen. The ADF will clear any page that has started scanning and leave the other pages in the ADF. 38
-
 1
1 -
2
-
3
-
4
-
5
-
6
-
7
-
8
-
9
-
10
-
11
-
12
-
13
-
14
-
15
-
16
-
17
-
18
-
19
-
20
-
21
-
22
-
23
-
24
-
25
-
26
-
27
-
28
-
29
-
30
-
31
-
32
-
 33
33 -
 34
34 -
 35
35 -
 36
36 -
 37
37 -
 38
38 -
 39
39 -
 40
40 -
 41
41 -
 42
42 -
 43
43 -
44
-
45
-
46
-
47
-
48
-
49
-
50
-
51
-
52
-
53
-
54
-
55
-
56
-
57
-
58
-
59
-
60
-
61
-
62
-
63
-
64
-
65
-
66
-
67
-
68
-
69
-
70
-
71
-
72
-
73
-
74
-
75
-
76
-
77
-
78
-
79
-
80
-
81
-
82
-
83
-
84
-
85
-
86
-
87
-
88
-
89
-
90
-
91
-
92
-
93
-
94
-
95
-
96
-
97
-
98
-
99
-
100
-
101
-
102
-
103
-
104
-
105
-
106
-
107
-
108
-
109
-
110
-
111
-
112
-
113
-
114
-
115
-
116
-
117
-
118
-
119
-
120
-
121
-
122
-
123
-
124
-
125
-
126
-
127
-
128
-
129
-
130
-
131
-
132
-
133
-
134
-
135
-
136
-
137
-
138
-
139
-
140
-
141
-
142
-
143
-
144
-
145
-
146
-
147
-
148
-
149
-
150
-
151
-
152
-
153
-
154
-
155
-
156
-
157
-
158
-
159
-
160
-
161
-
162
-
163
-
164
-
165
-
166
-
167
-
168
-
169
-
170
-
171
-
172
-
173
-
174
-
175
-
176
-
177
-
178
-
179
-
180
-
181
-
182
-
183
-
184
-
185
-
186
-
187
-
188
-
189
-
190
-
191
 |
 |
