Lexmark 752e Setup Guide - Page 62
Printing a network setup Printing Quick Reference information, Launch the CD.
 |
View all Lexmark 752e manuals
Add to My Manuals
Save this manual to your list of manuals |
Page 62 highlights
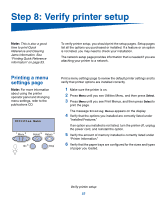
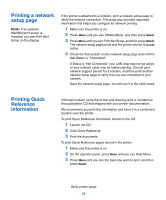
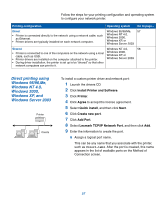
Printing a network setup page Note: If an optional MarkNet print server is installed, you see Print Net1 Setup on the display. If the printer is attached to a network, print a network setup page to verify the network connection. This page also provides important information that helps you configure for network printing. 1 Make sure the printer is on. 2 Press Menu until you see Utilities Menu, and then press Select. 3 Press Menu until you see Print Net Setup, and then press Select. The network setup page prints and the printer returns to Ready status. 4 Check the first section on the network setup page and confirm that Status is "Connected." If Status is "Not Connected," your LAN drop may not be active or your network cable may be malfunctioning. Consult your network support person for a solution, and then print another network setup page to verify that you are connected to your network. Save the network setup page. You will use it in the other steps. Printing Quick Reference information Information about using the printer and clearing jams is included on the publications CD that shipped with your printer documentation. We recommend you print this information and store it in a convenient location near the printer. To print Quick Reference information stored on the CD: 1 Launch the CD. 2 Click Quick Reference. 3 Print the documents. To print Quick Reference pages stored in the printer: 1 Make sure the printer is on. 2 On the operator panel, press Menu until you see Help Menu. 3 Press Menu until you see the topic you want to print, and then press Select. Verify printer setup 53
-
 1
1 -
2
-
3
-
4
-
5
-
6
-
7
-
8
-
9
-
10
-
11
-
12
-
13
-
14
-
15
-
16
-
17
-
18
-
19
-
20
-
21
-
22
-
23
-
24
-
25
-
26
-
27
-
28
-
29
-
30
-
31
-
32
-
33
-
34
-
35
-
36
-
37
-
38
-
39
-
40
-
41
-
42
-
43
-
44
-
45
-
46
-
47
-
48
-
49
-
50
-
51
-
52
-
53
-
54
-
55
-
56
-
 57
57 -
 58
58 -
 59
59 -
 60
60 -
 61
61 -
 62
62 -
 63
63 -
 64
64 -
 65
65 -
 66
66 -
 67
67 -
68
-
69
-
70
-
71
-
72
-
73
 |
 |
