Lexmark 752e Setup Guide - Page 68
Step 3: Install the printer driver or subset on network, clients, Network Neighborhood, Install, Start
 |
View all Lexmark 752e manuals
Add to My Manuals
Save this manual to your list of manuals |
Page 68 highlights
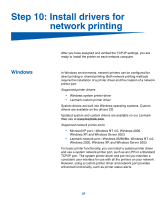
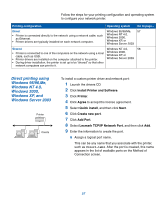
Note: If you are missing files, you may be prompted to provide the server operating system CD. Note: This method is usually the best use of system resources. The server handles driver modifications and the print job processing. This lets network clients return to applications much faster. 5 In the Alternate Drivers section, select the operating systems of all the network clients that will print to the printer. 6 Click OK. 7 Check the following to make sure the printer was successfully shared. • The printer object in the Printers folder now has a shared indicator. For example, in Windows NT 4.0, a hand appears under the printer object. • Browse Network Neighborhood. Find the host name of the server and look for the shared name you assigned to the printer. Step 3: Install the printer driver (or subset) on network clients Using the point and print method With this method, a subset of driver information is copied from the server to the client computer. This is just enough information to send a print job to the printer. 1 On the Windows desktop of the client computer, double-click Network Neighborhood. 2 Locate the host name of the server computer, and then double- click the host name. 3 Right-click the shared printer name, and then click Install. 4 Wait a few minutes for the driver information to be copied from the server computer to the client computer, and for a new printer object to be added to the Printers folder. The time this takes varies based on network traffic and other factors. 5 Close Network Neighborhood. 6 Print a test page to verify printer installation. Using the peer-to-peer method With this method, the printer driver is fully installed on each client computer. Network clients retain control of driver modifications. The client computer handles the print job processing. 1 Click Start Settings Printers. 2 Click Add Printer to launch the Add Printer wizard. 59
-
 1
1 -
2
-
3
-
4
-
5
-
6
-
7
-
8
-
9
-
10
-
11
-
12
-
13
-
14
-
15
-
16
-
17
-
18
-
19
-
20
-
21
-
22
-
23
-
24
-
25
-
26
-
27
-
28
-
29
-
30
-
31
-
32
-
33
-
34
-
35
-
36
-
37
-
38
-
39
-
40
-
41
-
42
-
43
-
44
-
45
-
46
-
47
-
48
-
49
-
50
-
51
-
52
-
53
-
54
-
55
-
56
-
57
-
58
-
59
-
60
-
61
-
62
-
 63
63 -
 64
64 -
 65
65 -
 66
66 -
 67
67 -
 68
68 -
 69
69 -
 70
70 -
 71
71 -
 72
72 -
 73
73
 |
 |