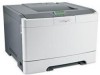
Lexmark C543DN Service Manual - Page 36
POR (Power-On Reset) sequence, Close Door, Insert Cartridge, Defective Cartridge, Ready, 128MB, 500Mhz - fuser error
 |
UPC - 734646071819
View all Lexmark C543DN manuals
Add to My Manuals
Save this manual to your list of manuals |
Page 36 highlights
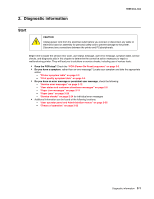
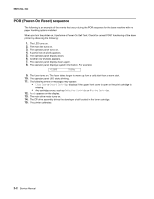
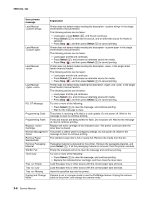
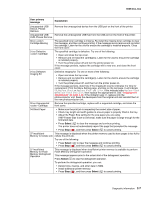
5025-2xx, 4xx POR (Power-On Reset) sequence The following is an example of the events that occur during the POR sequence for the base machine with no paper handling options installed. When you turn the printer on, it performs a Power-On Self Test. Check for correct POST functioning of the base printer by observing the following: 1. The LED turns on. 2. The main fan turns on. 3. The operator panel turns on. 4. A partial row of pixels appears. 5. The operator panel display clears. 6. Another row of pixels appears. 7. The operator panel display clears again. 8. The operator panel displays system information. For example: *128MB 500Mhz 9. The fuser turns on. The fuser takes longer to warm up from a cold start than a warm start. 10. The operator panel LED starts blinking. 11. The following errors or messages may appear: • Close Door or Insert Cartridge displays if the upper front cover is open or the print cartridge is missing. • Any cartridge errors, such as Defective Cartridge or Missing Cartridge. 12. Ready appears on the display. 13. The main drive motor turns on. 14. The EP drive assembly drives the developer shaft located in the toner cartridge. 15. The printer calibrates. 2-2 Service Manual
-
 1
1 -
2
-
3
-
4
-
5
-
6
-
7
-
8
-
9
-
10
-
11
-
12
-
13
-
14
-
15
-
16
-
17
-
18
-
19
-
20
-
21
-
22
-
23
-
24
-
25
-
26
-
27
-
28
-
29
-
30
-
 31
31 -
 32
32 -
 33
33 -
 34
34 -
 35
35 -
 36
36 -
 37
37 -
 38
38 -
 39
39 -
 40
40 -
 41
41 -
42
-
43
-
44
-
45
-
46
-
47
-
48
-
49
-
50
-
51
-
52
-
53
-
54
-
55
-
56
-
57
-
58
-
59
-
60
-
61
-
62
-
63
-
64
-
65
-
66
-
67
-
68
-
69
-
70
-
71
-
72
-
73
-
74
-
75
-
76
-
77
-
78
-
79
-
80
-
81
-
82
-
83
-
84
-
85
-
86
-
87
-
88
-
89
-
90
-
91
-
92
-
93
-
94
-
95
-
96
-
97
-
98
-
99
-
100
-
101
-
102
-
103
-
104
-
105
-
106
-
107
-
108
-
109
-
110
-
111
-
112
-
113
-
114
-
115
-
116
-
117
-
118
-
119
-
120
-
121
-
122
-
123
-
124
-
125
-
126
-
127
-
128
-
129
-
130
-
131
-
132
-
133
-
134
-
135
-
136
-
137
-
138
-
139
-
140
-
141
-
142
-
143
-
144
-
145
-
146
-
147
-
148
-
149
-
150
-
151
-
152
-
153
-
154
-
155
-
156
-
157
-
158
-
159
-
160
-
161
-
162
-
163
-
164
-
165
-
166
-
167
-
168
-
169
-
170
-
171
-
172
-
173
-
174
-
175
-
176
-
177
-
178
-
179
-
180
-
181
-
182
-
183
-
184
-
185
-
186
-
187
-
188
-
189
-
190
-
191
-
192
-
193
-
194
-
195
-
196
-
197
-
198
-
199
-
200
-
201
-
202
-
203
-
204
-
205
-
206
-
207
-
208
-
209
-
210
-
211
-
212
-
213
-
214
-
215
-
216
-
217
-
218
-
219
-
220
-
221
-
222
-
223
-
224
-
225
-
226
-
227
-
228
-
229
-
230
-
231
-
232
-
233
-
234
-
235
-
236
 |
 |
