Lexmark CX522 Embedded Web Server Administrator s Guide - Page 54
Erasing printer hard disk memory, Configuring printer hard disk encryption, Restoring factory
 |
View all Lexmark CX522 manuals
Add to My Manuals
Save this manual to your list of manuals |
Page 54 highlights
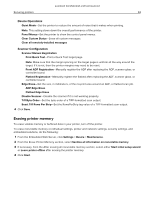
Lexmark Confidential until announced Securing printers 54 Erasing printer hard disk memory Notes: • This process can take from several minutes to more than an hour, making the printer unavailable for other tasks. • The following instructions are available only in printer models with hard disk installed. 1 From the Embedded Web Server, click Settings > Device > Maintenance. 2 From the Erase Hard Disk section, select Sanitize all information on hard disk. 3 Click Start. Configuring printer hard disk encryption Notes: • Disk encryption erases the contents of the hard disk. If necessary, back up important data from the printer before starting the encryption. • Do not turn off the printer during the encryption process. Loss of data can occur. • Disk encryption can take from several minutes to more than an hour, making the printer unavailable for other tasks. • The following instructions are available only in printer models with a hard disk installed. 1 From the Embedded Web Server, click Settings > Security > Disk Encryption. 2 Click Start encryption. Note: In the latest firmware version, disk encryption is by default enabled without the option to disable it. Restoring factory default settings 1 From the Embedded Web Server, click Settings > Device > Restore Factory Defaults. 2 Select the settings that you want to restore. Note: Some settings are available only in some printer models. • Restore printer settings-Restore all the printer settings to their default values. • Restore network settings-Restore all the network settings to their default values. • Restore fax settings-Restore all the fax settings to their default values. • Restore app settings-Restore all the app settings to their default values. 3 Click Start. Statement of Volatility Your printer contains various types of memory that can store printer and network settings and user data.
-
 1
1 -
2
-
3
-
4
-
5
-
6
-
7
-
8
-
9
-
10
-
11
-
12
-
13
-
14
-
15
-
16
-
17
-
18
-
19
-
20
-
21
-
22
-
23
-
24
-
25
-
26
-
27
-
28
-
29
-
30
-
31
-
32
-
33
-
34
-
35
-
36
-
37
-
38
-
39
-
40
-
41
-
42
-
43
-
44
-
45
-
46
-
47
-
48
-
 49
49 -
 50
50 -
 51
51 -
 52
52 -
 53
53 -
 54
54 -
 55
55 -
 56
56 -
 57
57 -
 58
58 -
 59
59 -
60
-
61
-
62
-
63
-
64
-
65
-
66
-
67
-
68
-
69
-
70
-
71
 |
 |