Lexmark E230 User's Guide - Page 116
General problems, Custom 6-Rough Env, Printer, Software, Agree, Local Printer Install, Finish, Custom
 |
View all Lexmark E230 manuals
Add to My Manuals
Save this manual to your list of manuals |
Page 116 highlights
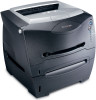
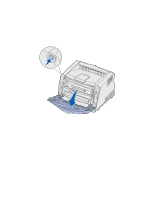
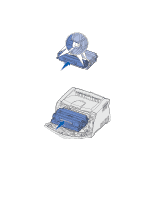
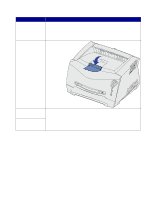
General problems Problem / Question What do the blinking lights mean? Why am I missing characters when I print on envelopes? How do I clear a paper jam? The toner low light sequence is on, but I don't have another cartridge to put in yet. Can I still print with the low cartridge? The printer seems to print slower when using the manual feeder. Solution / Answer See "Understanding the operator panel lights" on page 52 for information about what each light pattern means. If you see voids (missing characters) when printing envelopes, check your printer driver settings to make sure you selected Envelope from the Paper Type menu. If Envelope is already selected, try changing the texture setting to a rougher setting. Sometimes toner does not adhere well to smooth-textured envelopes. From your printer driver, select Custom 6-Rough Env from the Paper Type menu. To change Custom 6 back to its default settings for Paper Type, Paper Texture, and Paper Weight, use the Local Printer Setup Utility on the drivers CD that shipped with your printer. If you already installed the printer drivers and utilities, skip to step 7. 1 Insert the drivers CD into your computer. 2 Click Printer Software. 3 Click Agree. 4 Select Local Printer Install, and then click Next. 5 Select your printer and port, and make sure Local Printer Setup Utility is checked. 6 Click Finish. The Utility will be installed on your computer under Program Files (unless you chose a different directory). 7 Open the Local Printer Setup Utility. 8 From the Paper Menu, scroll through the menu items until you see the Custom menu setting. 9 Click Custom. 10 Scroll down to Custom 6 Paper Type. 11 Select envelope for the Custom 6 paper type, heavy for the Custom 6 paper weight, and rough for the Custom 6 paper texture. 12 From the toolbar, click Actions. 13 Click Apply to save the changes you made. 14 Click File Æ Exit to close the Local Printer Setup Utility. See "How to clear paper jams" on page 26 for information about clearing jams. Yes, you can still print. To extend the life of you toner cartridge somewhat, remove the cartridge, rotate it in all directions to distribute the toner, then insert it back into the printer. When the toner low light sequence is first displayed, you should still be able to print approximately 1200 pages, based on approximately 5% coverage of pages. This is normal. The printer sometimes prints at a slightly slower speed when feeding print media from the manual feeder. Troubleshooting 116
-
 1
1 -
2
-
3
-
4
-
5
-
6
-
7
-
8
-
9
-
10
-
11
-
12
-
13
-
14
-
15
-
16
-
17
-
18
-
19
-
20
-
21
-
22
-
23
-
24
-
25
-
26
-
27
-
28
-
29
-
30
-
31
-
32
-
33
-
34
-
35
-
36
-
37
-
38
-
39
-
40
-
41
-
42
-
43
-
44
-
45
-
46
-
47
-
48
-
49
-
50
-
51
-
52
-
53
-
54
-
55
-
56
-
57
-
58
-
59
-
60
-
61
-
62
-
63
-
64
-
65
-
66
-
67
-
68
-
69
-
70
-
71
-
72
-
73
-
74
-
75
-
76
-
77
-
78
-
79
-
80
-
81
-
82
-
83
-
84
-
85
-
86
-
87
-
88
-
89
-
90
-
91
-
92
-
93
-
94
-
95
-
96
-
97
-
98
-
99
-
100
-
101
-
102
-
103
-
104
-
105
-
106
-
107
-
108
-
109
-
110
-
 111
111 -
 112
112 -
 113
113 -
 114
114 -
 115
115 -
 116
116 -
 117
117 -
 118
118 -
 119
119 -
 120
120 -
 121
121 -
122
-
123
-
124
-
125
-
126
-
127
 |
 |