Lexmark MarkNet MarkNet External Print Server Quick Start - Page 7
Step 2: Assign an, IP address, Step 3: Print a, network setup - setup utility
 |
View all Lexmark MarkNet manuals
Add to My Manuals
Save this manual to your list of manuals |
Page 7 highlights
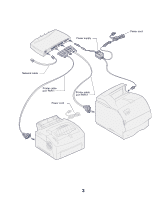
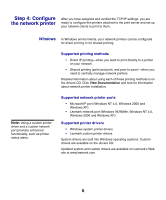
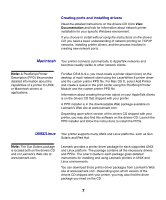
Step 2: Assign an IP address You must assign an IP address, netmask, and gateway to the print server in order for other network devices to find the attached printers. If your network is using DHCP, address values are automatically assigned. To verify the address assignment, print a network setup page and make sure the IP address, netmask, and gateway appear as non zero. Follow the instructions in "Step 3: Print a network setup page" to view this information. Note: Information about other ways to set an IP address is also on the drivers CD. If your network is not using DHCP, you must manually assign an IP address. One of the easiest ways is to use the Print Server Setup Utility on the drivers CD. Click What's on this CD and look for Print Server Setup Utility to find information about installing and using the utility. Step 3: Print a network setup page Press Test to print a network setup page. The page prints on the printer connected to port PAR 1 on the print server. Check under the TCP/IP heading to verify your IP address, netmask, and gateway settings are non zero. After the network setup page prints, the printer returns to a Ready state. 5
-
 1
1 -
 2
2 -
 3
3 -
 4
4 -
 5
5 -
 6
6 -
 7
7 -
 8
8 -
 9
9 -
 10
10 -
 11
11 -
 12
12 -
13
-
14
-
15
-
16
-
17
-
18
-
19
-
20
-
21
-
22
-
23
-
24
-
25
-
26
-
27
-
28
-
29
-
30
-
31
-
32
-
33
-
34
-
35
-
36
-
37
-
38
-
39
-
40
-
41
-
42
-
43
-
44
-
45
-
46
-
47
-
48
-
49
-
50
-
51
-
52
-
53
-
54
-
55
-
56
-
57
-
58
-
59
-
60
-
61
-
62
-
63
-
64
-
65
-
66
-
67
-
68
-
69
-
70
-
71
-
72
-
73
-
74
-
75
-
76
 |
 |