Lexmark N4050e User's Guide for Windows - Page 24
Advanced Setup, Configuring the print server in Ad-Hoc mode - wireless printer server
 |
UPC - 734646394932
View all Lexmark N4050e manuals
Add to My Manuals
Save this manual to your list of manuals |
Page 24 highlights
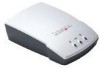
5 Advanced Setup The wireless print server is shipped with default settings that let you configure it in Ad-Hoc mode by accessing the embedded Web page of the print server. Like basic setup, this method involves first configuring the print server and then installing the printer on the network. However, because this configuration method does not use a direct USB connection to your computer or the Wireless Print Server Setup Utility, you will be required to access several of the wireless settings on both your computer and your network. As a result, extensive knowledge of your wireless network and computer settings will be needed. Note: To configure the wireless print server by this method, you must have a computer with a wireless network card. Configuring the print server in Ad-Hoc mode 1 Connect the print server to the printer with the USB cable, and turn on the printer. 2 Make sure the print server power indicator light is on. 3 Access and record your computer's current wireless network parameters. For information on accessing your current wireless network parameters, refer to your wireless network documentation, or contact the person who set up your network. 4 Change your current wireless network parameters to the following values: Wireless network parameter Set to SSID (Network Name print server or Service Set ID) Basic Service Set Type (BSST) Ad-Hoc Data Encryption Mode None WEP Key None Advanced Setup 18
-
 1
1 -
2
-
3
-
4
-
5
-
6
-
7
-
8
-
9
-
10
-
11
-
12
-
13
-
14
-
15
-
16
-
17
-
18
-
 19
19 -
 20
20 -
 21
21 -
 22
22 -
 23
23 -
 24
24 -
 25
25 -
 26
26 -
 27
27 -
 28
28 -
 29
29
 |
 |
