Lexmark W850 Maintenance Guide - Page 10
The photoconductor clicks into place when correctly installed.
 |
View all Lexmark W850 manuals
Add to My Manuals
Save this manual to your list of manuals |
Page 10 highlights
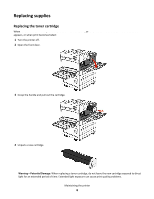
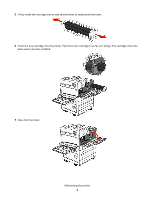
6 Align and insert the end of the photoconductor. 7 Remove the tape from the top of the photoconductor. 8 Push the photoconductor as far as it will go. The photoconductor clicks into place when correctly installed. Maintaining the printer 10
-
 1
1 -
2
-
3
-
4
-
 5
5 -
 6
6 -
 7
7 -
 8
8 -
 9
9 -
 10
10 -
 11
11 -
 12
12 -
 13
13 -
 14
14 -
 15
15
 |
 |

6
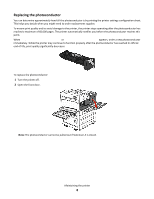
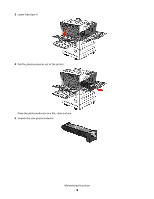
Align and insert the end of the photoconductor.
7
Remove the tape from the top of the photoconductor.
8
Push the photoconductor as far as it will go.
The photoconductor clicks into place when correctly installed.
Maintaining the printer
10