Lexmark X264dn Quick Reference - Page 4
Scanning to a USB flash memory, device - user guide
 |
UPC - 734646140584
View all Lexmark X264dn manuals
Add to My Manuals
Save this manual to your list of manuals |
Page 4 highlights
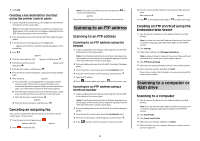
6 Enter a profile name. The profile name is also the user name, it is the name that appears in the Scan Profile list on the display. 7 Click Submit. 8 Scan your document. A shortcut number was automatically assigned when you clicked Submit. Remember this shortcut number and use it when you are ready to scan your documents. a Load an original document faceup, short edge first into the ADF or facedown on the scanner glass. Note: Do not load postcards, photos, small items, transparencies, photo paper, or thin media (such as magazine clippings) into the ADF. Place these items on the scanner glass. b If you are loading a document into the ADF, then adjust the paper guides. c Press the Scan/Email button. d Press the arrow buttons until Profiles appears, and then press . e Press . Enter Shortcut: appears. f Enter the shortcut number. g Press or to send the scanned image. Note: The scan settings determine if the image is sent in black or color. Pressing the black or color button does not change these settings. 9 Return to the computer to view the file. The output file is saved in the location you specified or launched in the program you specified. Scanning to a USB flash memory device Note: The USB port is not available on selected printer models. 1 Insert a USB flash memory device into the front USB port. Access USB appears. Note: When a USB flash memory device is inserted into the printer, the printer can only scan to the USB device or print files from the USB device. All other printer functions are unavailable. 2 Press 1 on the keypad. 3 Press the arrow buttons until Scan to USB appears, and then press . Press Start To Begin appears. 4 Load an original document faceup, short edge first into the ADF or facedown on the scanner glass. Note: Do not load postcards, photos, small items, transparencies, photo paper, or thin media (such as magazine clippings) into the ADF. Place these items on the scanner glass. 5 If you are loading a document into the ADF, then adjust the paper guides. 6 Press or to send the scanned image. Note: The scan settings determine if the image is sent in black or color. Pressing the black or color button does not change these settings. 4
-
 1
1 -
 2
2 -
 3
3 -
 4
4
 |
 |
