Lexmark X6675 Network Guide - Page 18
Wi-Fi indicator light is blinking orange during, installation Windows only - network setup
 |
View all Lexmark X6675 manuals
Add to My Manuals
Save this manual to your list of manuals |
Page 18 highlights
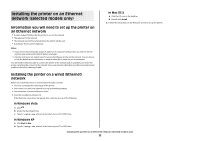
In Windows XP a Click Start. b Click Printers and Faxes. In Windows 2000 a Click Start. b Click Settings Œ Printers. 2 Right-click the printer named Lexmark XXXX Series (Network), where XXXX is the model number of your printer. 3 Select Use Printer Online from the menu. 4 Close the Printers or Printers and Faxes window and try printing again. SELECT THE WIRELESS PORT If you have previously set up your printer as a locally attached printer, you may need to select the wireless printer to use the printer wirelessly. 1 Do one of the following: In Windows Vista a Click . b Click Control Panel. c Under Hardware and Sound, click Printer. In Windows XP a Click Start. b Click Printers and Faxes. In Windows 2000 a Click Start. b Click Settings Œ Printers. 2 Right-click the printer, and then select Properties from the menu. 3 Click the Ports tab. 4 Locate the selected port. The selected port has a check beside it in the Port column. 5 If the Description column of the selected port indicates that it is a USB port, scroll through the list and select the port with Printer Port in the Description column. 6 Click OK, and then try to print again. Wi-Fi indicator light is blinking orange during installation (Windows only) When the Wi-Fi indicator light is blinking orange, it indicates that the printer has been set up for wireless networking but cannot connect to the network for which it has been configured. The printer may be unable to join the network because of interference, its distance from the wireless access point (wireless router), or until its settings are changed. These are possible solutions. Try one or more of the following: MAKE SURE THE ACCESS POINT IS ON Check the access point and, if necessary, turn it on. MOVE YOUR ACCESS POINT TO MINIMIZE INTERFERENCE There may be temporary interference from other devices such as microwave ovens or other appliances, cordless phones, baby monitors, and security system cameras. Make sure your access point is not positioned too closely to these devices. TRY ADJUSTING EXTERNAL ANTENNAS Antennas usually work best if they are pointing straight up. You may find that reception improves if you experiment with different angles for the printer and/or wireless access point antennas. MOVE YOUR PRINTER Move the printer closer to the access point. Although the possible distance between devices in 802.11b or 802.11g networks is 300 feet, the maximum range for optimal performance is generally 100-150 feet. You can find the signal strength of the network on the network setup page. CHECK SECURITY KEYS If you are using WEP security A valid WEP key is: • Exactly 10 or 26 hexadecimal characters. Hexadecimal characters are A-F, a-f, and 0-9. or • Exactly 5 or 13 ASCII characters. ASCII characters are letters, numbers, and symbols found on a keyboard. Troubleshooting a printer on a wireless network 18
-
 1
1 -
2
-
3
-
4
-
5
-
6
-
7
-
8
-
9
-
10
-
11
-
12
-
 13
13 -
 14
14 -
 15
15 -
 16
16 -
 17
17 -
 18
18 -
 19
19 -
 20
20 -
 21
21 -
 22
22 -
 23
23 -
24
-
25
-
26
-
27
-
28
-
29
-
30
-
31
-
32
-
33
-
34
-
35
 |
 |