Lexmark X945e Quick Reference - Page 9
Replacing a photoconductor - waste toner box
 |
View all Lexmark X945e manuals
Add to My Manuals
Save this manual to your list of manuals |
Page 9 highlights
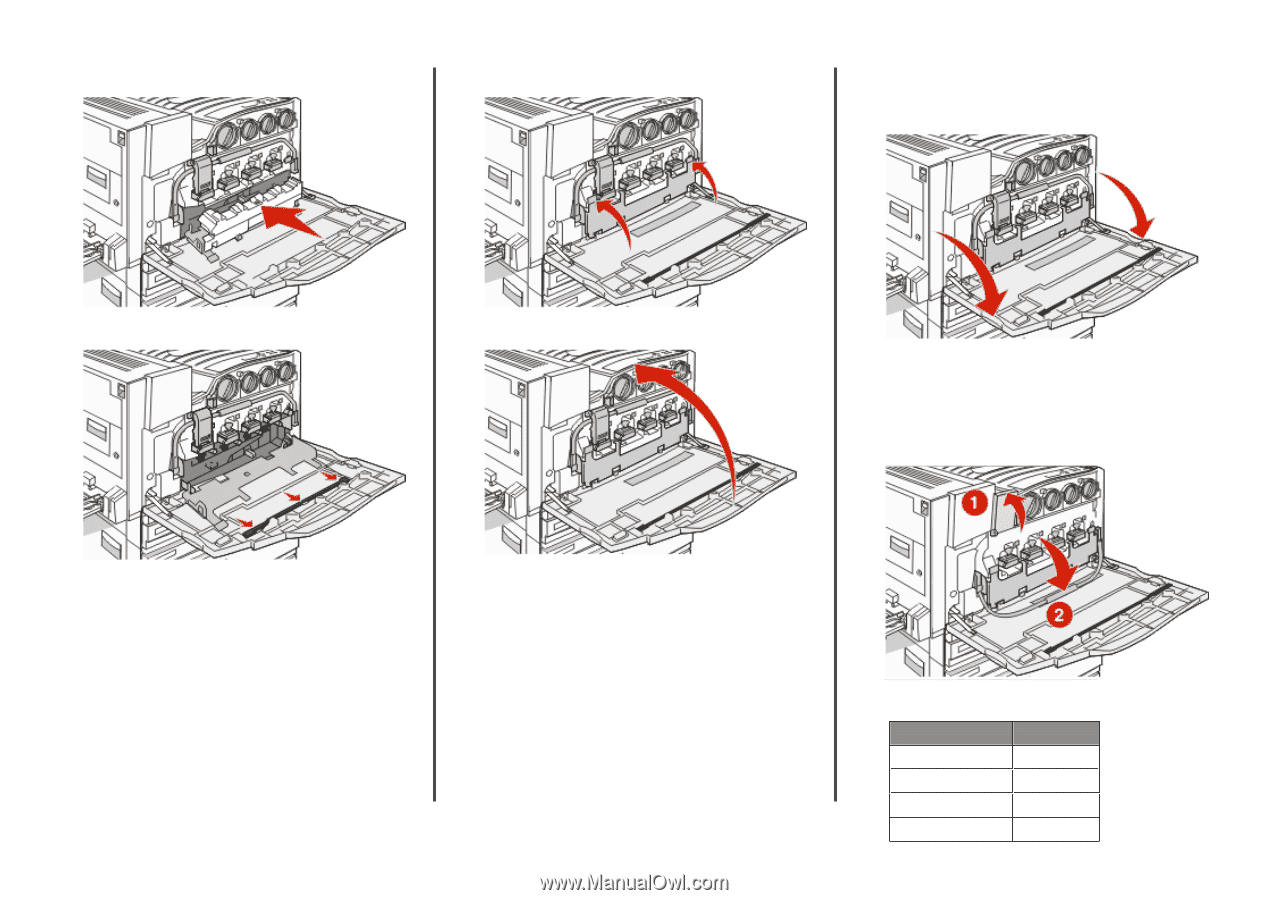
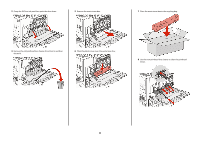
9 Insert the new waste toner box. 11 Close Door E6. photoconductors when 84 Replace color pc units appears. 1 Open Door E (front printer door). 10 Place the new printhead lens cleaner in the notches of Door E. 12 Close Door E. Warning-Potential Damage: To avoid overexposing the photoconductors, do not leave the door open for more than 10 minutes. 2 Release the bar by pressing the E5 button located on the bottom of the E5 latch, lift the E5 latch, and then press the bar down. 13 Remove all paper from the printer paper path. Visit www.lexmark.com/recycling to learn how to recycle the waste toner box. Replacing a photoconductor Replace the black photoconductor when 84 Replace black pc unit appears. Replace the cyan, magenta, and yellow 9 3 Remove the photoconductor(s) specified on the display. Photoconductor color Opening name Black E1 Cyan E2 Magenta E3 Yellow E4
-
 1
1 -
2
-
3
-
 4
4 -
 5
5 -
 6
6 -
 7
7 -
 8
8 -
 9
9 -
 10
10 -
 11
11 -
 12
12
 |
 |